Admin user guide
Welcome to Kontainer DAM. Whether this is your first introduction to the system or you are coming back to brush up on your skills, we are here to help you get the job done.
In the guide below, we go through the basics of Kontainer DAM. To get started with Kontainer PIM, please visit the PIM Introduction guide here.
Our goal is to make you a success
Feel free to reach out to us via email or the chat in the bottom-right corner. There are no bots; only competent, experienced customer success colleagues.
You are also welcome to book onboarding training in the calendar here.
Click here for an introduction to PIM.
Getting started
The first step is always the hardest, so we want it to be as easy as possible. Kontainer DAM has many cool features, but we start with the basics.
The most common starting point
Though all organizations customize Kontainer to their needs and use the system differently, this is how new admin users generally need to hit the ground running:
- Uploading files to folders
- Tagging files with data
- Checking or giving access
- Quick intro to styling options and presets
- Auto-conversion templates – for social media, newsletters, CMS or reseller requirements
Let’s get started.
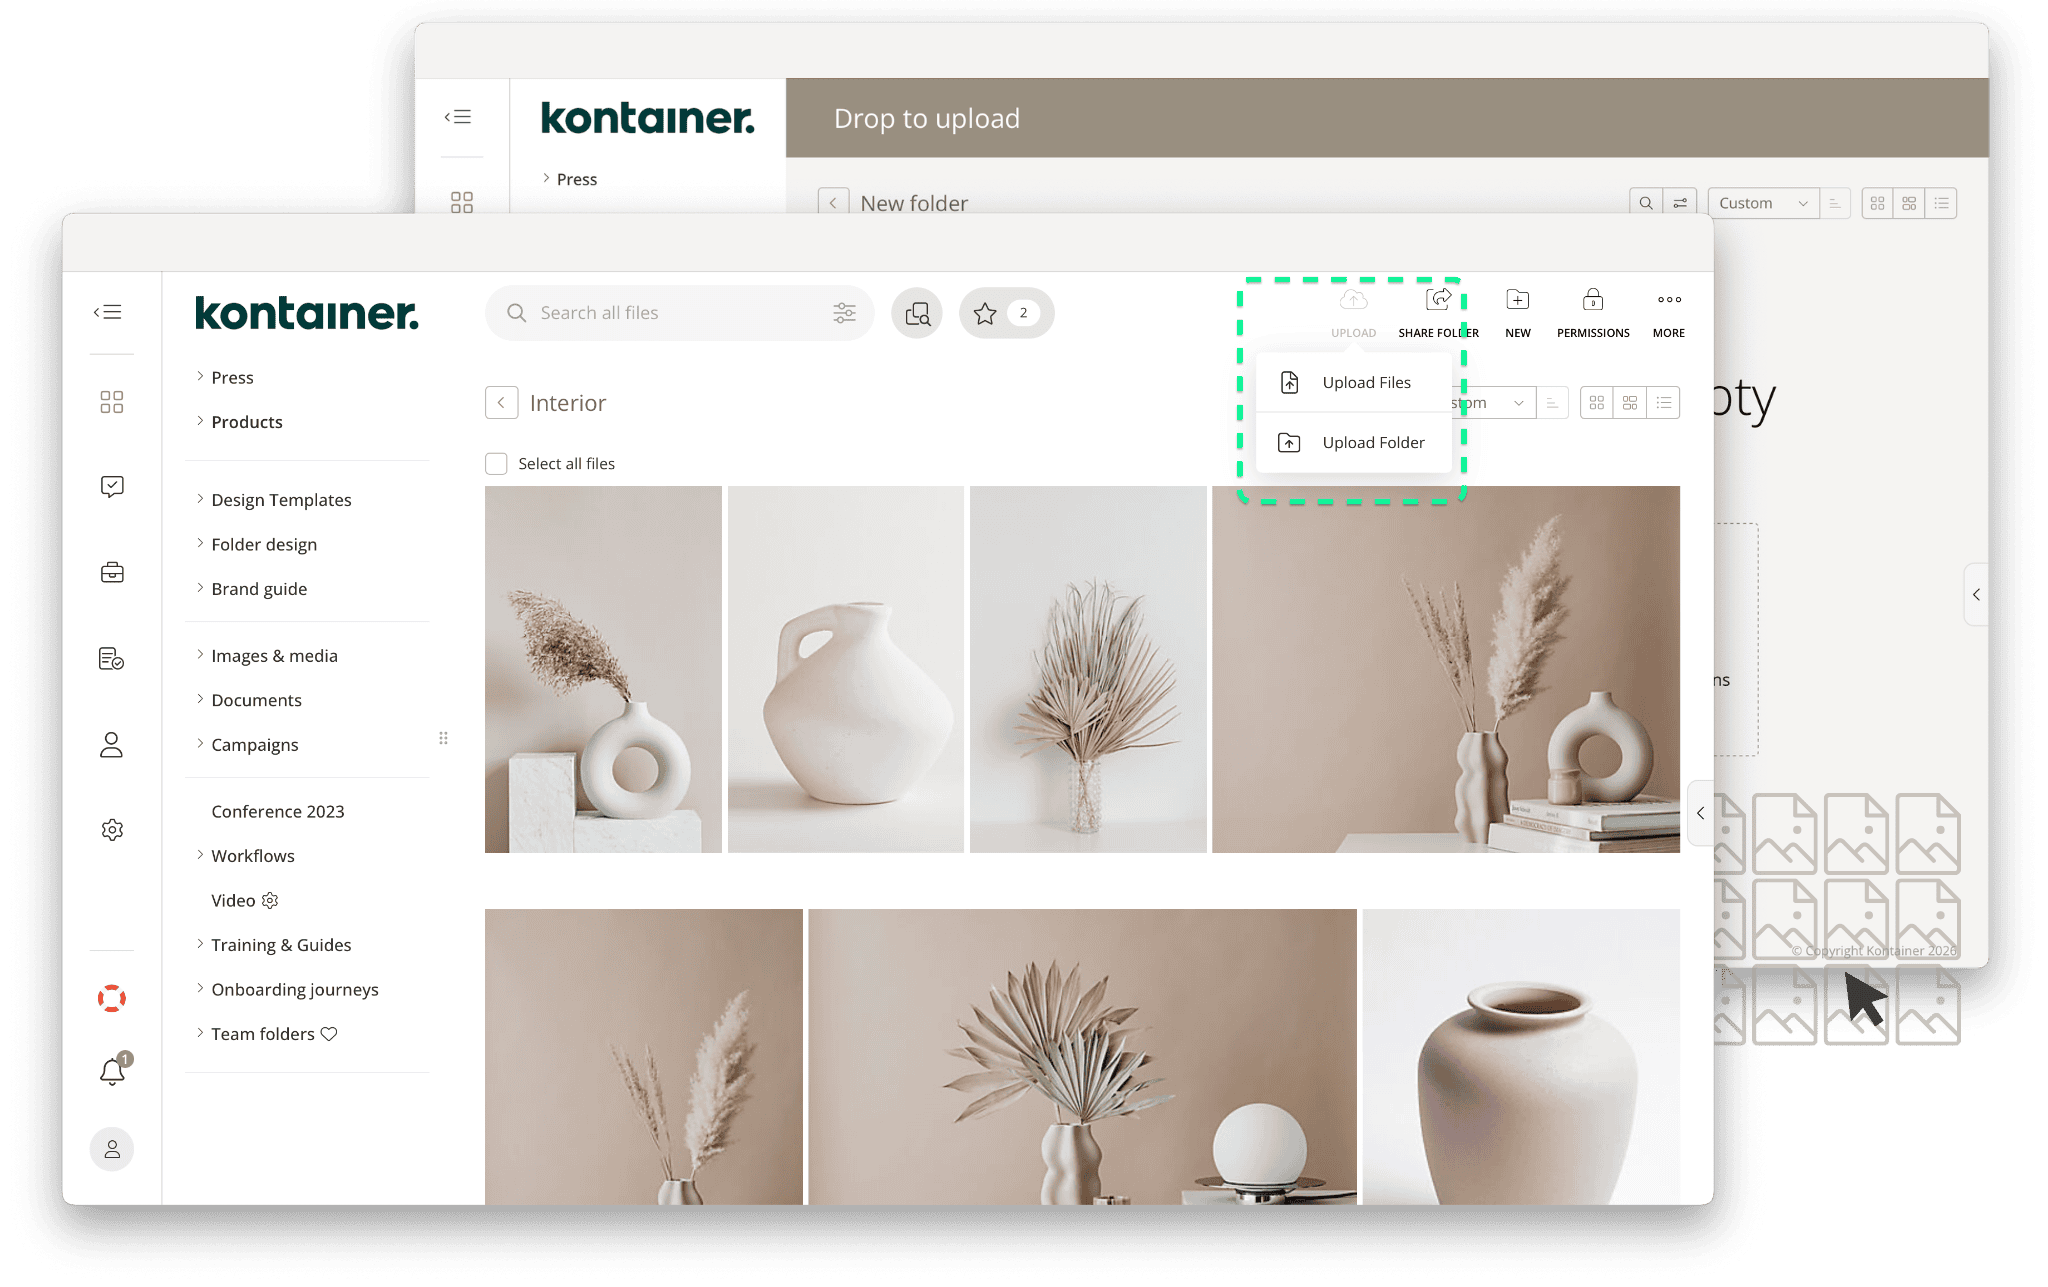
1) Uploading files to folders
To add files to a folder, navigate to the folder you want to add to, or create a new folder for your files.
Then use the upload button or drag and drop files into your folder.
Note: There are four folder types in Kontainer DAM; only the classic ‘Folder’ contains files and can be uploaded to. Click here to learn more about folder types.
Note: Many clients use varying automations to simplify and streamline file and data management. Feel free to get in touch if you are unsure about your setup.
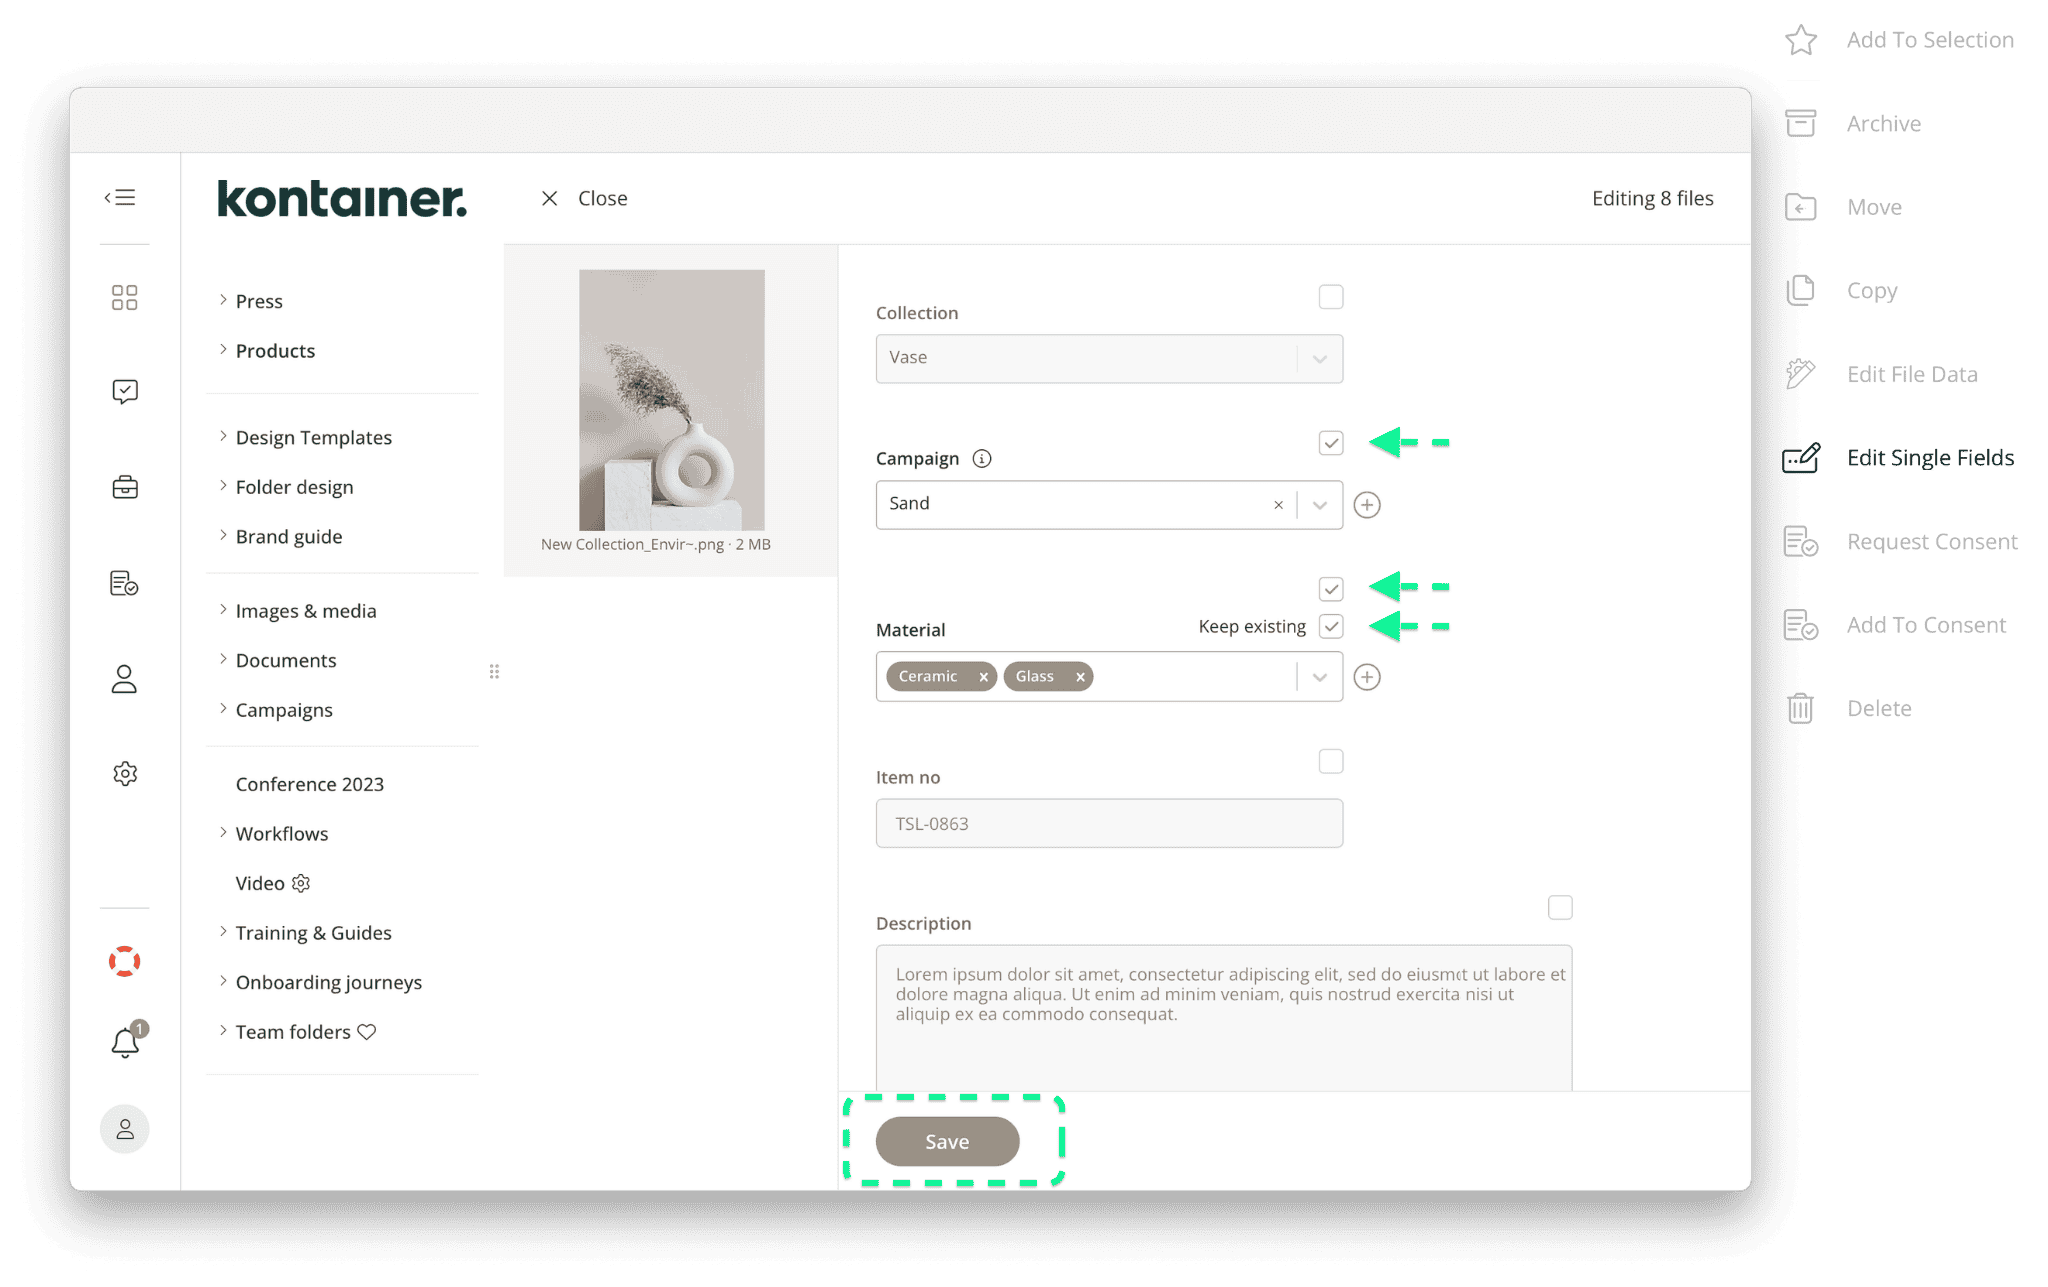
2) Tagging files with data
Once new files have been uploaded, you generally need to add data to make the files searchable and compliant. Explore our tagging guide here and the configuration guide for administrators here.
Note: Many clients auto-enrich files with data via data imports and various AI features. If you are unsure about whether anything is set up for you, do reach out, and we can check for you.
Start adding data using the Edit file data found by right-clicking an image selection or using one of the three-dot More menus.
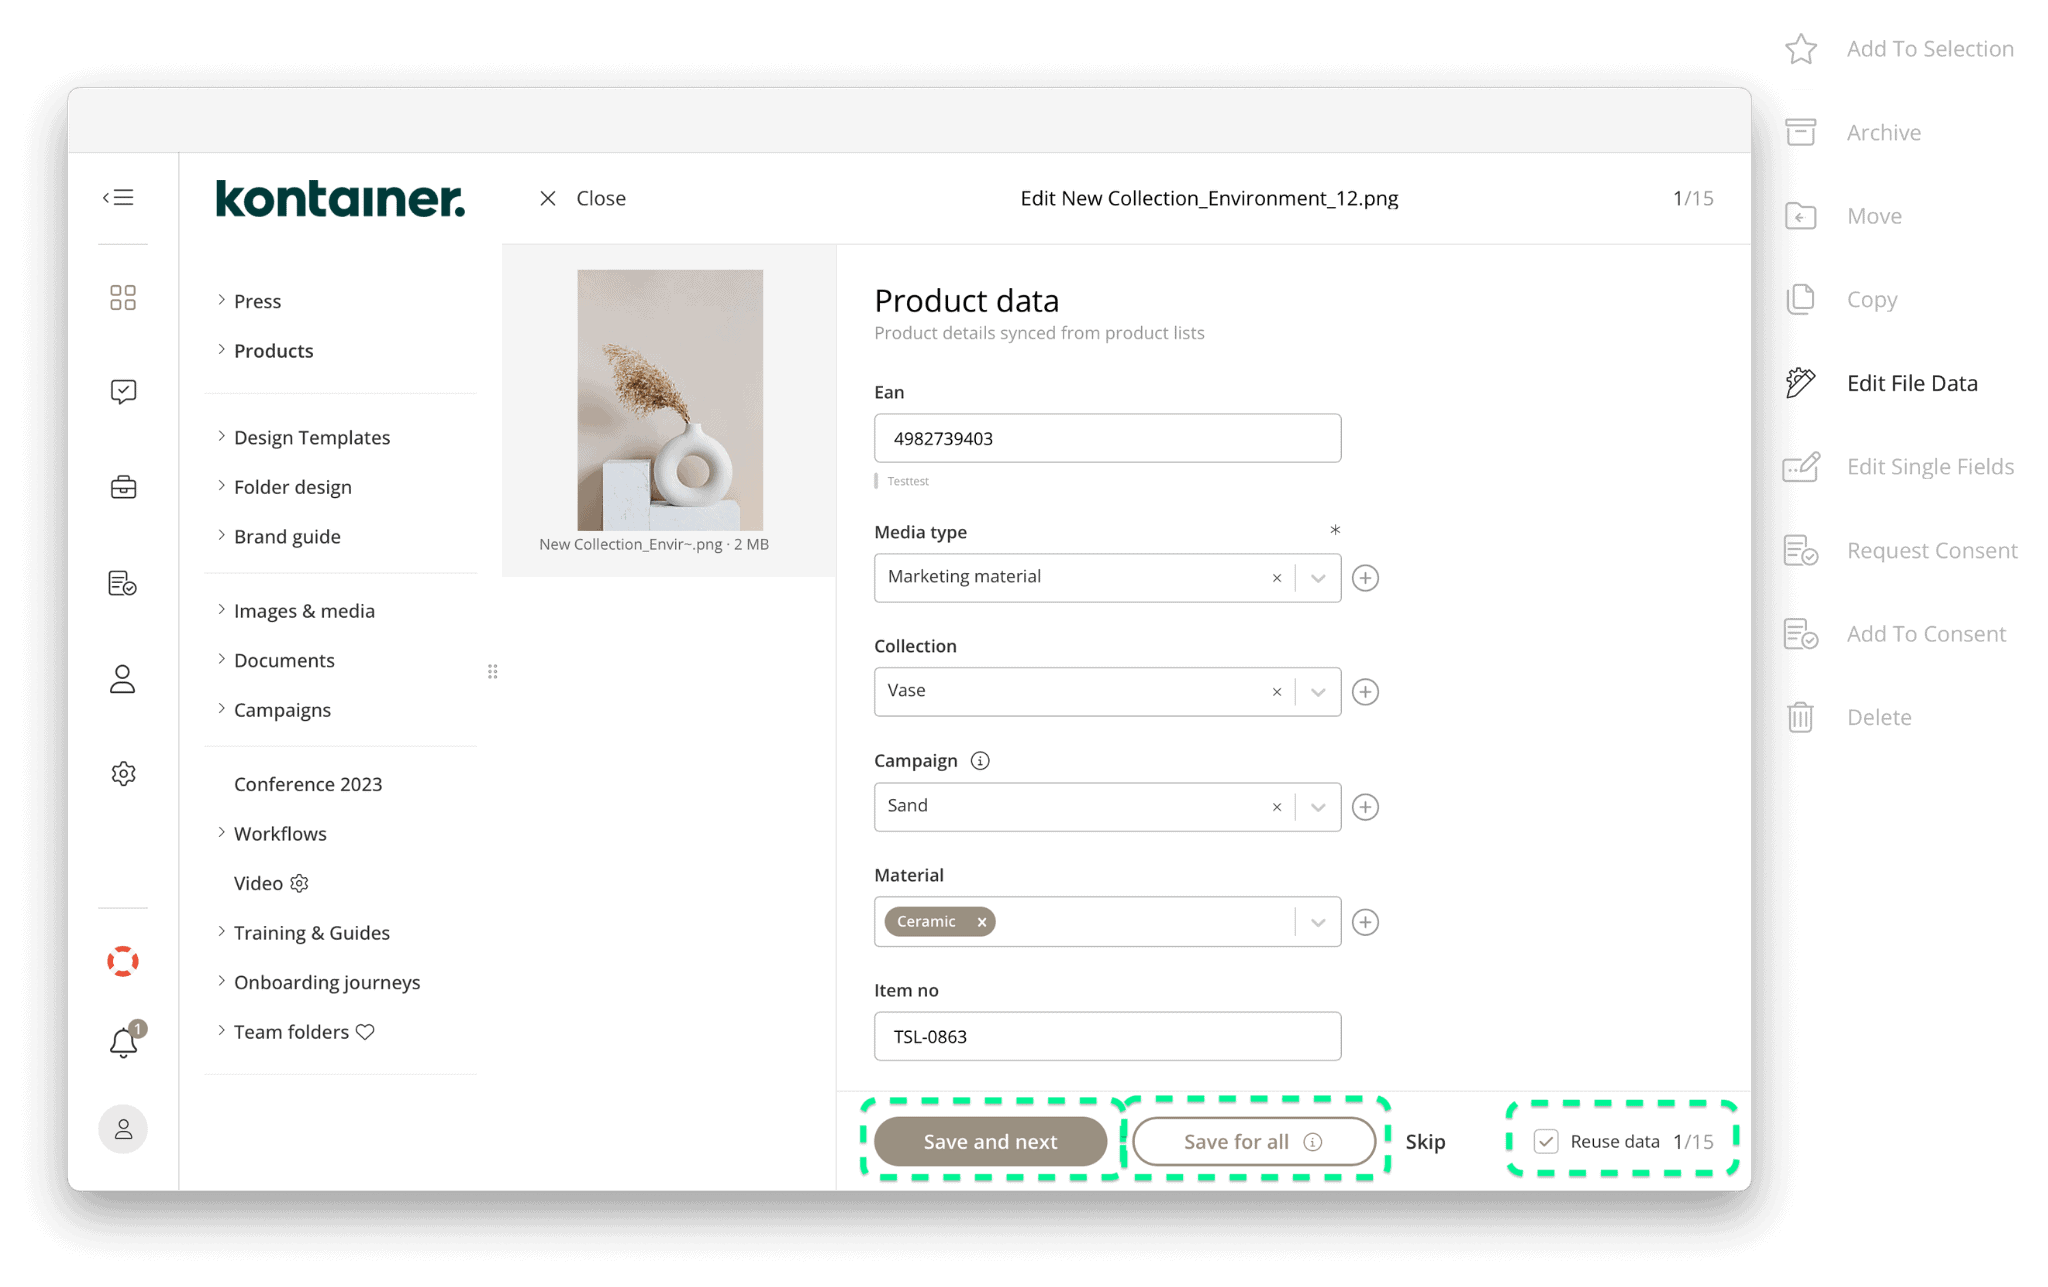
The Edit single fields allows you to add or change data while protecting the existing data.
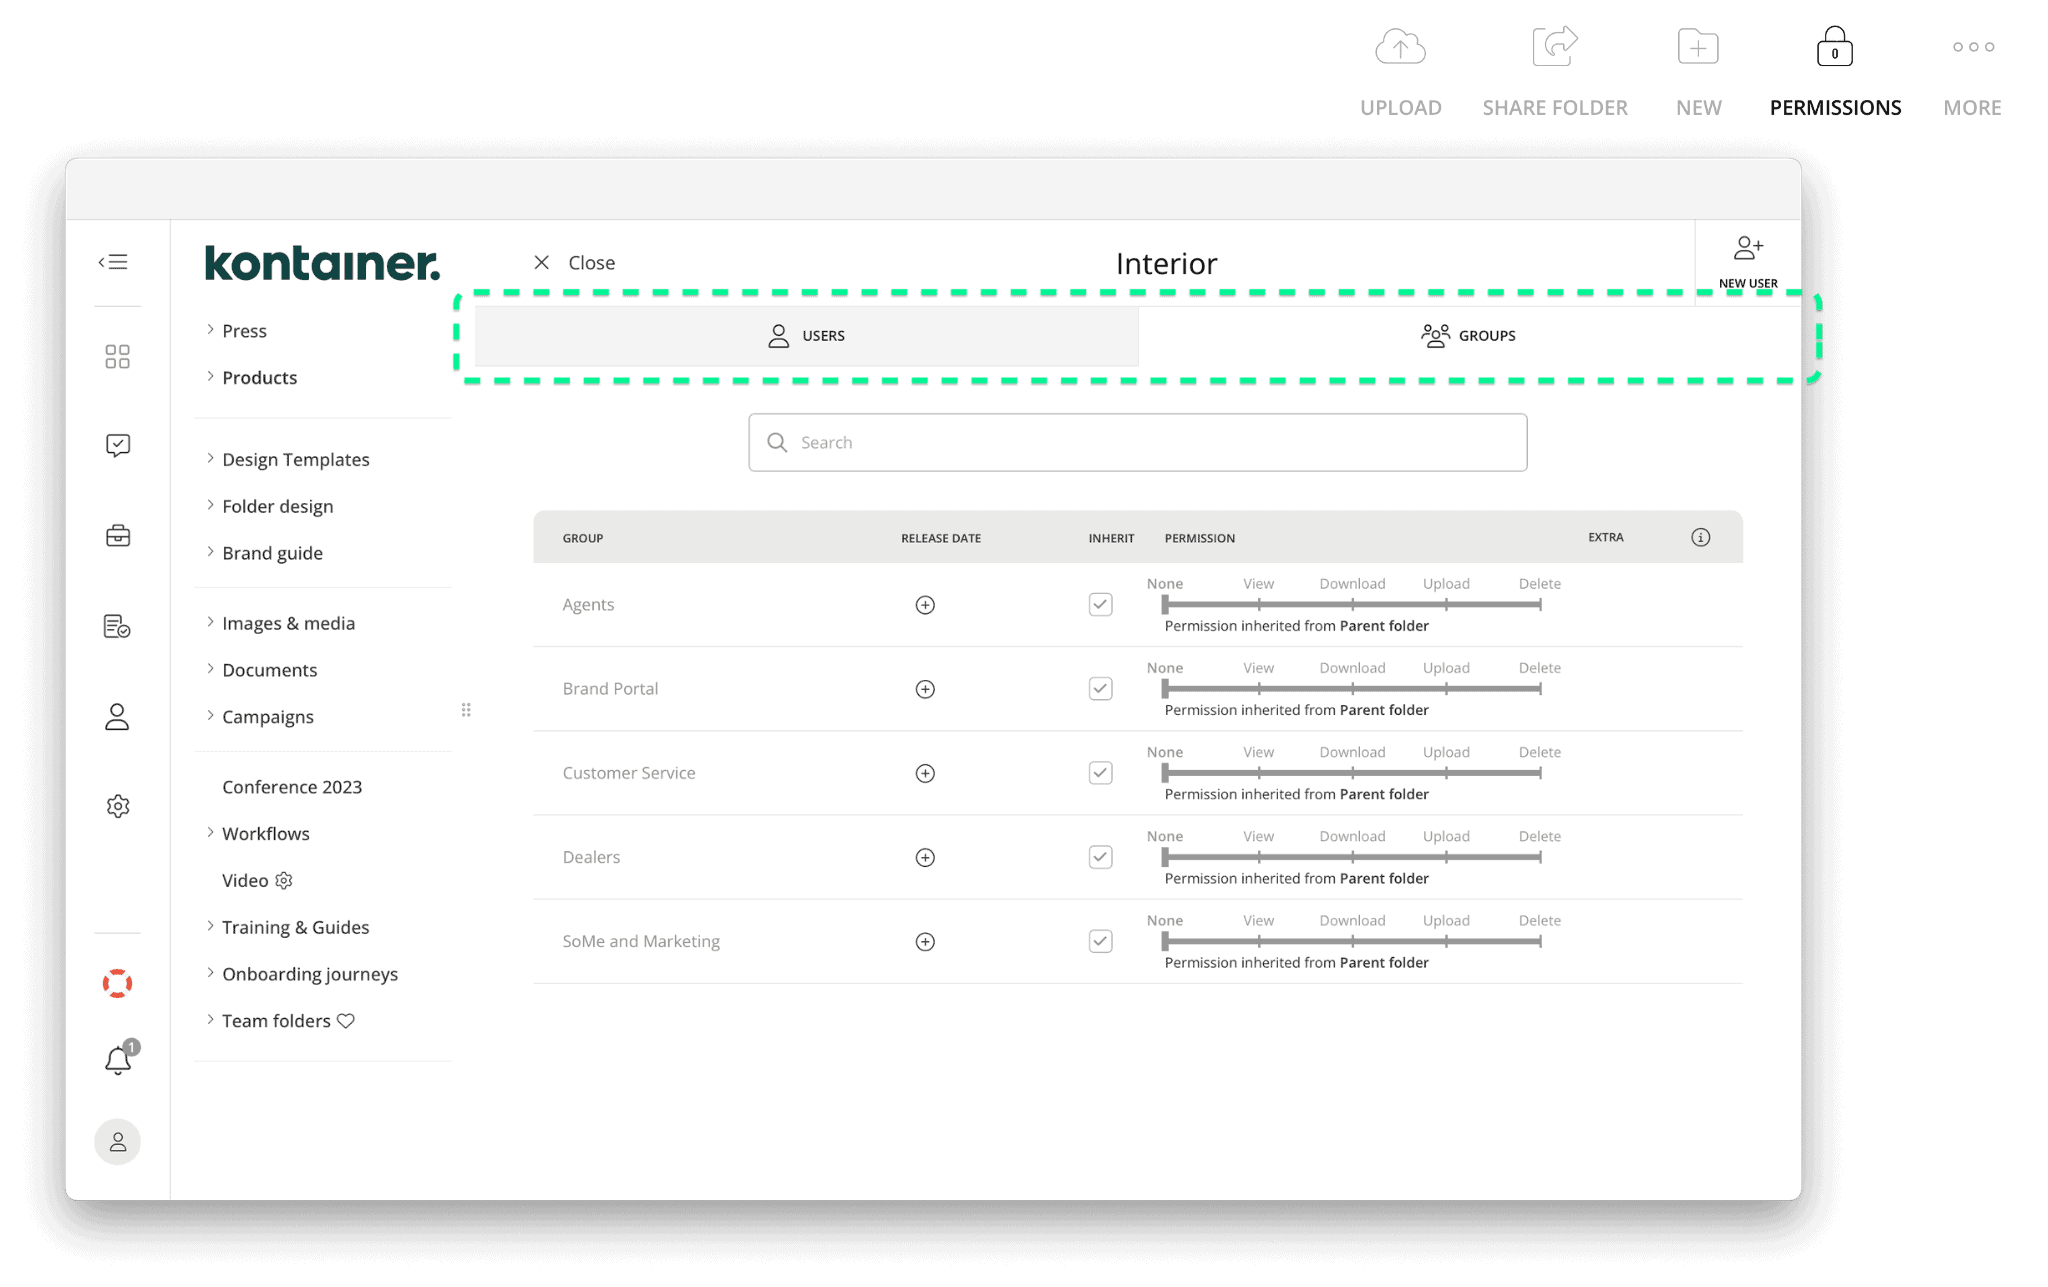
3) Checking or giving access
Any newly created main folder will only be visible to administrators. Any subfolder created will inherit access from its main folder.
To check permission settings for a folder you are adding to or have just created, use the Permissions option at the top right.
Note: Please be aware that many clients manage access not by user but by user groups. To learn more, go to the Permissions guide here.
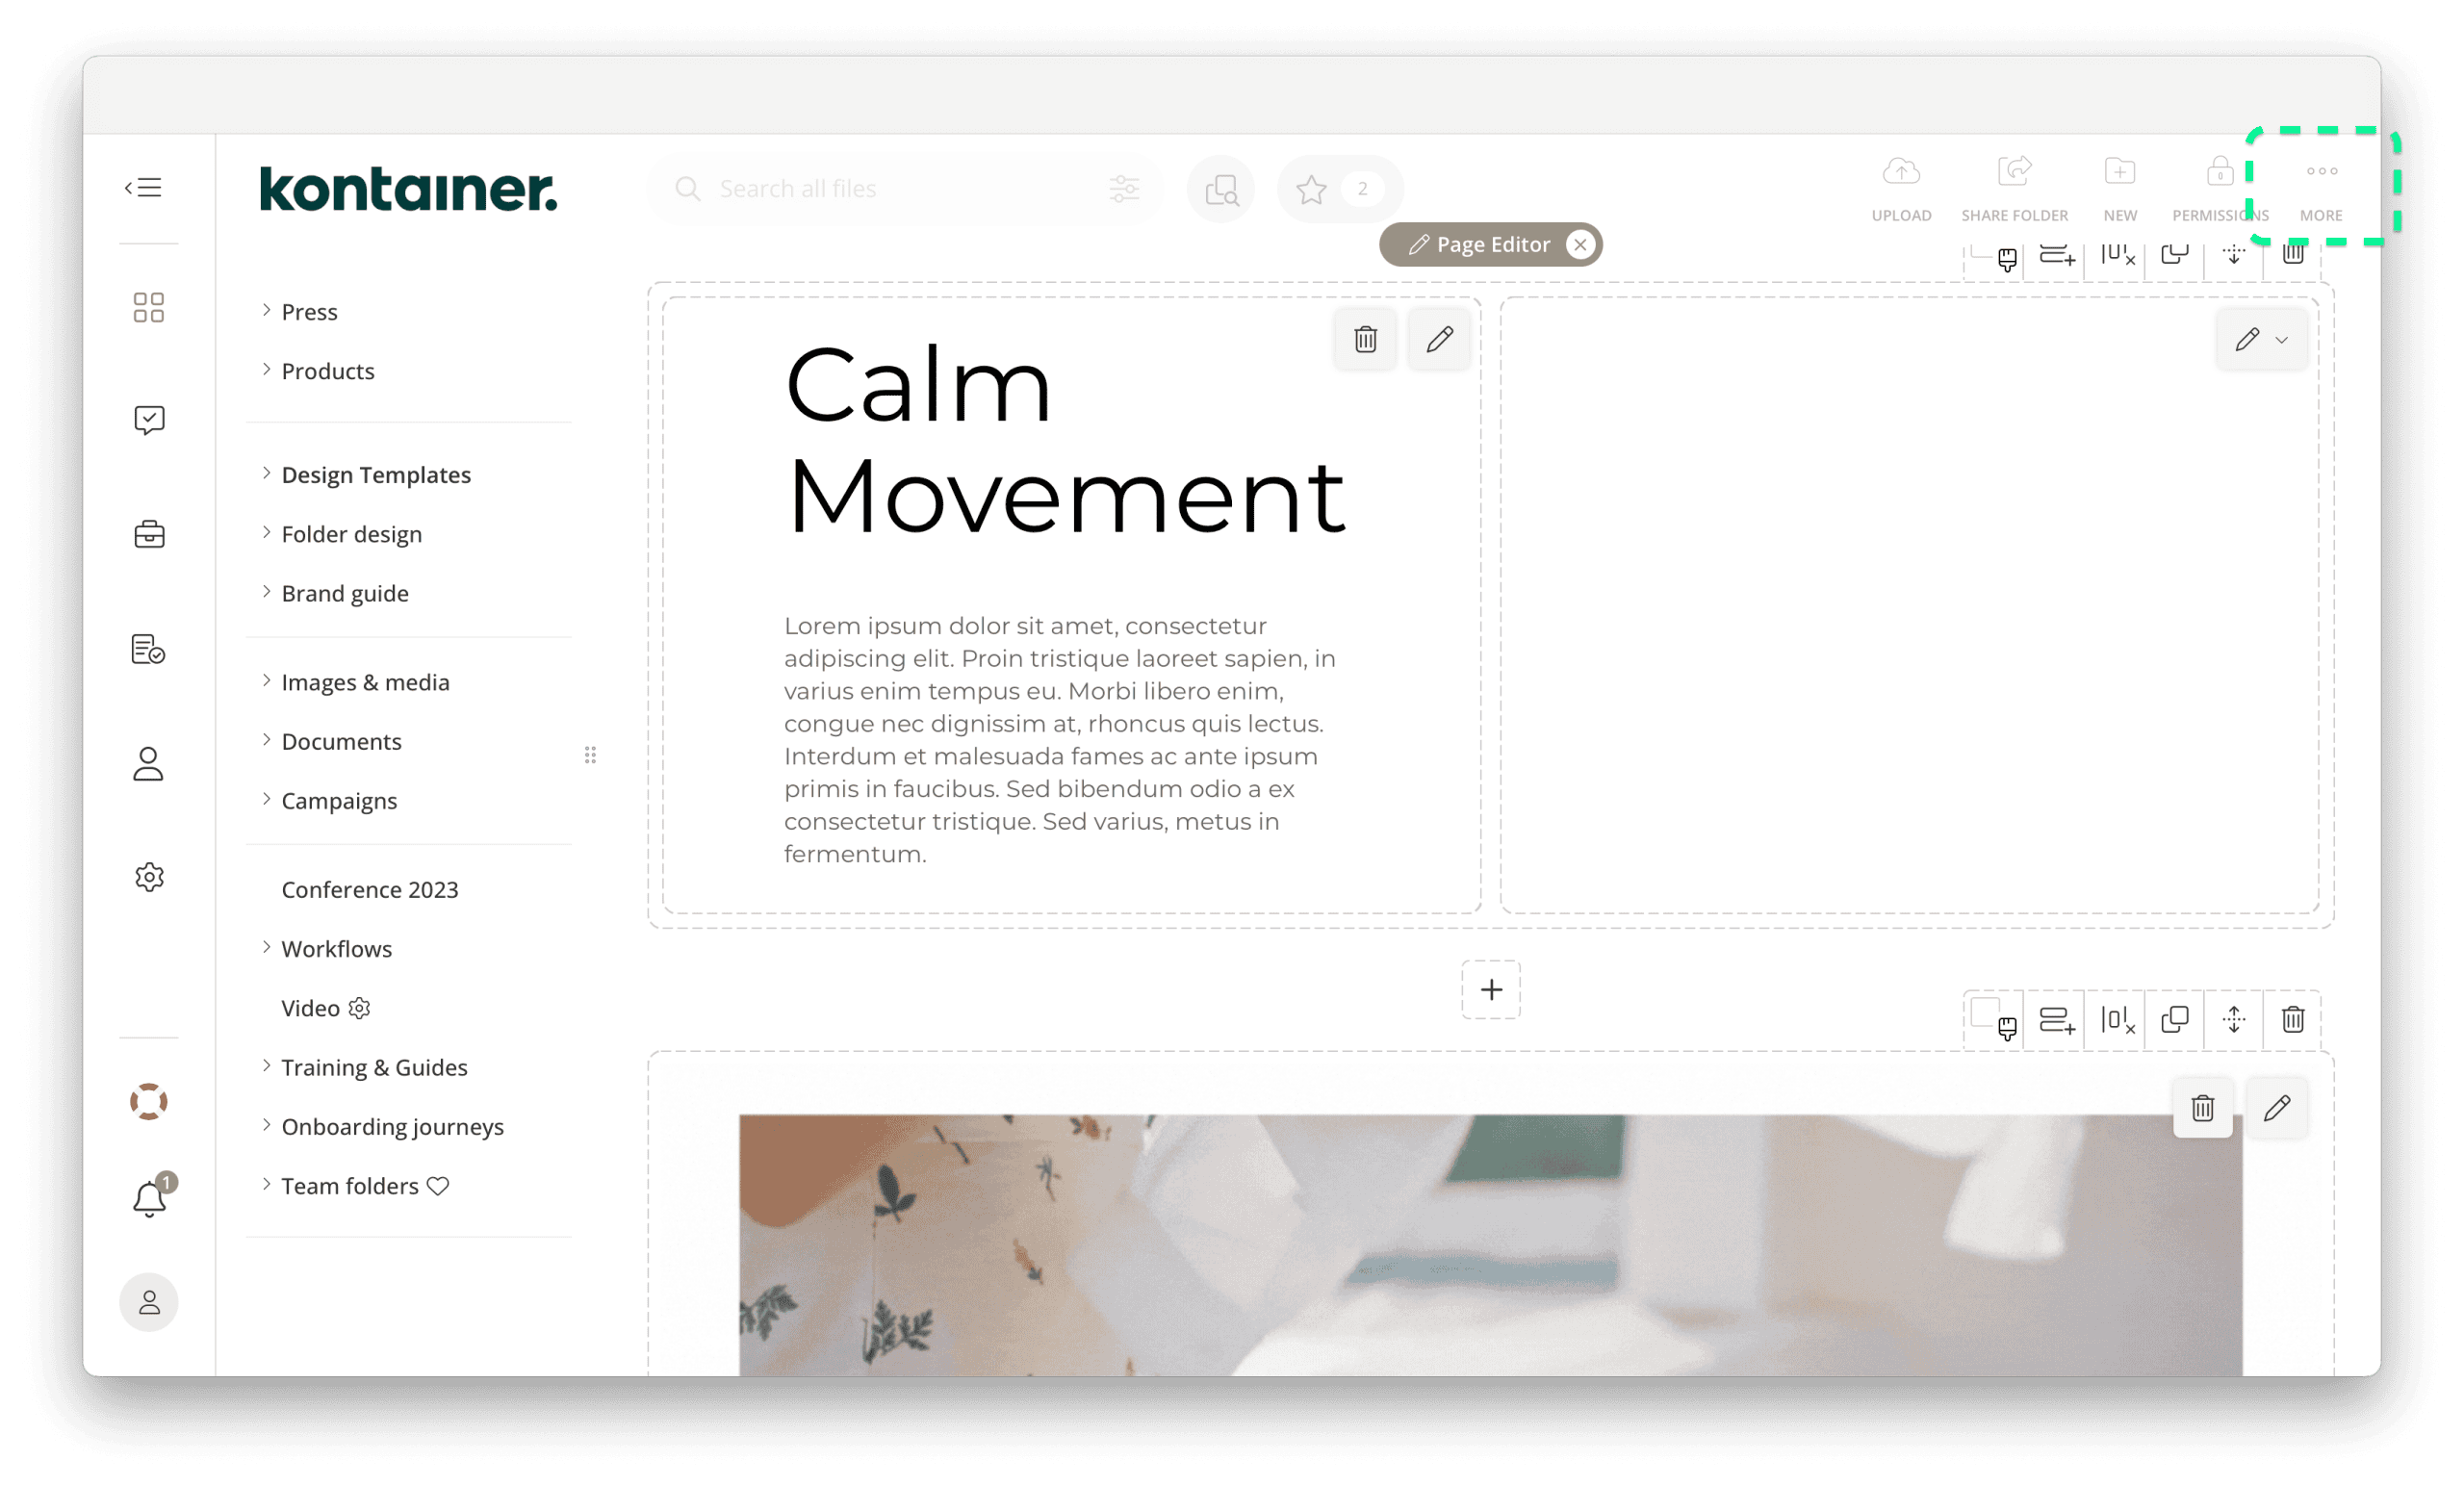
4) Styling
Kontainer is designed to make your brand shine. There are many customization options for the look and feel. Additionally, you can create designs inside your folders, make them into landing pages for your content, create user and brand guides, etc.
See our full styling guide here.
In the top right of every folder, you can access the Page editor from where you can curate your pages.
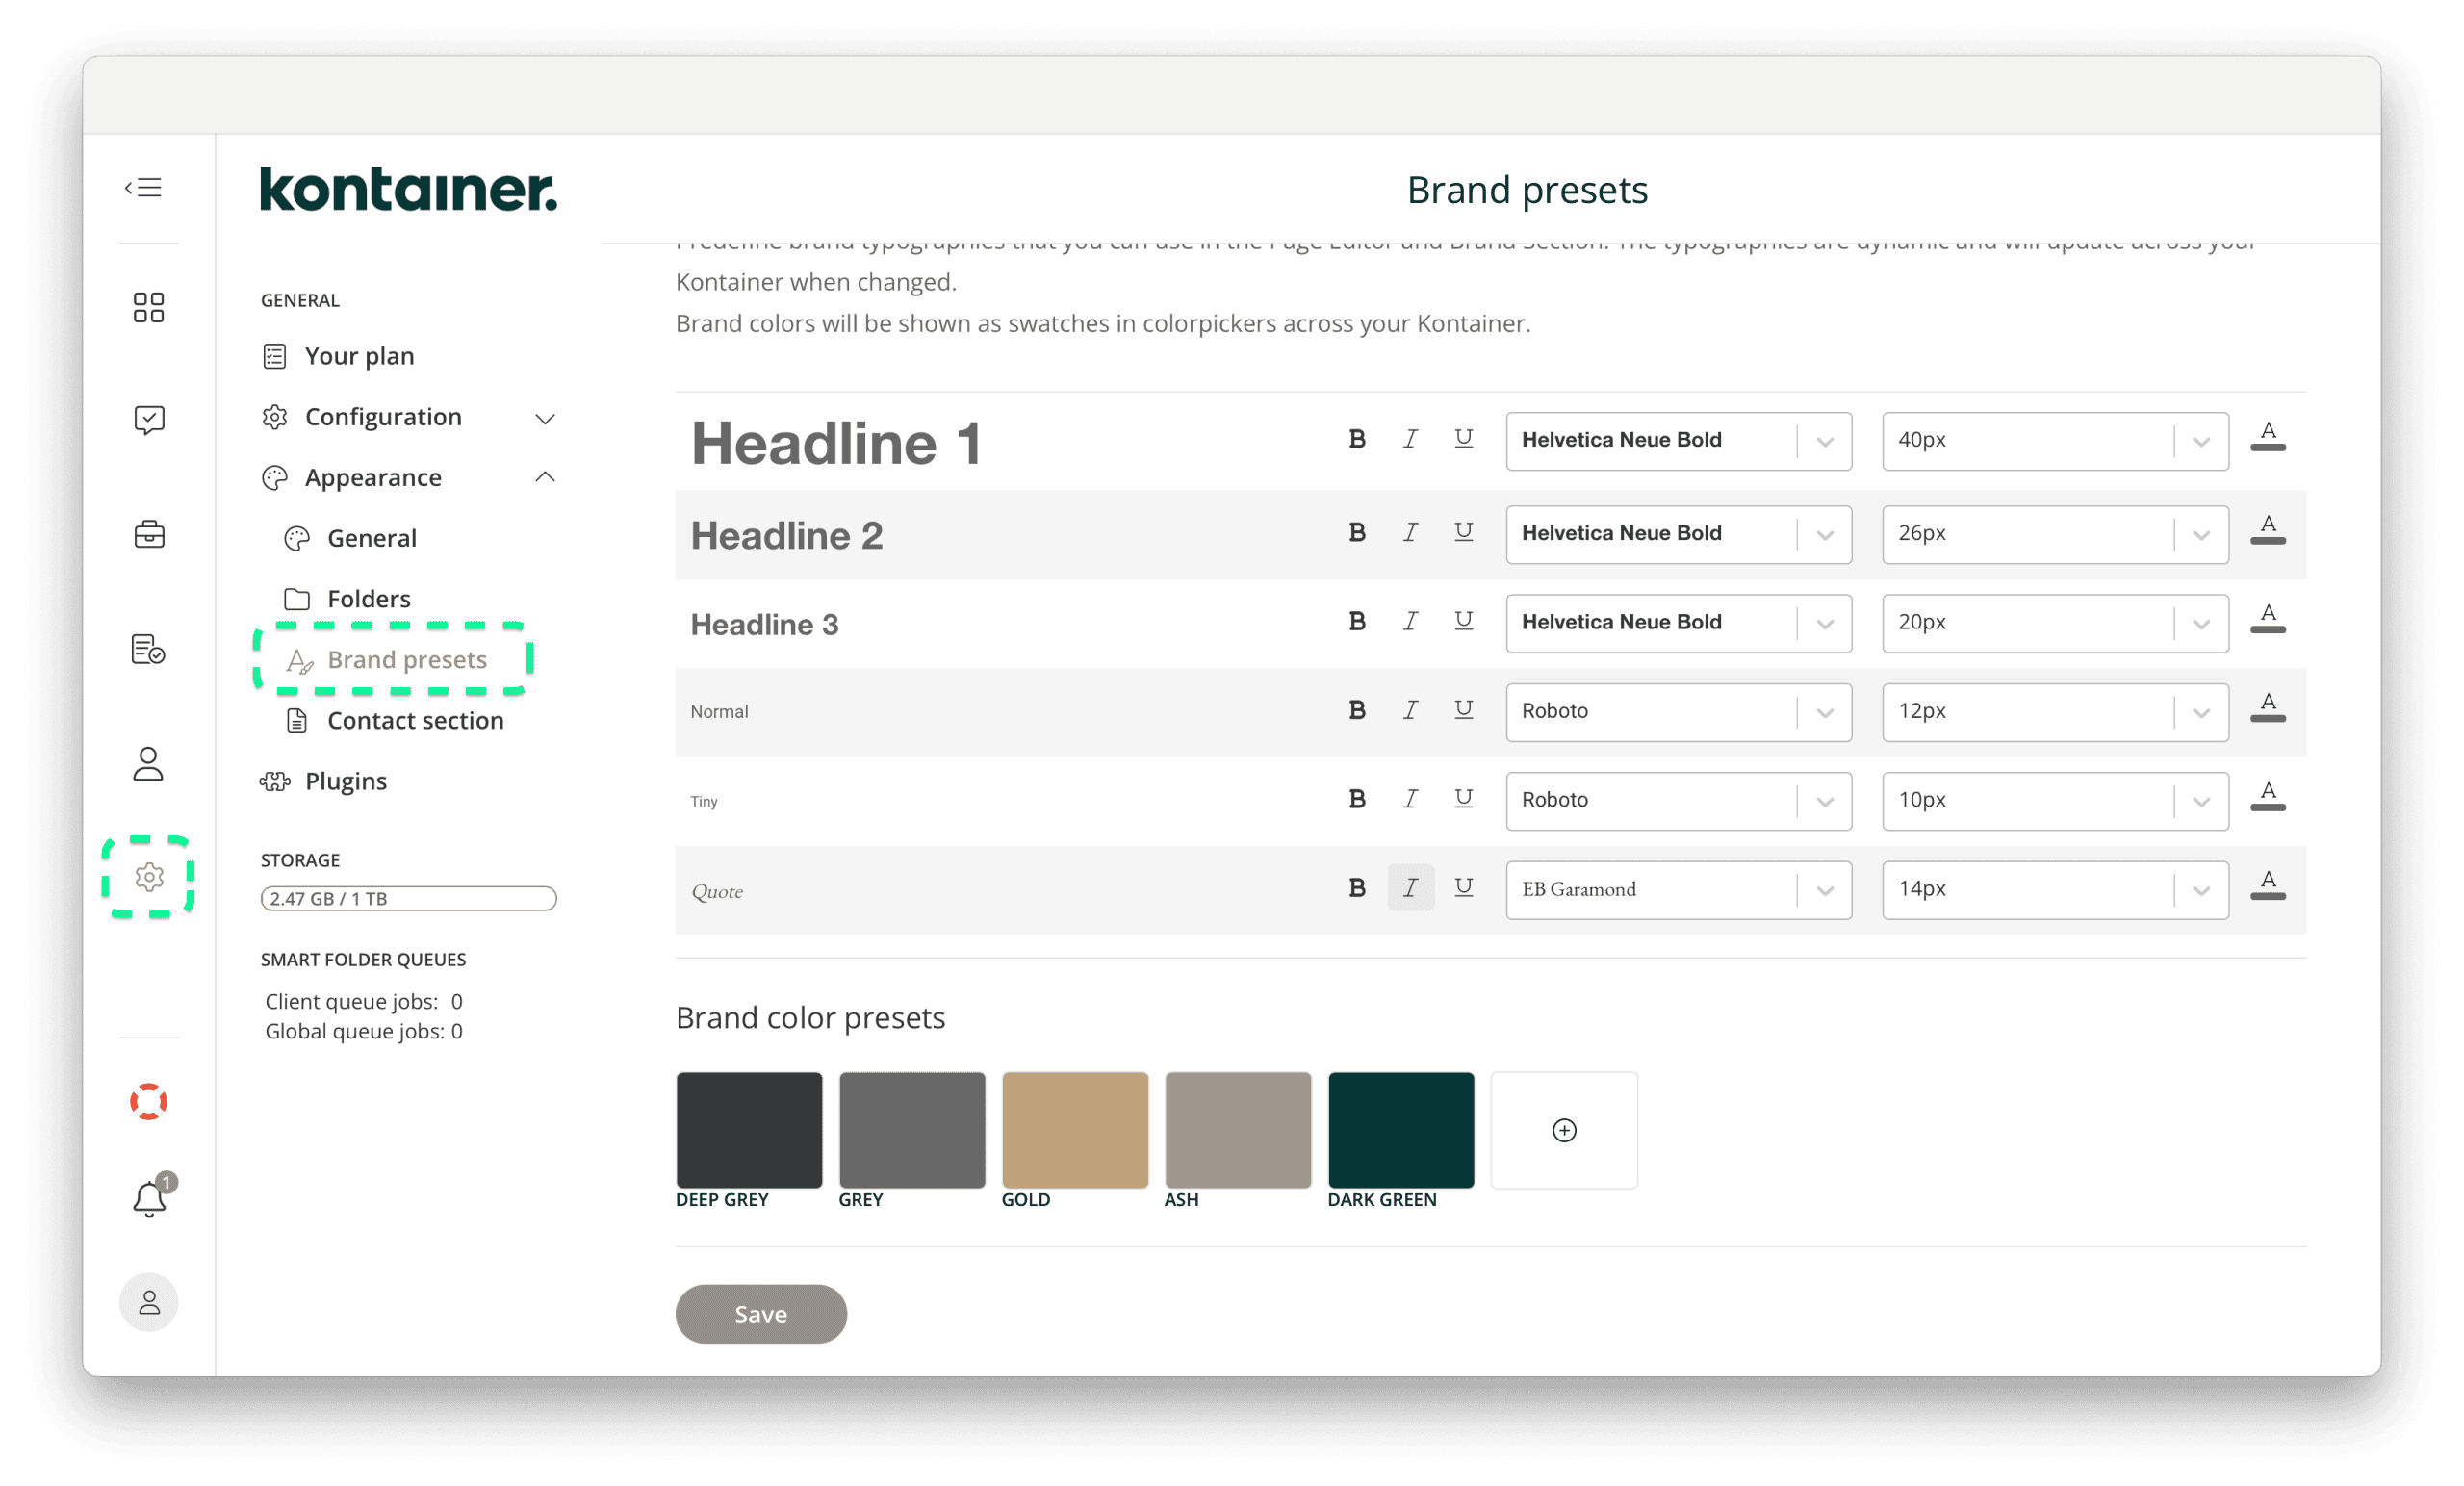
Under Settings/Appearance, there are various relevant settings that allow seamless integration with your brand.
In here, you can, for example, add Brand presets to quickly create designs in your folders.
Note: If you have brand-specific fonts that you would like added, let us know.
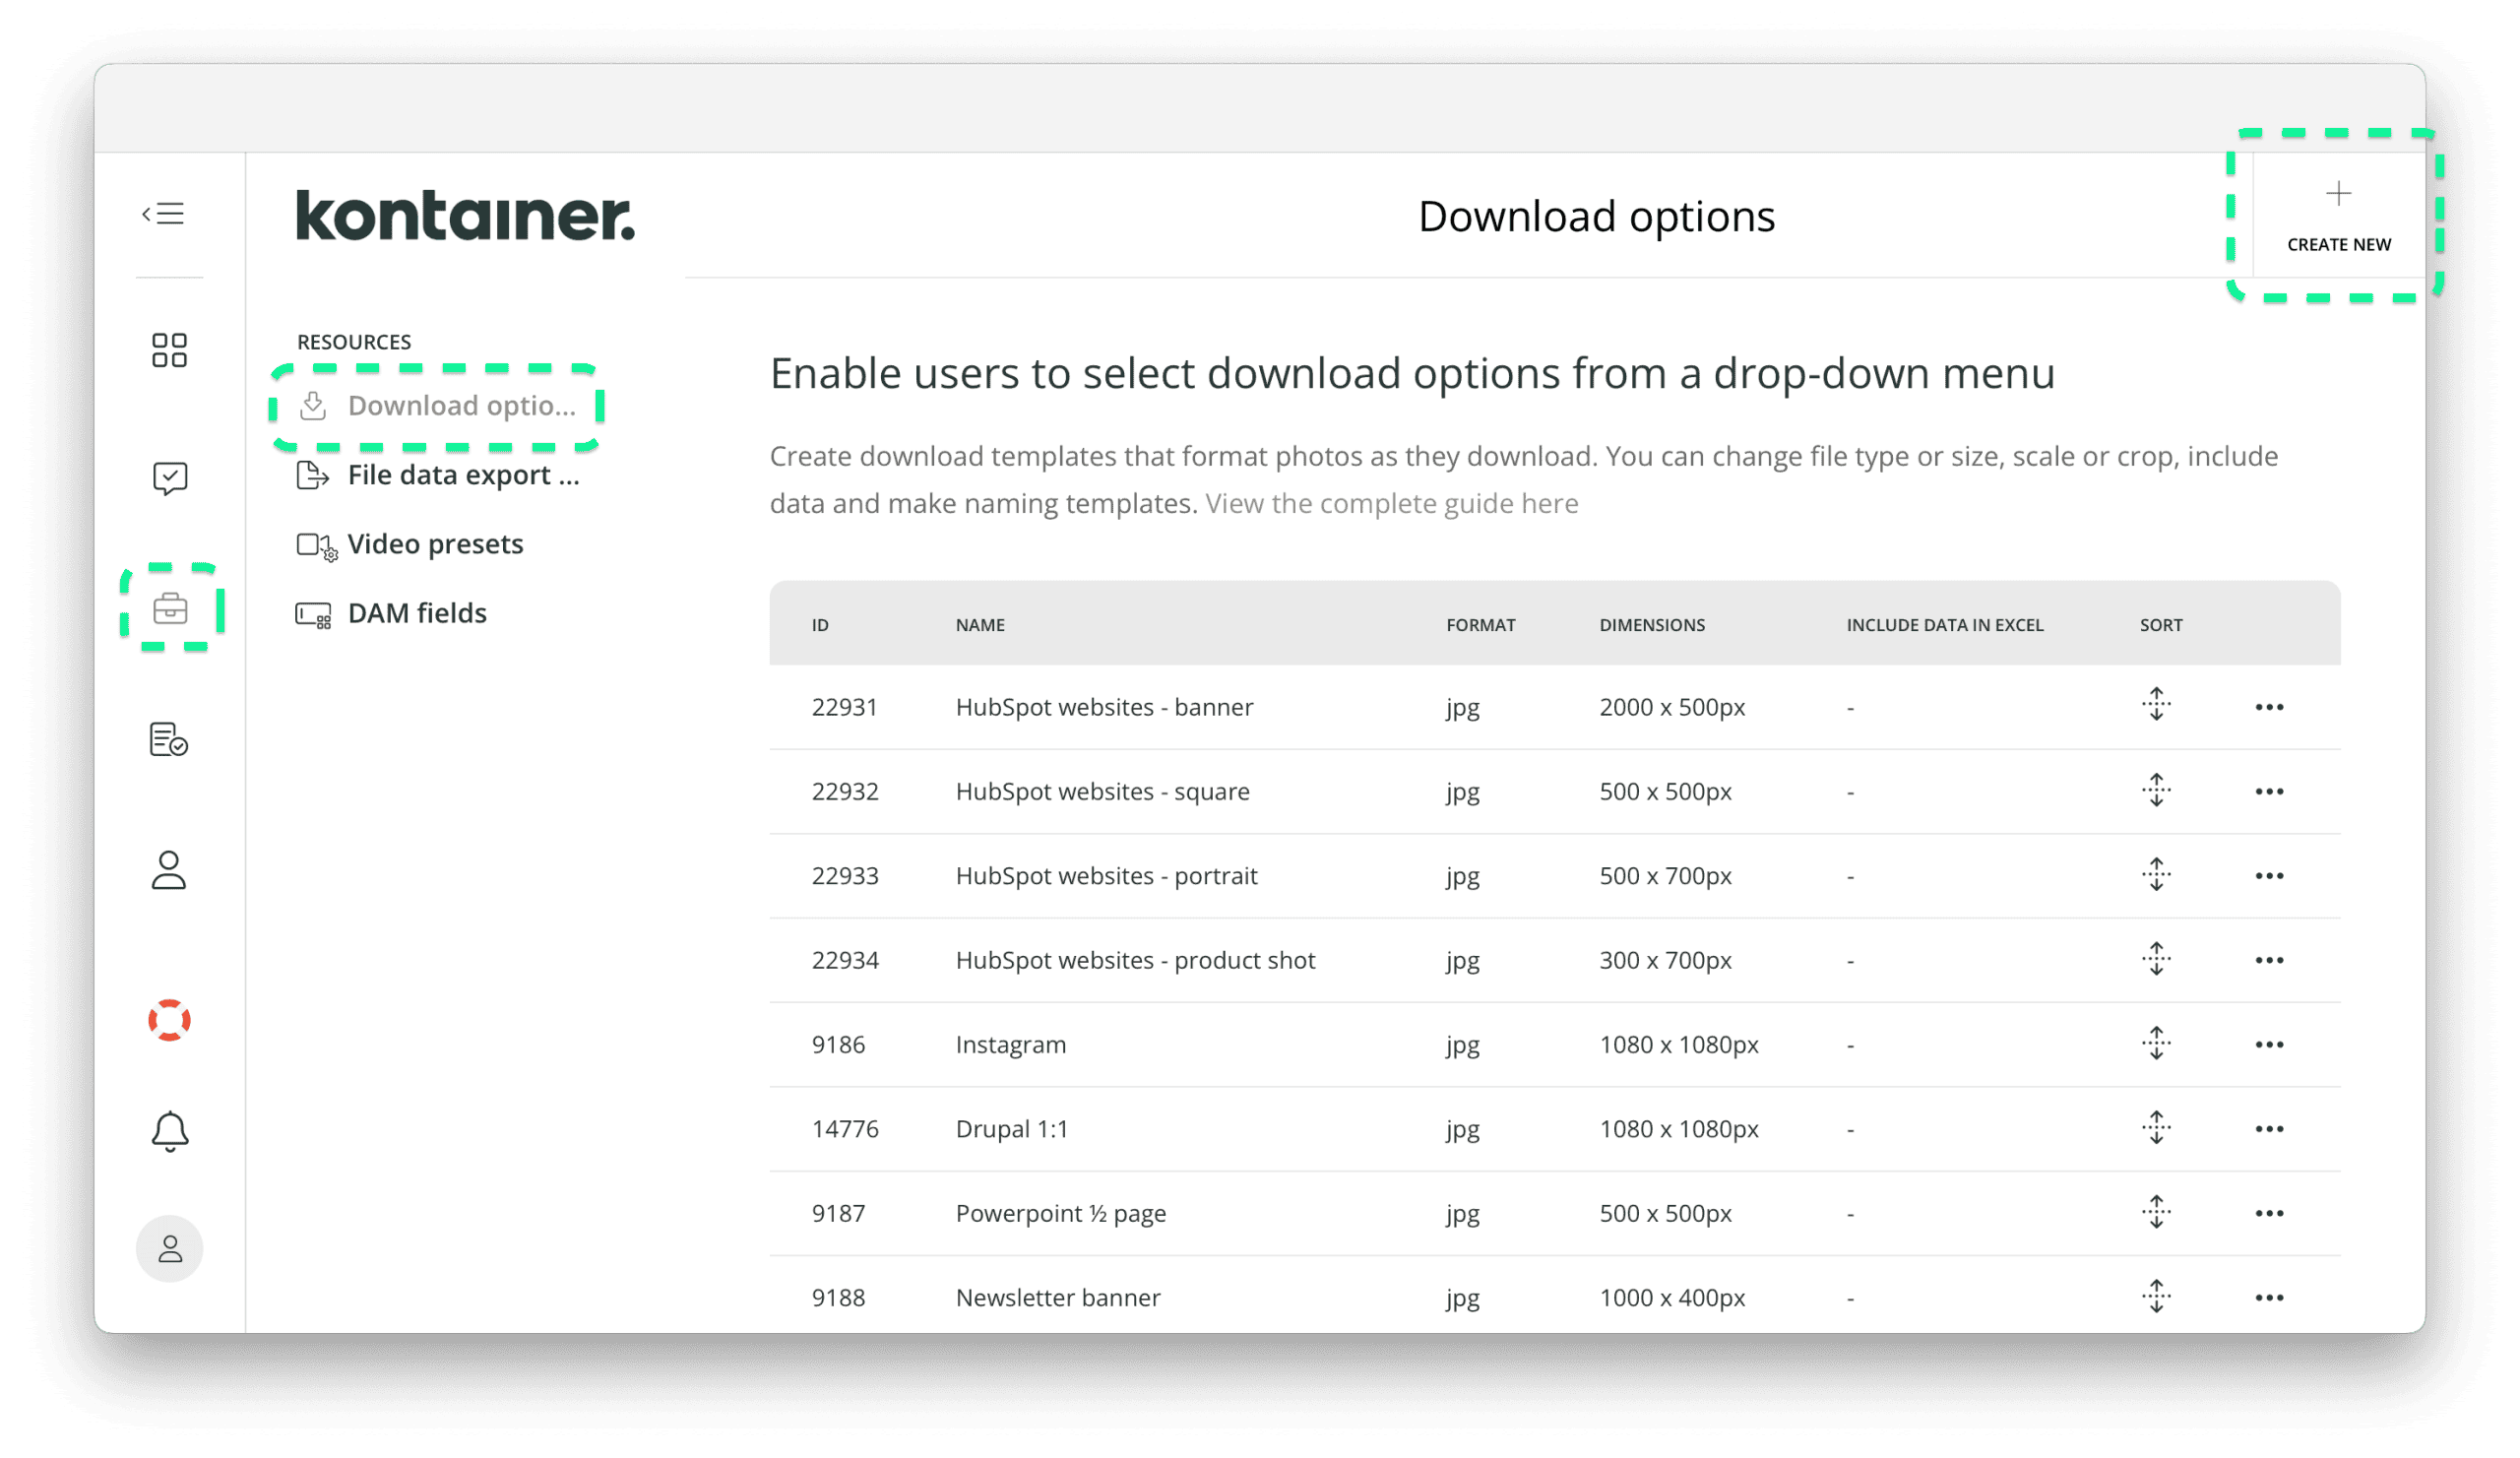
5) Auto-conversion of files
The last feature we will highlight here is the various template options that enable quick online export and use of files and data.
To learn more, explore these guides:
- Download templates for images (Typical uses: Social media, newsletters, presentations, websites)
- Data export templates (Typical use: Resellers, webshops, eCommerce, marketplaces)
- Video streaming guide (Secure and GDPR-compliant video hosting)
Templates are managed in the Resources menu.
Note: As with everything in Kontainer, access must be granted, so once you have created a template, non-administrators will only see it when granted access. Learn about Permissions here.
More guides to explore
There are many further guides to explore on the helpdesk. Here is a summary of key guides for administrators.
- Tagging
- Permissions
- Custom folder design & landing pages
- Styling
- Download templates
- Contact section (formerly Brand section)
- Managing tagging fields
Let us know how you get on, and book a meeting here or email us if you need any guidance or inspiration.