To apply a watermark to your downloadable content, follow these steps:
-
Navigate to:
Ressources > Download options -
Create or edit a download template.
Scroll to the bottom of the template settings and select “Enable watermark.”
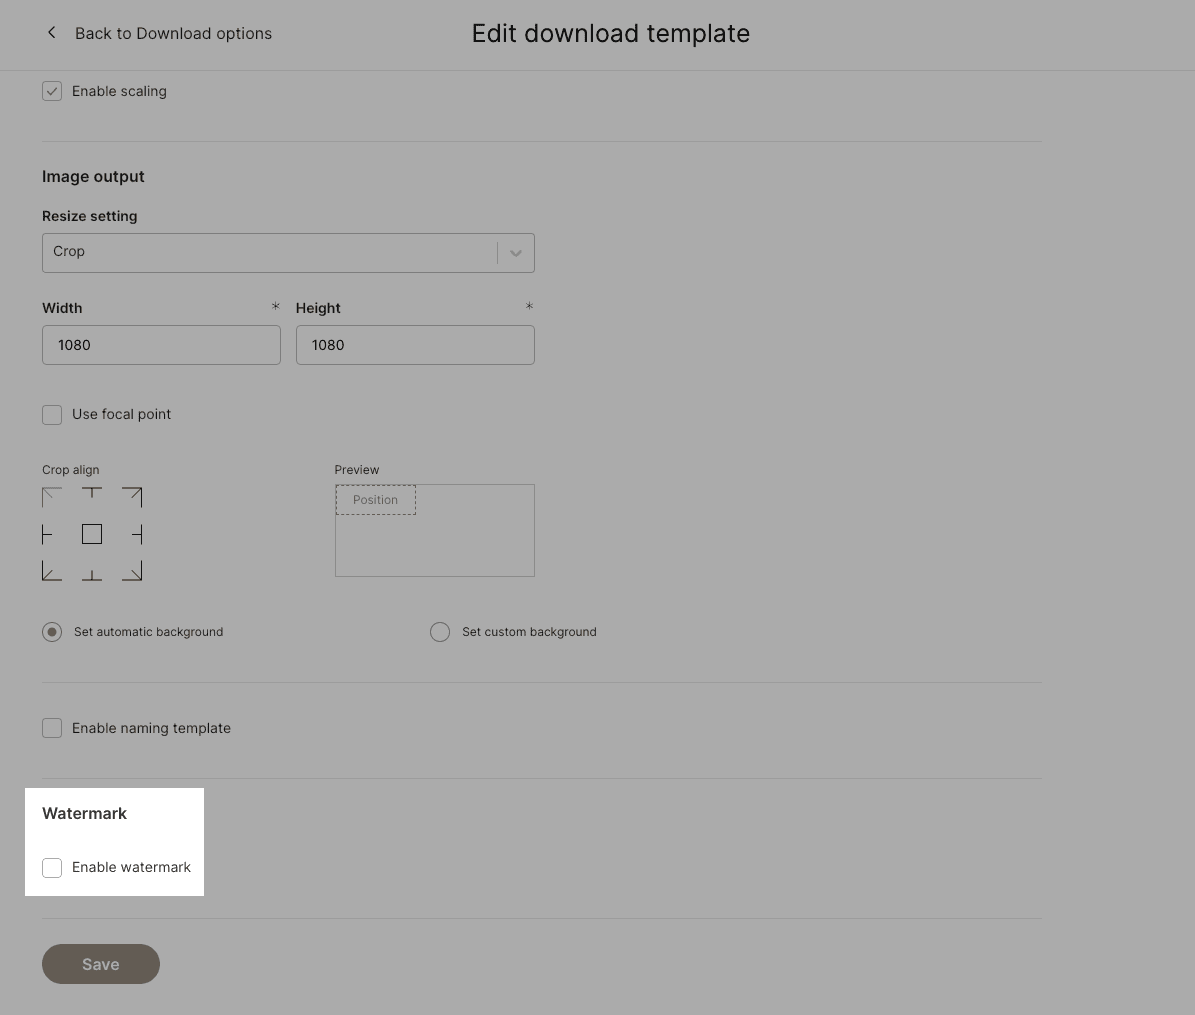
Once enabled, you can upload an image to serve as a watermark mask layer, which will be automatically applied over the downloaded content.
Step 1: Upload a Mask Image
Upload an image that you want to use as your watermark. This could be a logo placed in a corner, a copyright notice, or a semi-transparent “Draft” overlay across the image.
Example: A 200 × 100 px image with the word “Draft” on a transparent background.

Step 2: Set Opacity
Adjust the opacity to control how visible the watermark is. For example, setting the opacity to 70% ensures that the watermark is clearly visible without obstructing the underlying content.
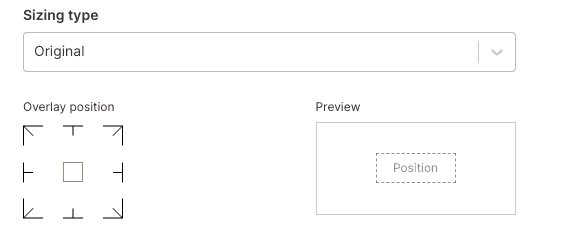
Step 3: Define Sizing and Placement
You can configure how the watermark scales and where it appears on the image using the Sizing Type and Overlay Position options.
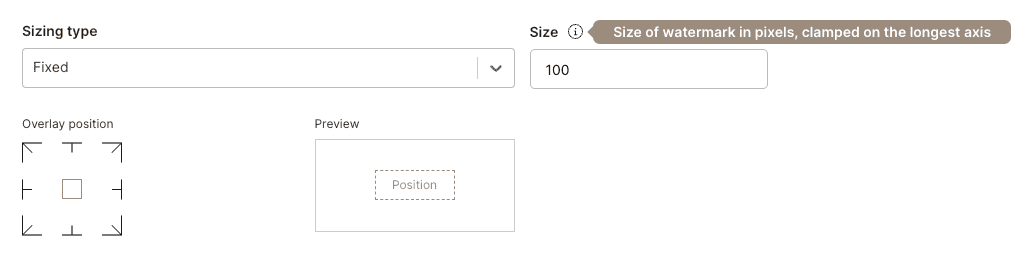
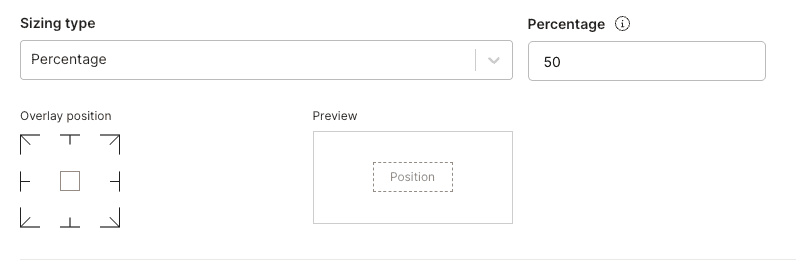
Sizing Type Options
-
Original
The watermark retains its original dimensions, regardless of the size of the output file.
Example: A 200 × 100 px watermark placed in the center will always remain 200 × 100 px. On a smaller output, it may be cropped; on a larger one, it may appear relatively small.
-
Fixed
Allows you to set a maximum size in pixels.
Example: A value of 100 constrains the watermark’s largest side (width or height) to 100 px. A 200 × 100 px image would be resized to 100 × 50 px.
-
Percentage
The watermark scales relative to the output size.
Example: A value of 50% means the watermark will fill up to 50% of the output’s longer side. If the output is 1000 × 1000 px, the watermark would be scaled to 500 × 250 px.
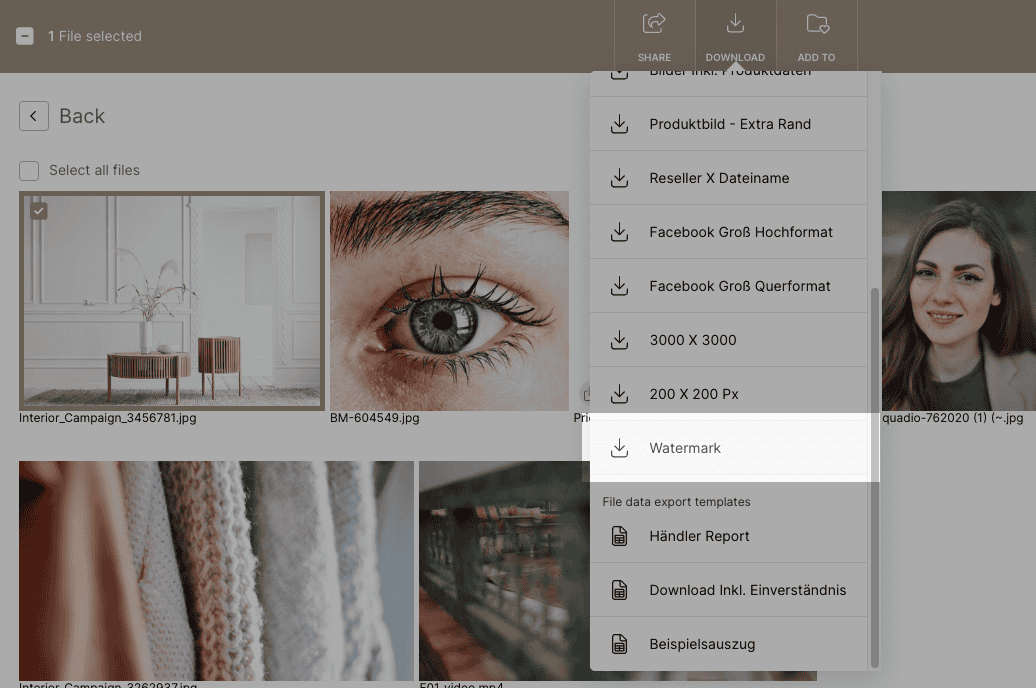
Example Configuration:
We created a template named “Watermark” that crops the output image to 500 × 500 px.
-
Watermark file: 200 × 100 px
-
Sizing type: Original
-
Overlay position: Center
-
Opacity: 70%
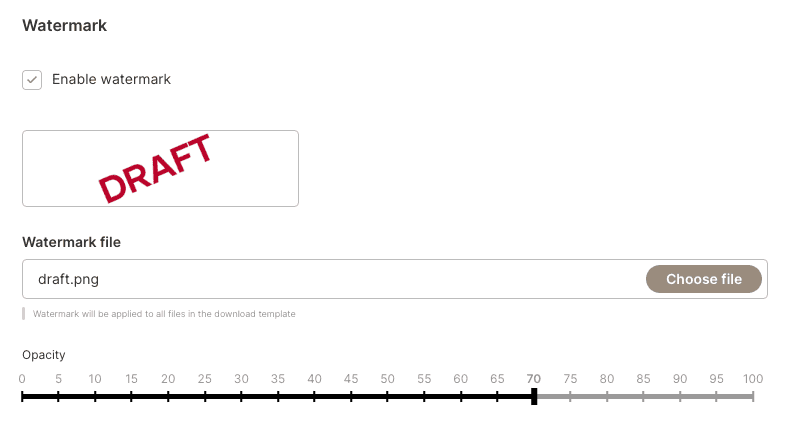
This results in the watermark being centered and semi-transparent at its original size over the final image:

If you would like to know more and see how this feature could work for your specific use case, please contact Customer Success.