Office 365 Add-in Manual
Note: If the Office plugin is included in your package, it might still need activation. Get in touch with customer success if you need any assistance.
Install our 365 Office Add-in to add a Kontainer button in Word, Excel, and PowerPoint.
Go to the Kontainer integration page to find out more about the use cases, benefits, etc.
Follow the step-by-step guide below to install either the online or desktop version.
Add access for your own account
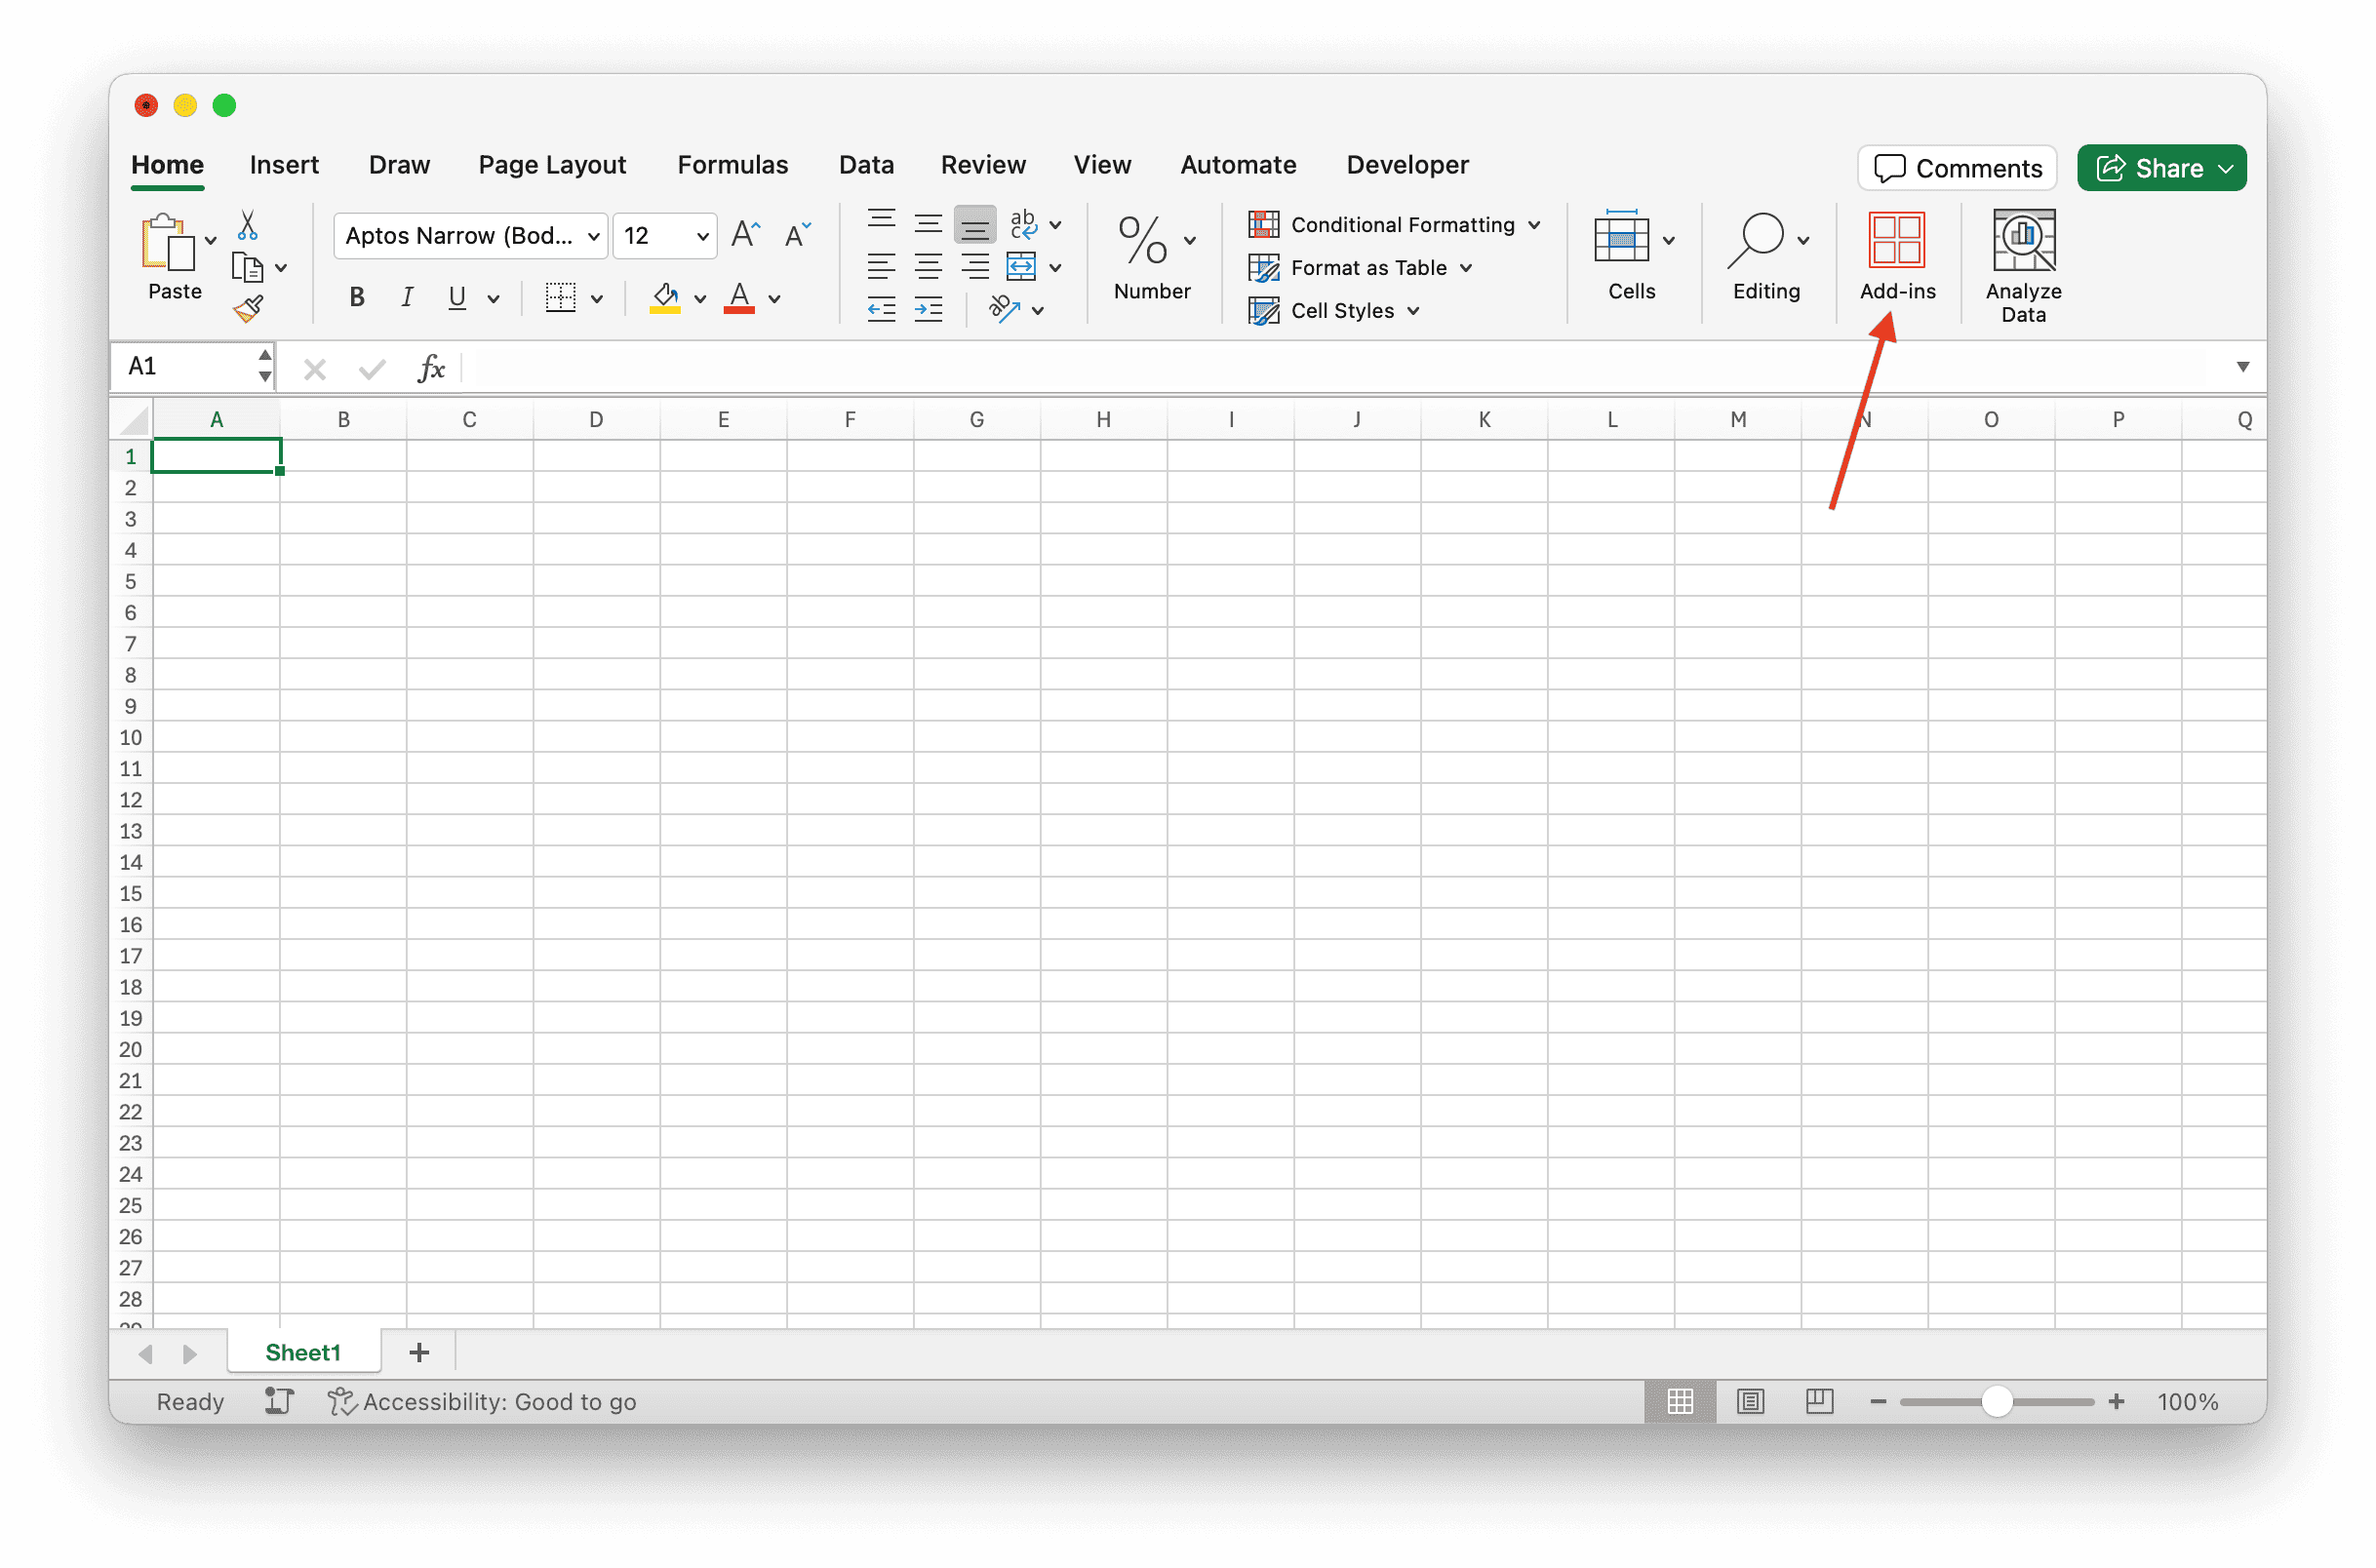
Step 1: Go to Add-ins
Start by opening one of your Office programs (Word, Excel, PowerPoint), click on Add-ins, search for Kontainer, and click Add.
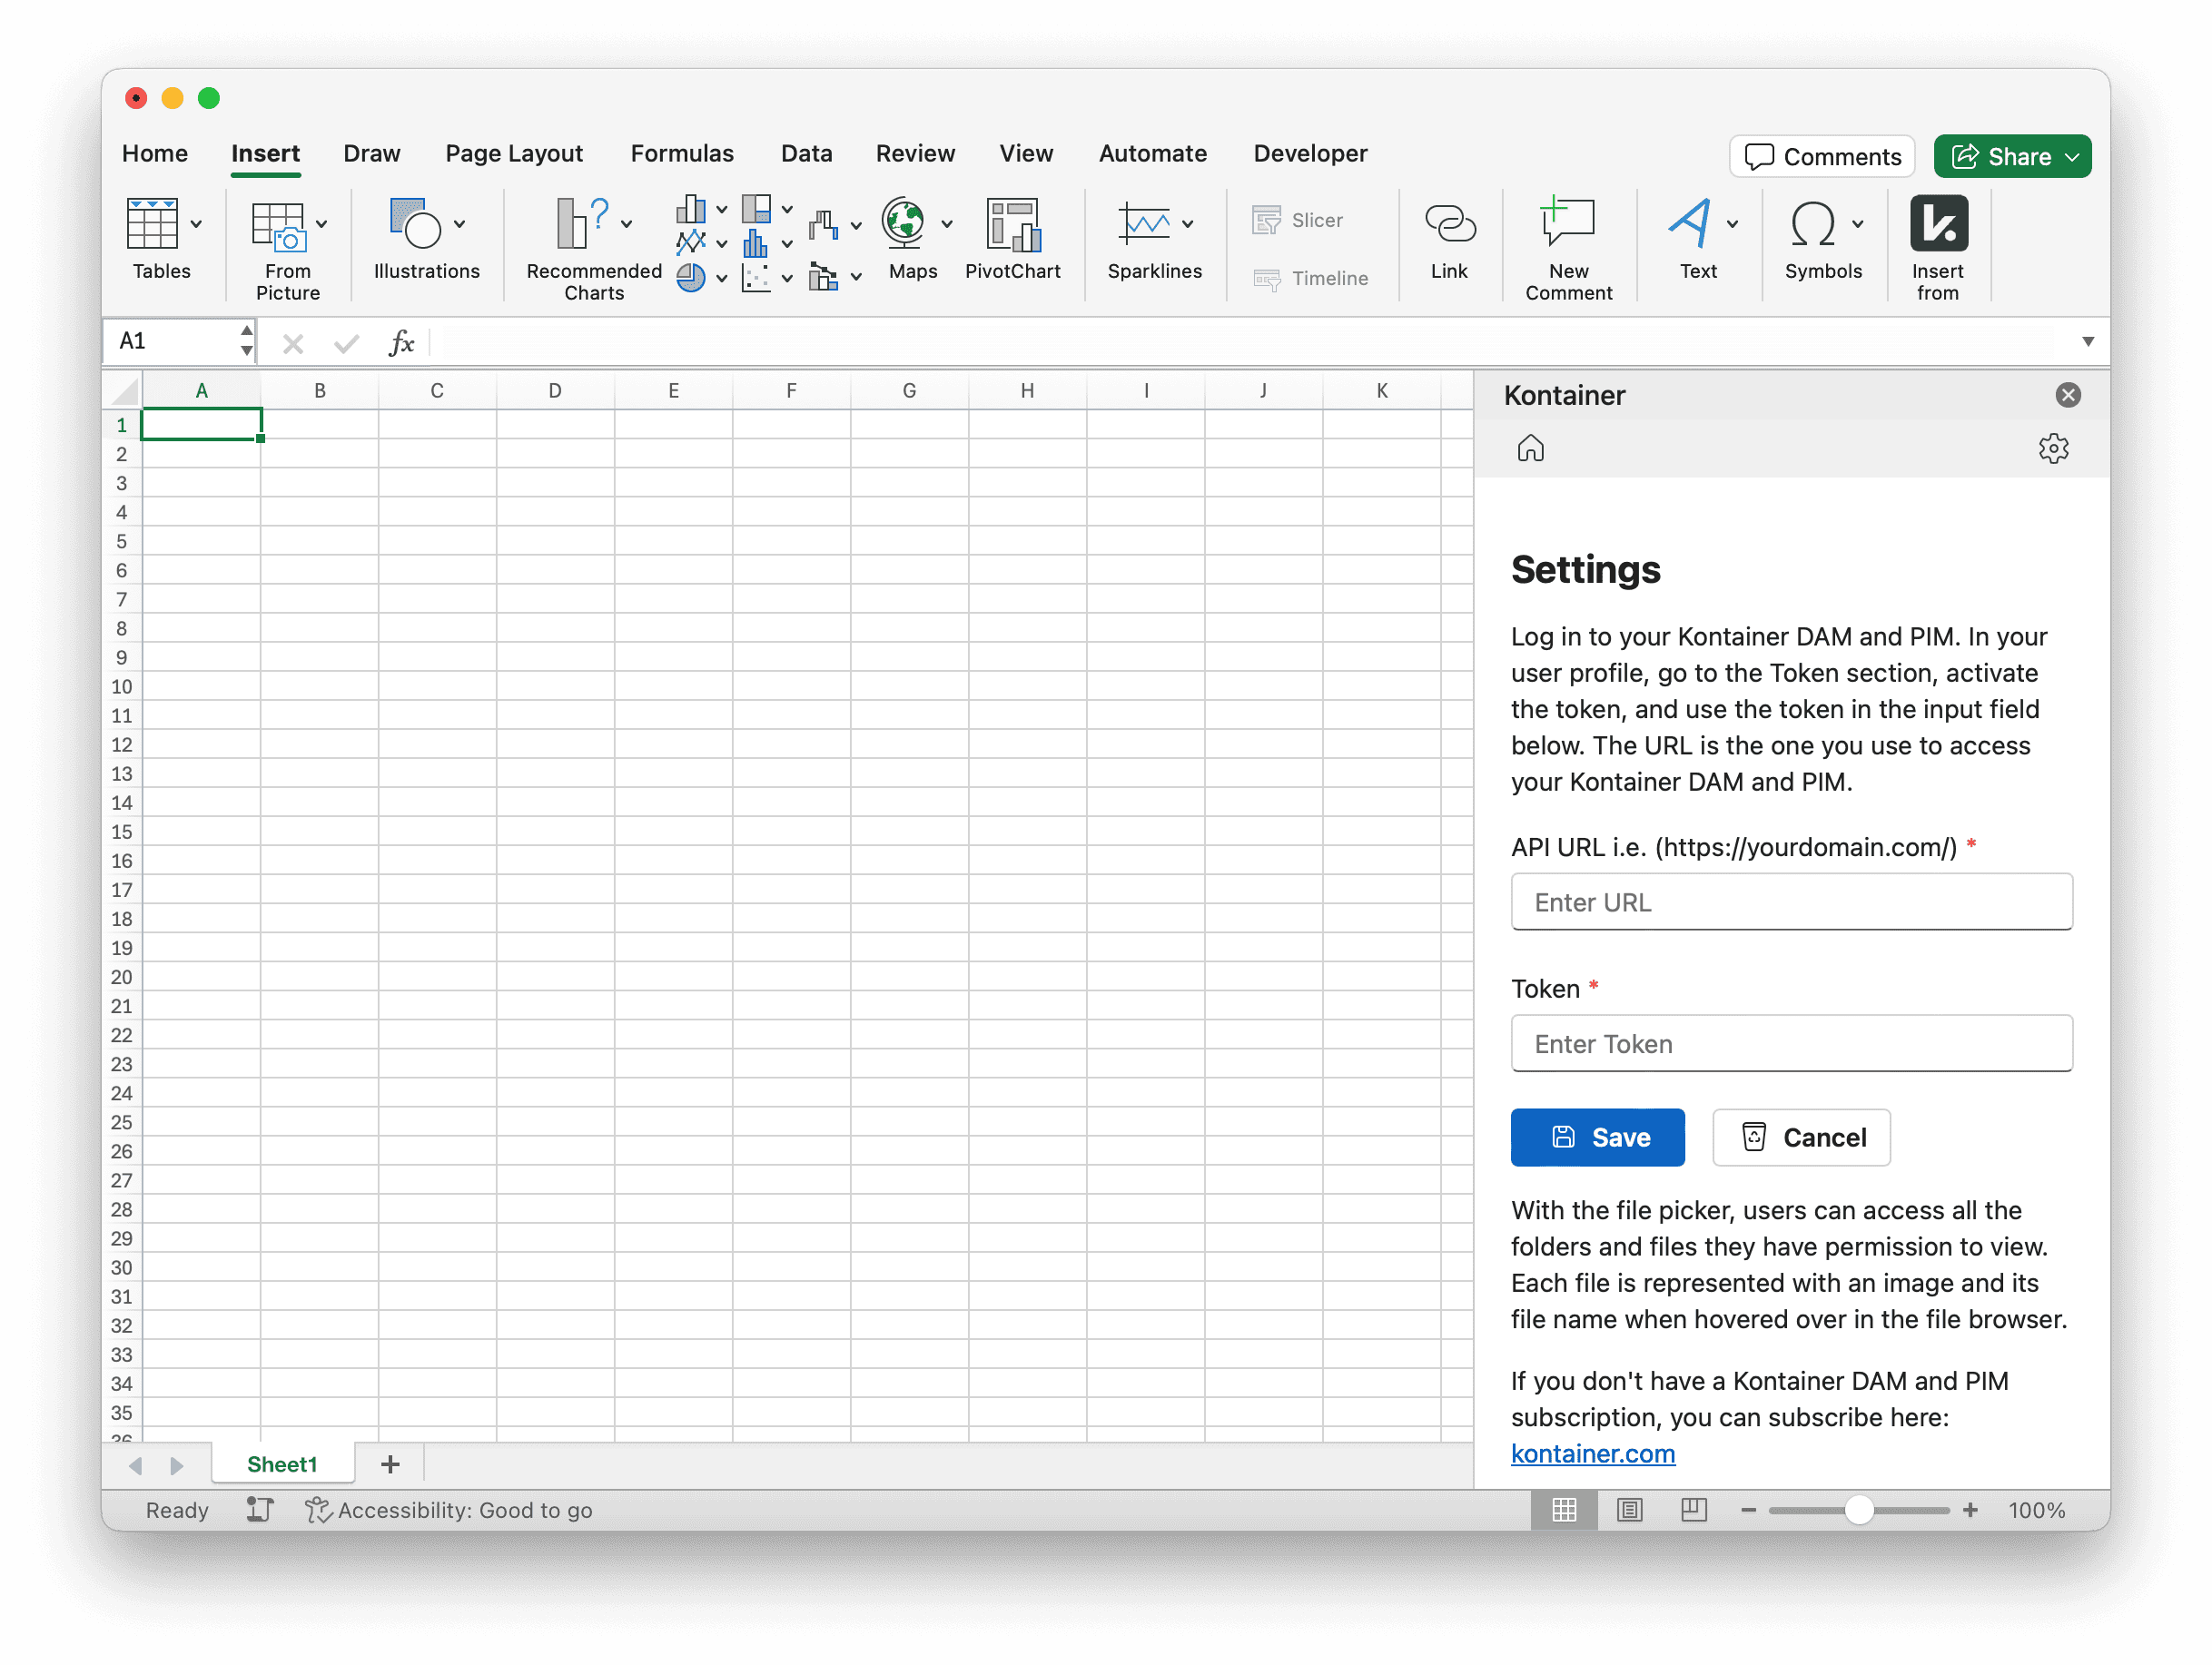
Step 2: Connect to Kontainer
Next, you’ll need to set up the connection to your Kontainer.
Click on the cog symbol under Add-ins to open the settings box, and enter your Kontainer API URL and a token.
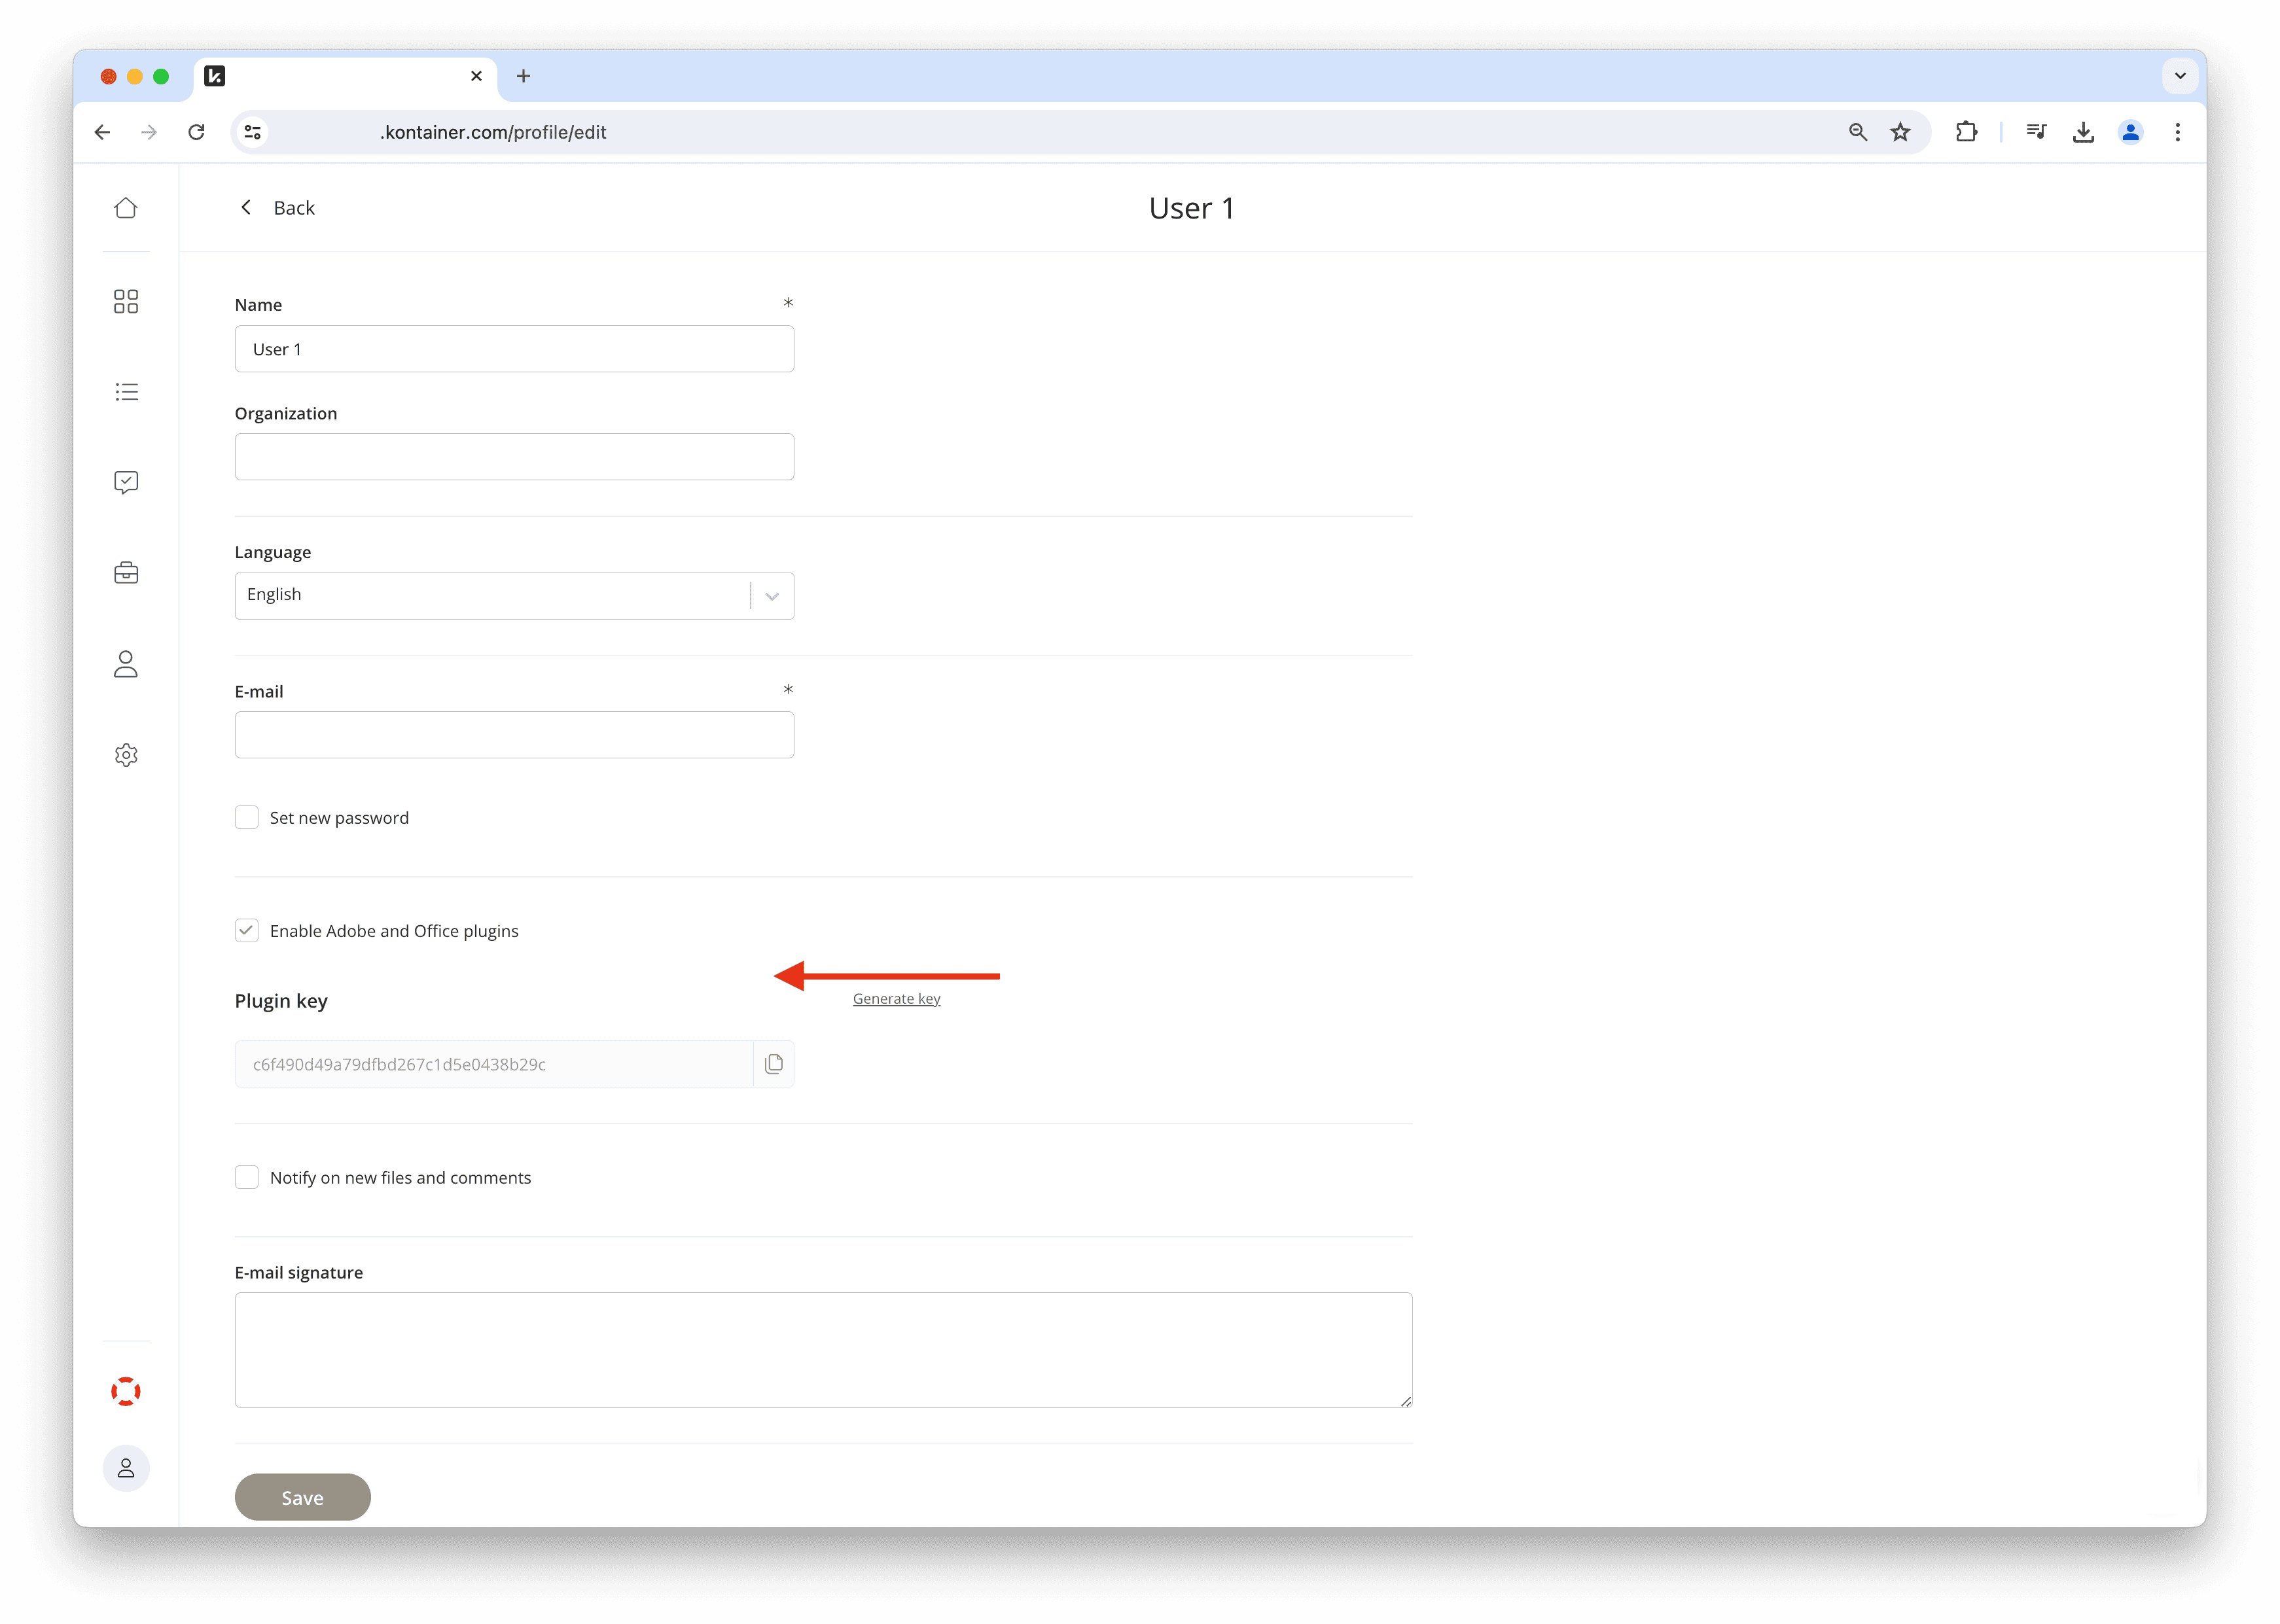
To find your token, go into your Kontainer -> Profile -> Edit profile and enable the plugin. Copy the text under the Plugin key and insert it into the allotted field in Office.
Note: Please be aware that the token needs to be activated for Adobe and Office to work. Get in touch with Customer success, if only Adobe is active on your account.
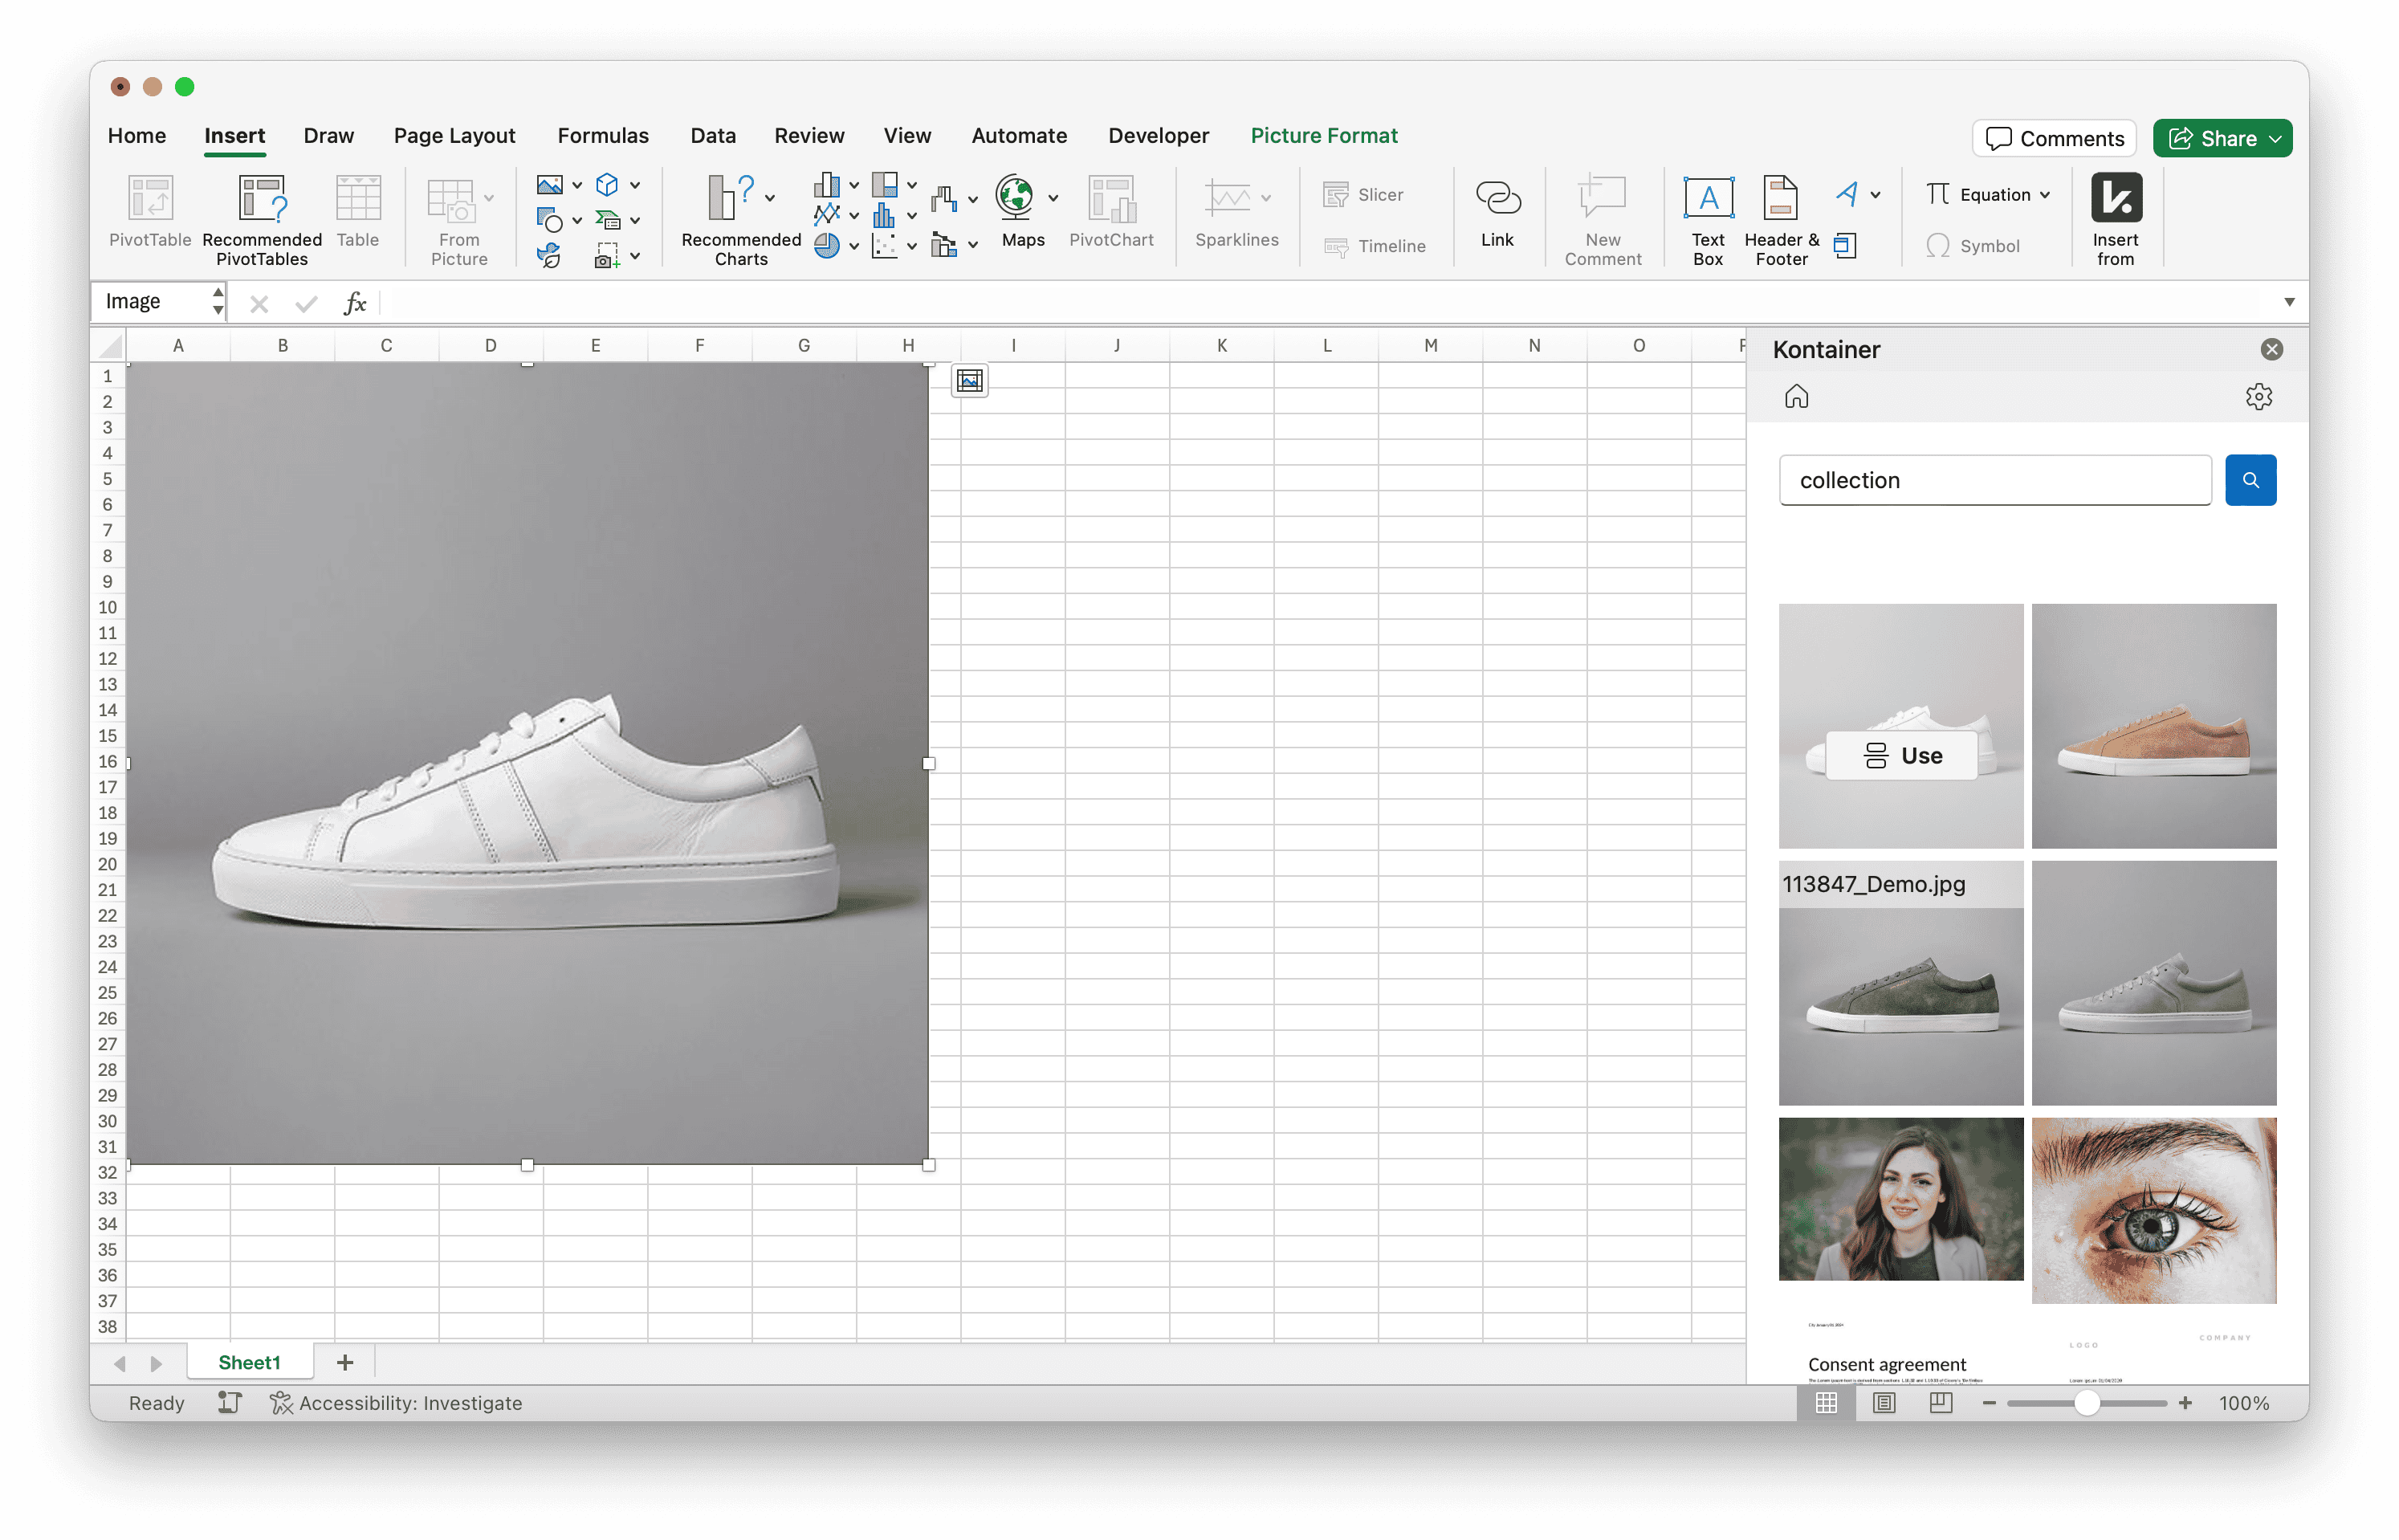
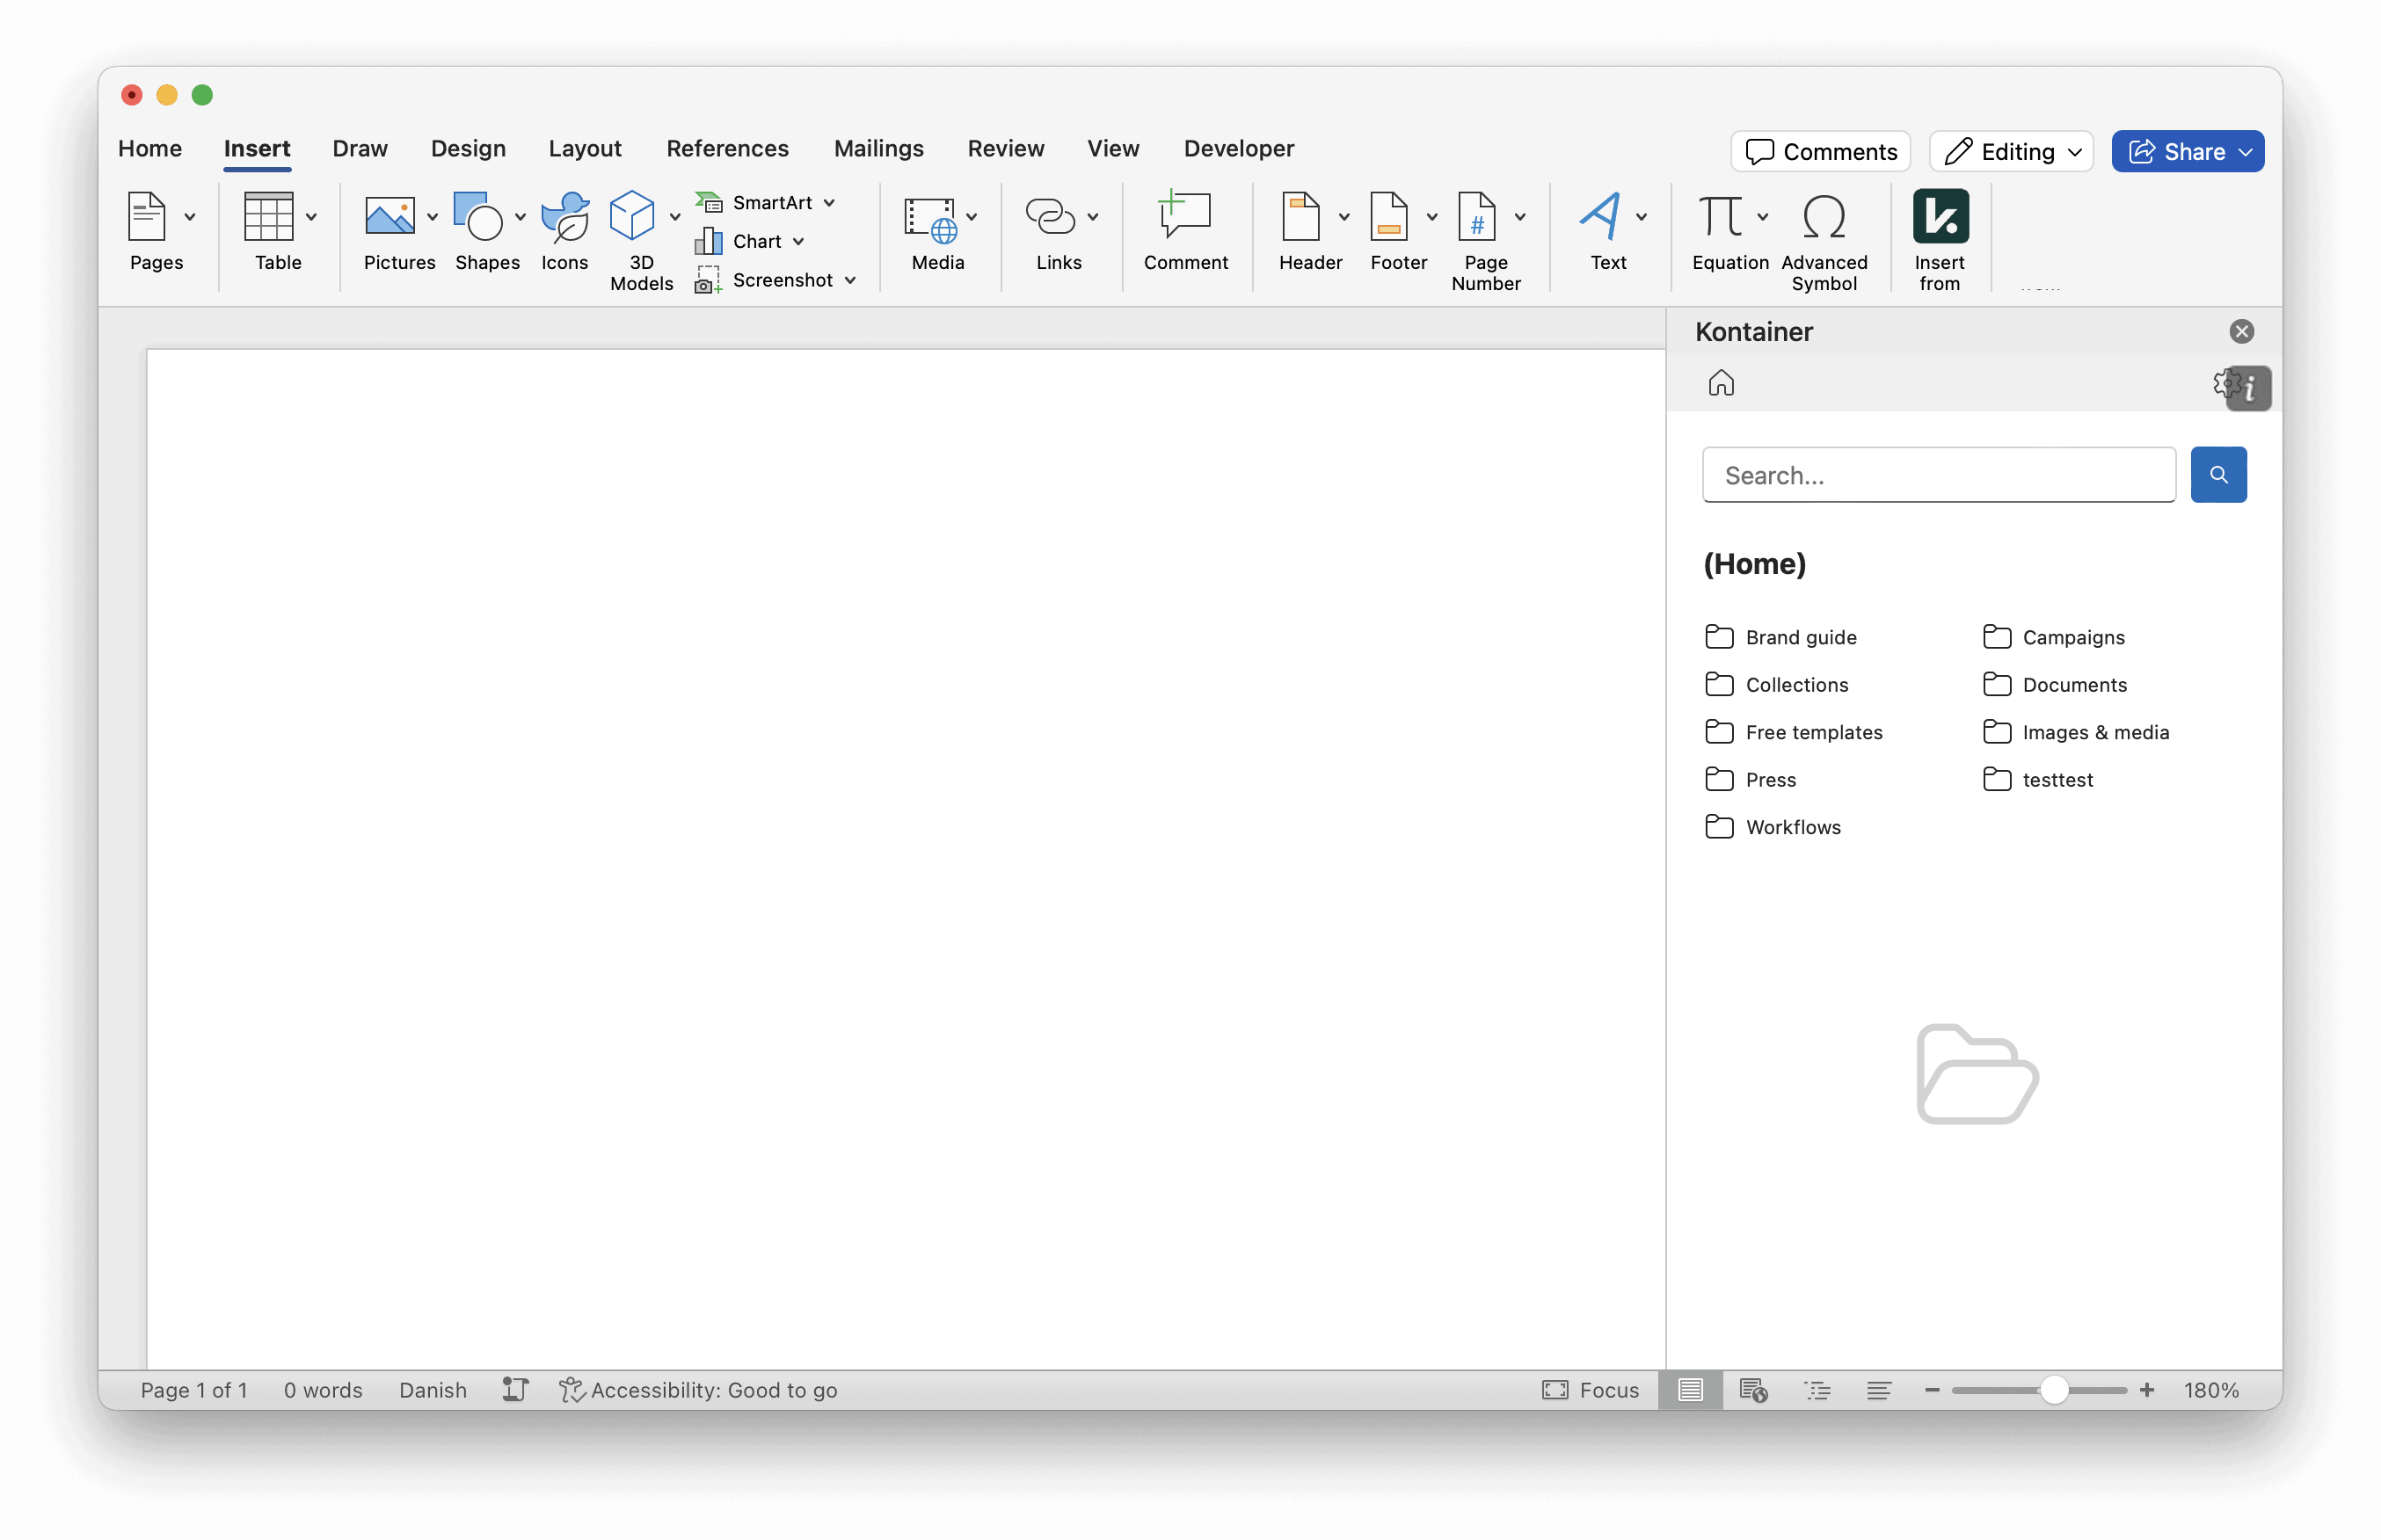
Step 3: Find and insert images
You can now insert images, videos, and more directly from your Kontainer into your documents, either by searching or browsing through your various folders.
Add for the whole organization in Office 365
If you are unable to add it yourself, your IT department might have to add it to the Office 365 admin panel.
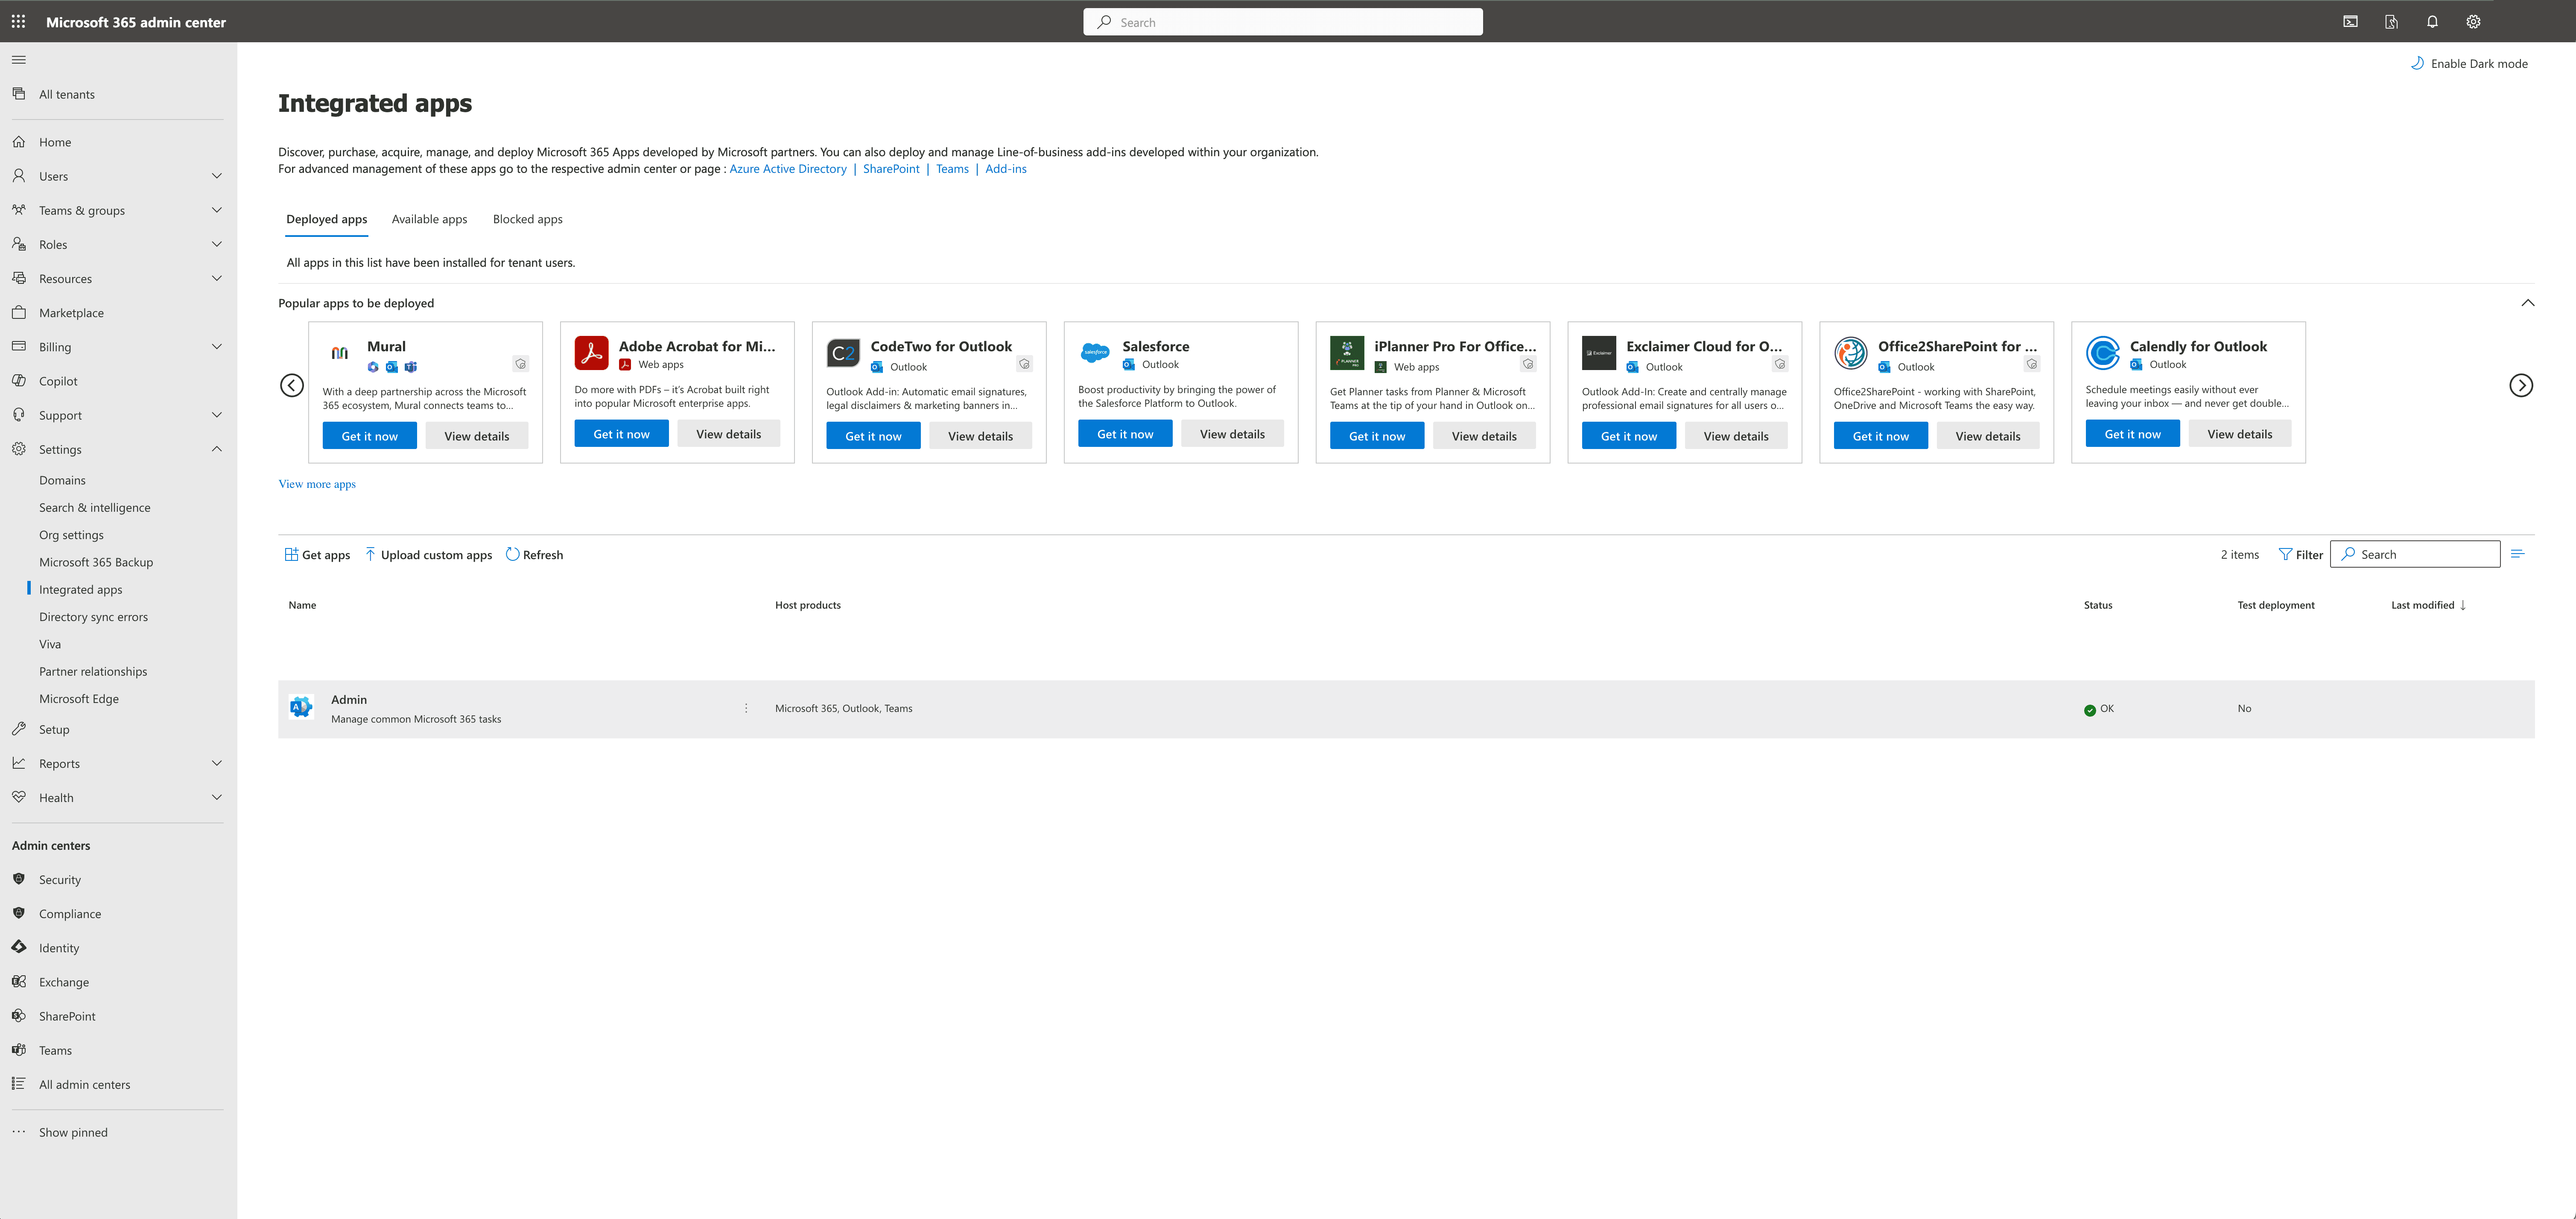
Step 1: Open Microsoft 365 admin center
Open your browser's Microsoft 365 admin center, and go to Settings and Integrated Apps.
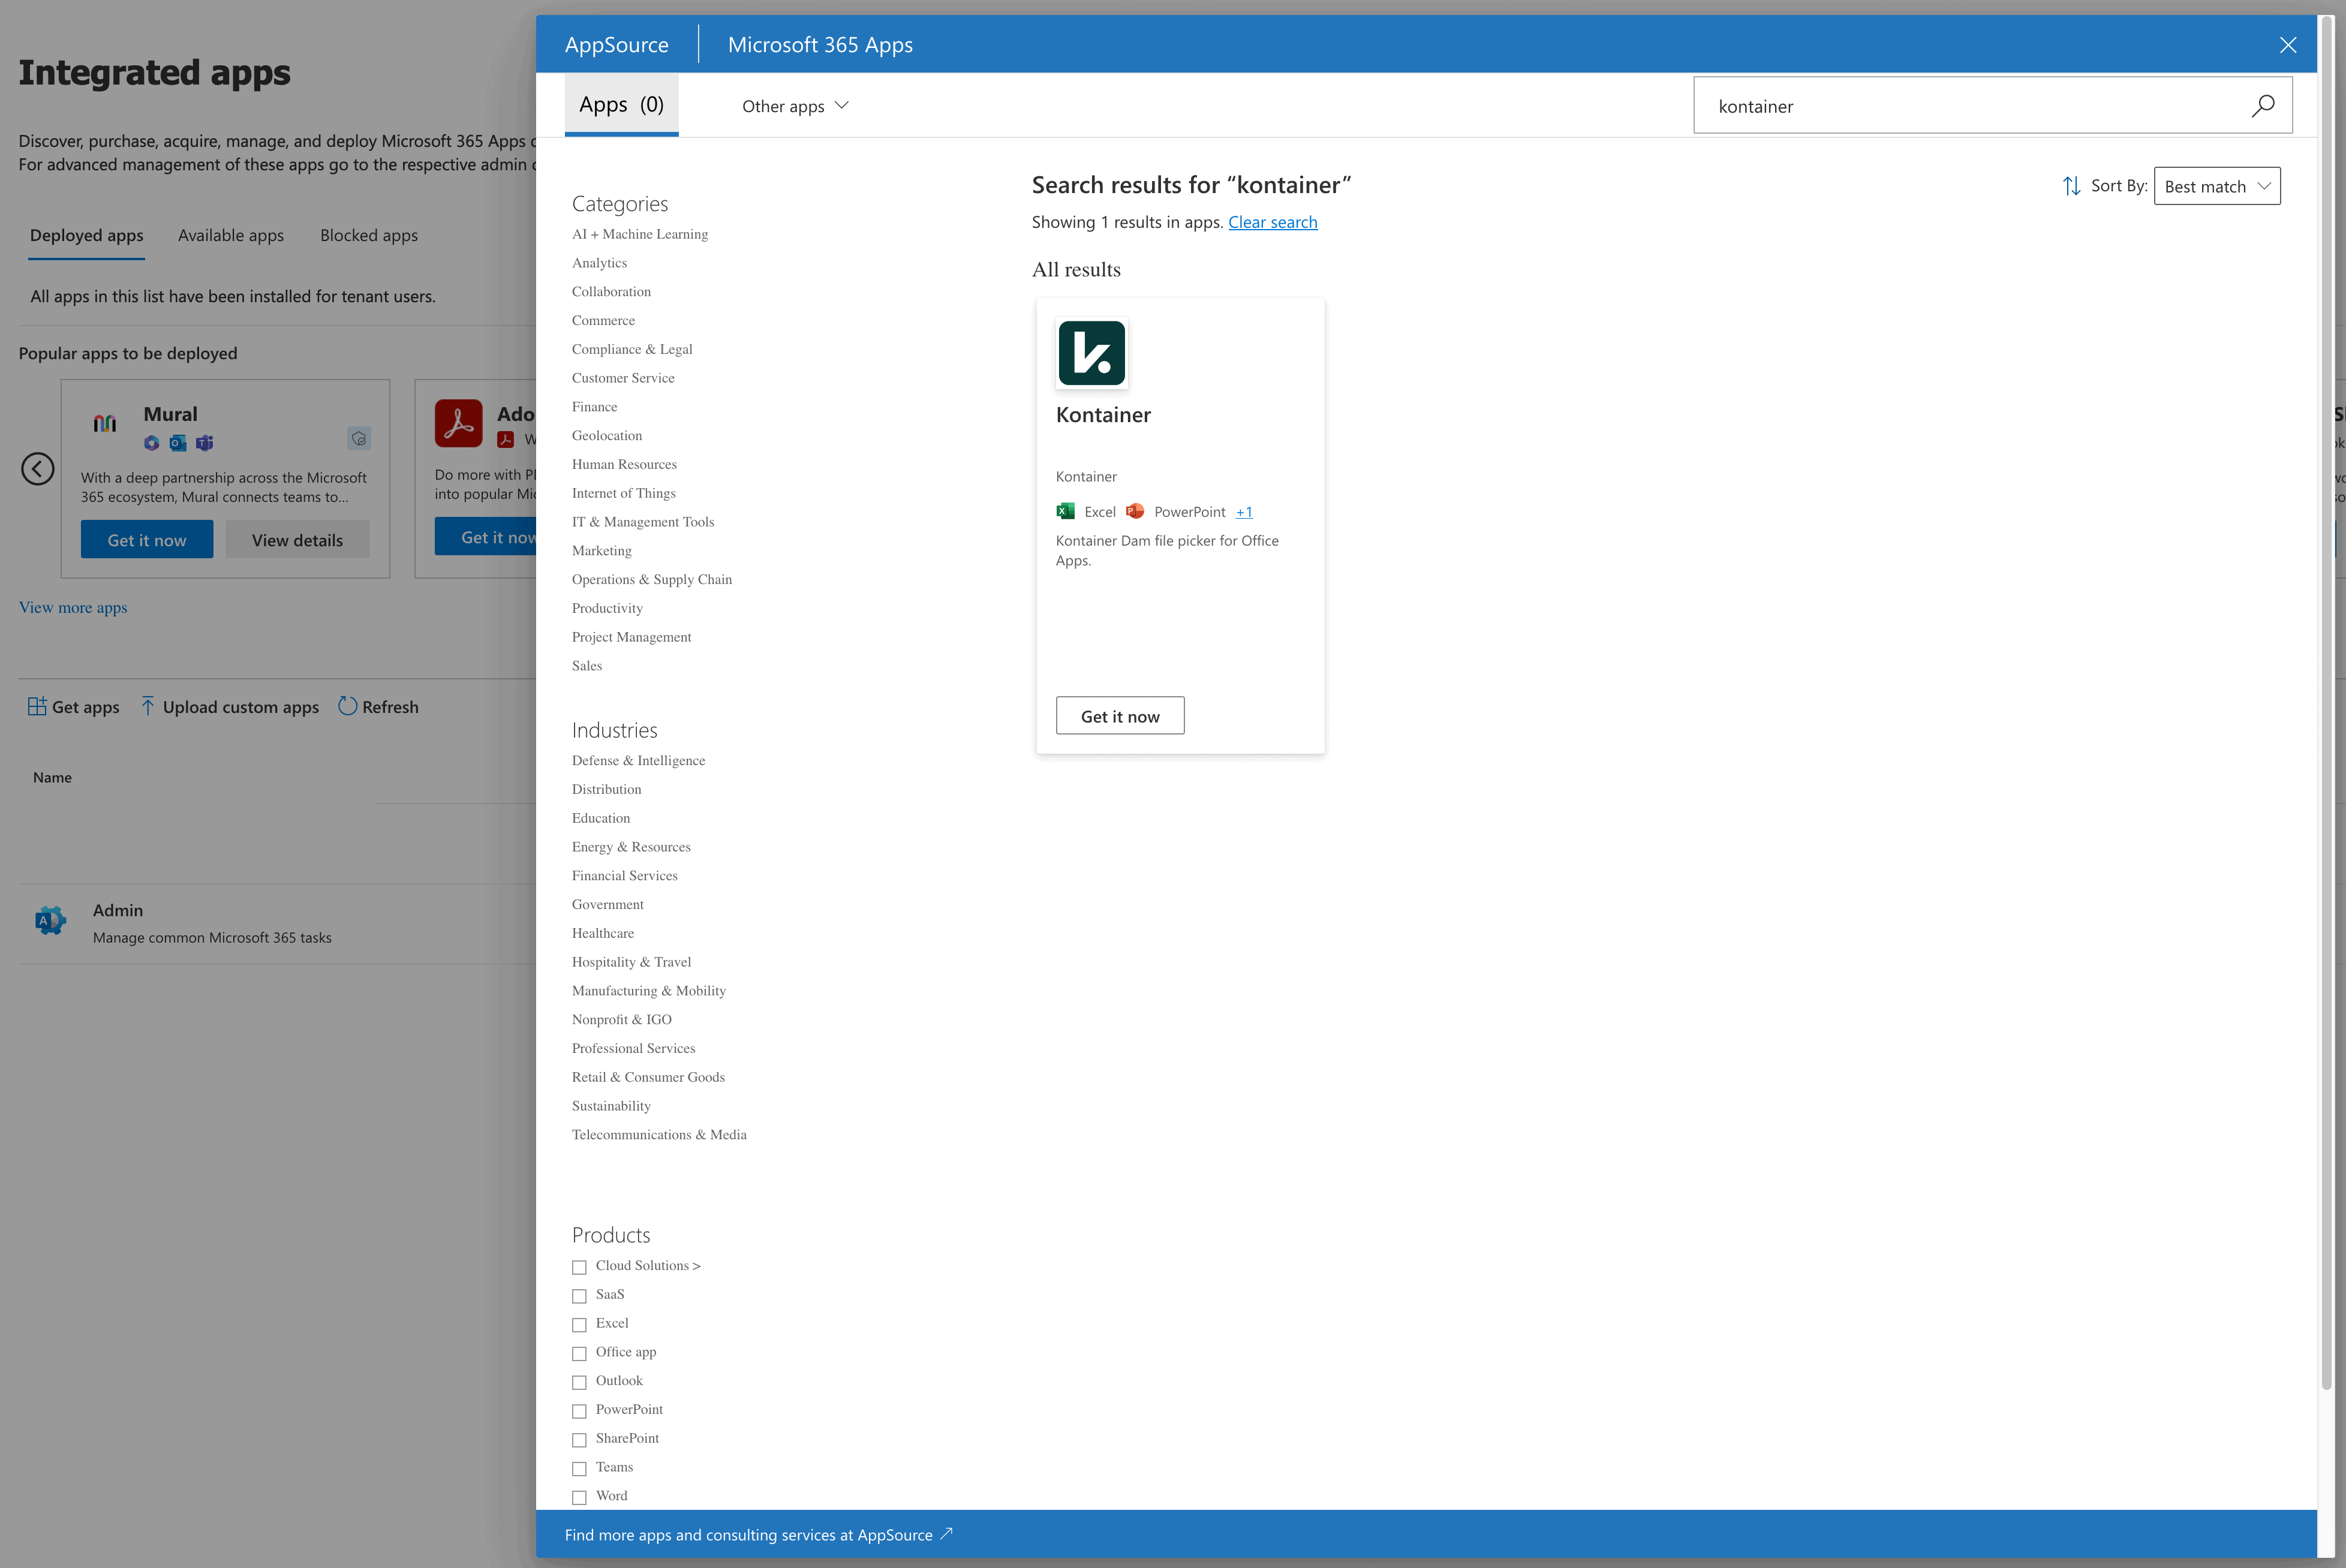
Step 2: Find and add the Kontainer app
Use the top search field to search for Kontainer, and click Get it now.
The Add-in will now be installed for everyone in the organization, added to Microsoft 365
Visit our 365 integration page for more information about the plugin. Or the pages for the individual 365 apps: Word, Excel and PowerPoint.
If you have any questions, please contact our customer support team via email.