You can set up users in Kontainer via SSO to create a secure and seamless experience for your internal users.
We have a standard setup for Microsoft Entra ID, ADFS and Google. Get in touch for other setups.
We create a ‘’Trust’’ between your Active Directory groups (managed by your IT) and Kontainer. This means the user will automatically be created and assigned to predetermined groups when they log in the first time.
Like any other group in Kontainer, you can always change and manage access settings.
You can also assign extra rights to individual users that are added to the basic permissions, they inherit from their group membership.
To keep your user list manageable, you can determine rules that will deactivate or delete users that have not been logged in for a certain amount of time – like 2, 4 or 6 months. If a user logs in again after being auto-deleted, their user is simply reactivated.
Alongside SSO users, you can add other users and groups manually.
Go to the Kontainer integration page to find out more about the use cases, benefits, etc.
The SSO includes, among others, Azure/Entra ID, Okta SSO, and Google SSO.
In the following, we will walk you through the setup of a Microsoft Entra ID SSO connection to Kontainer:
Azure/Entra ID App Registration
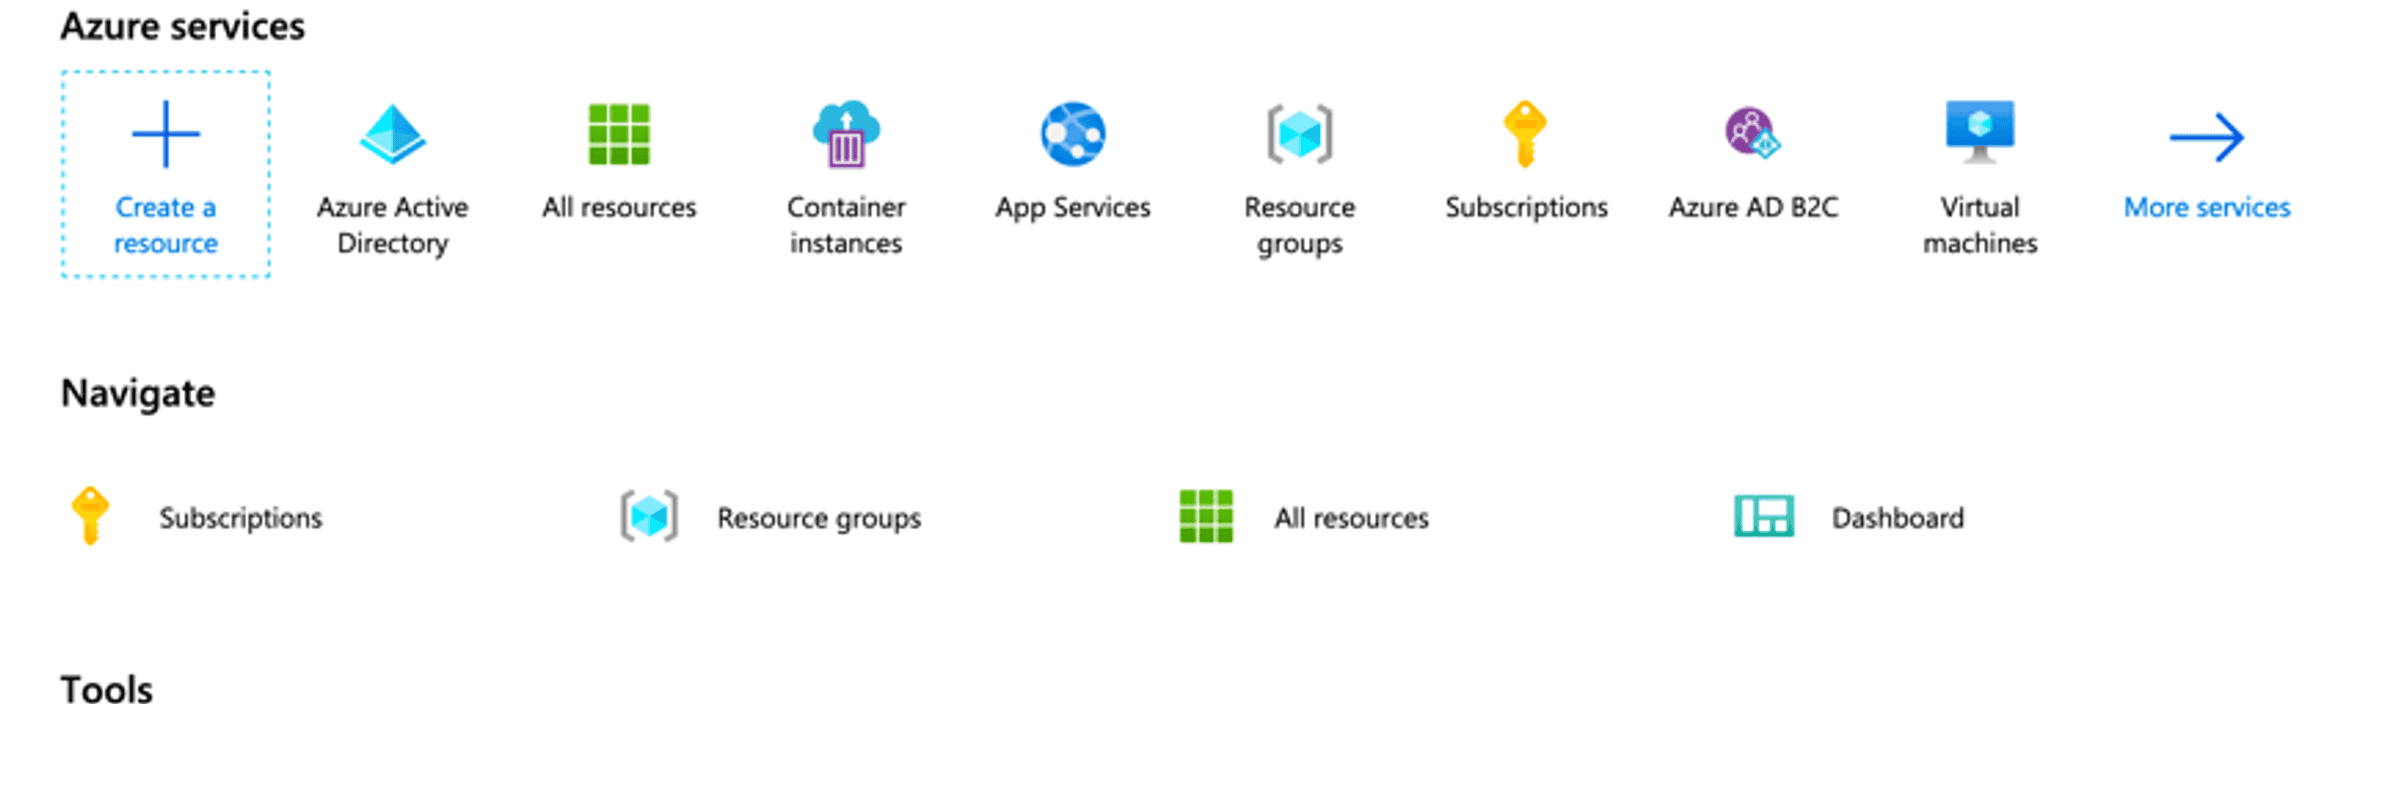
Step 1: Create a resource
On Entra ID services home click ”Entra ID Active Directory”
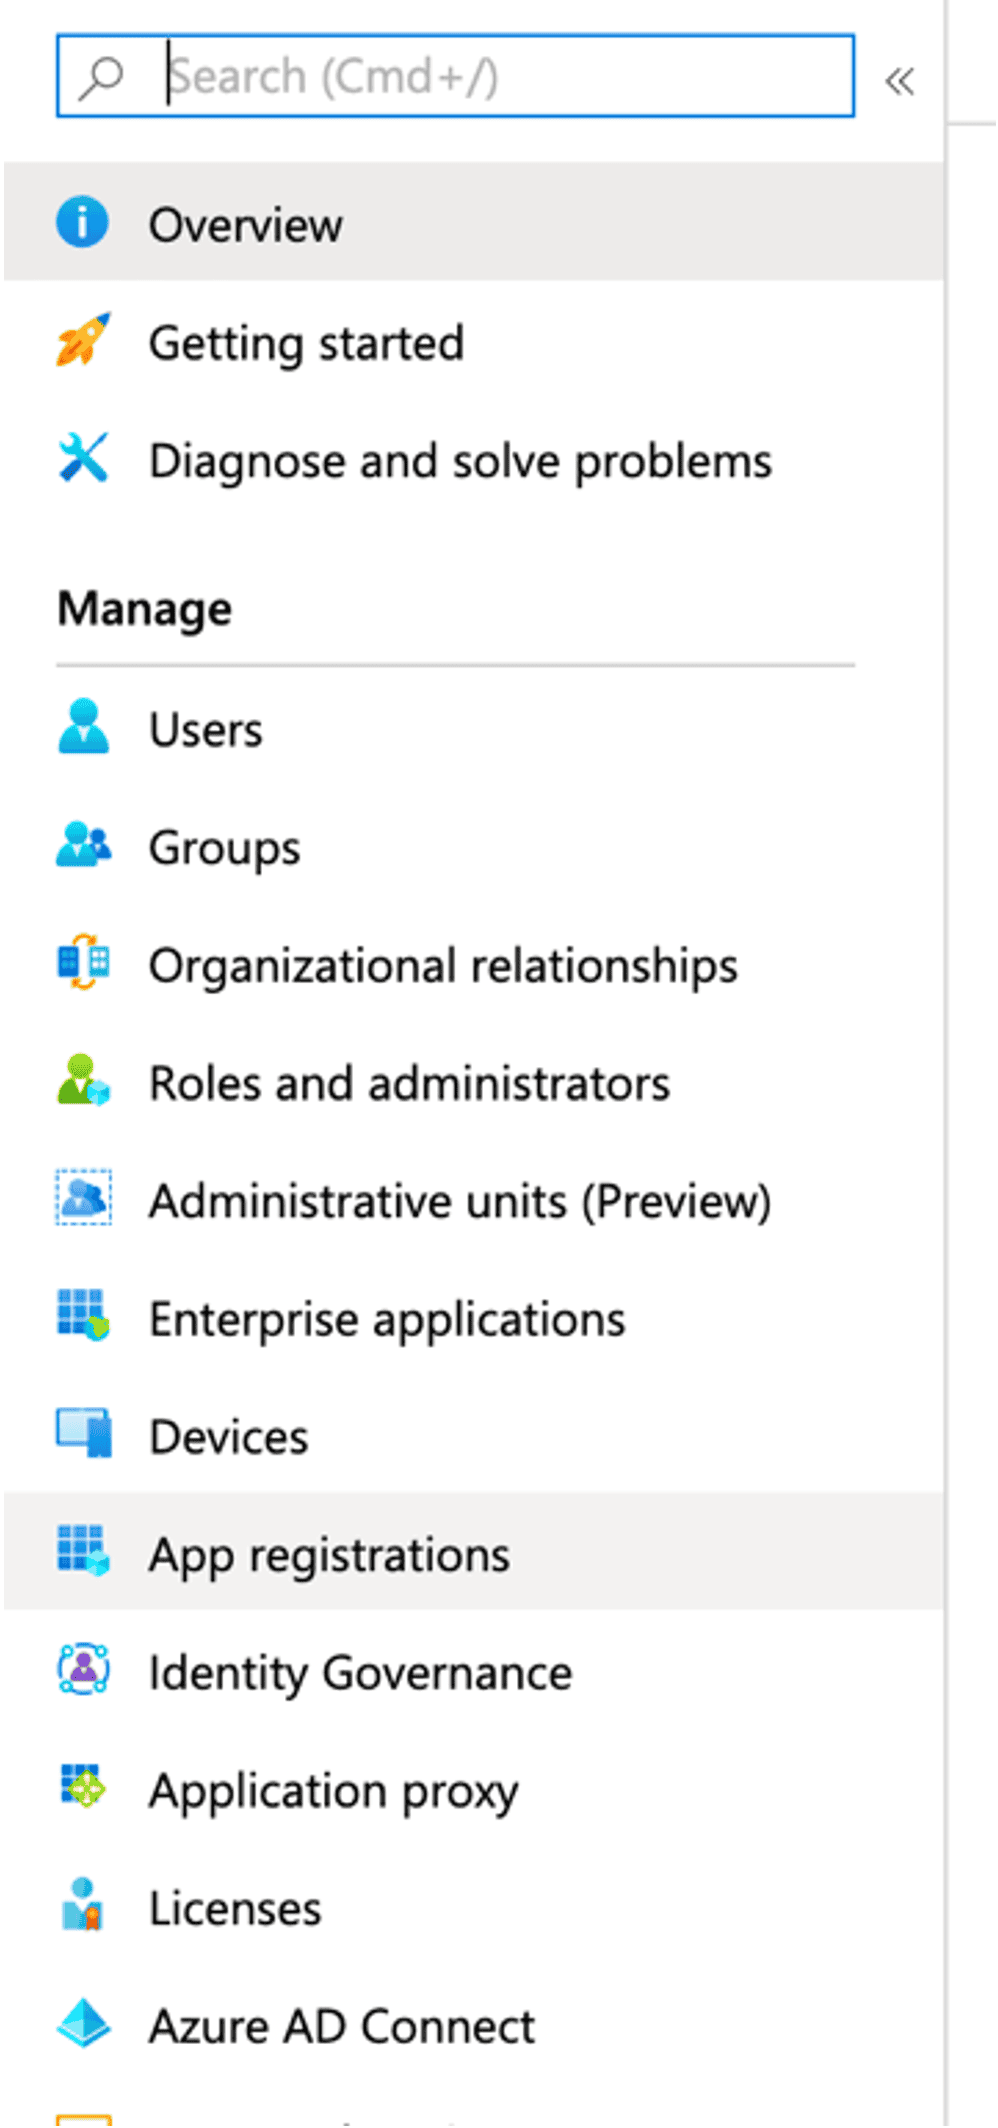
Step 2: Register app
In the right menu, click ”App registrations”
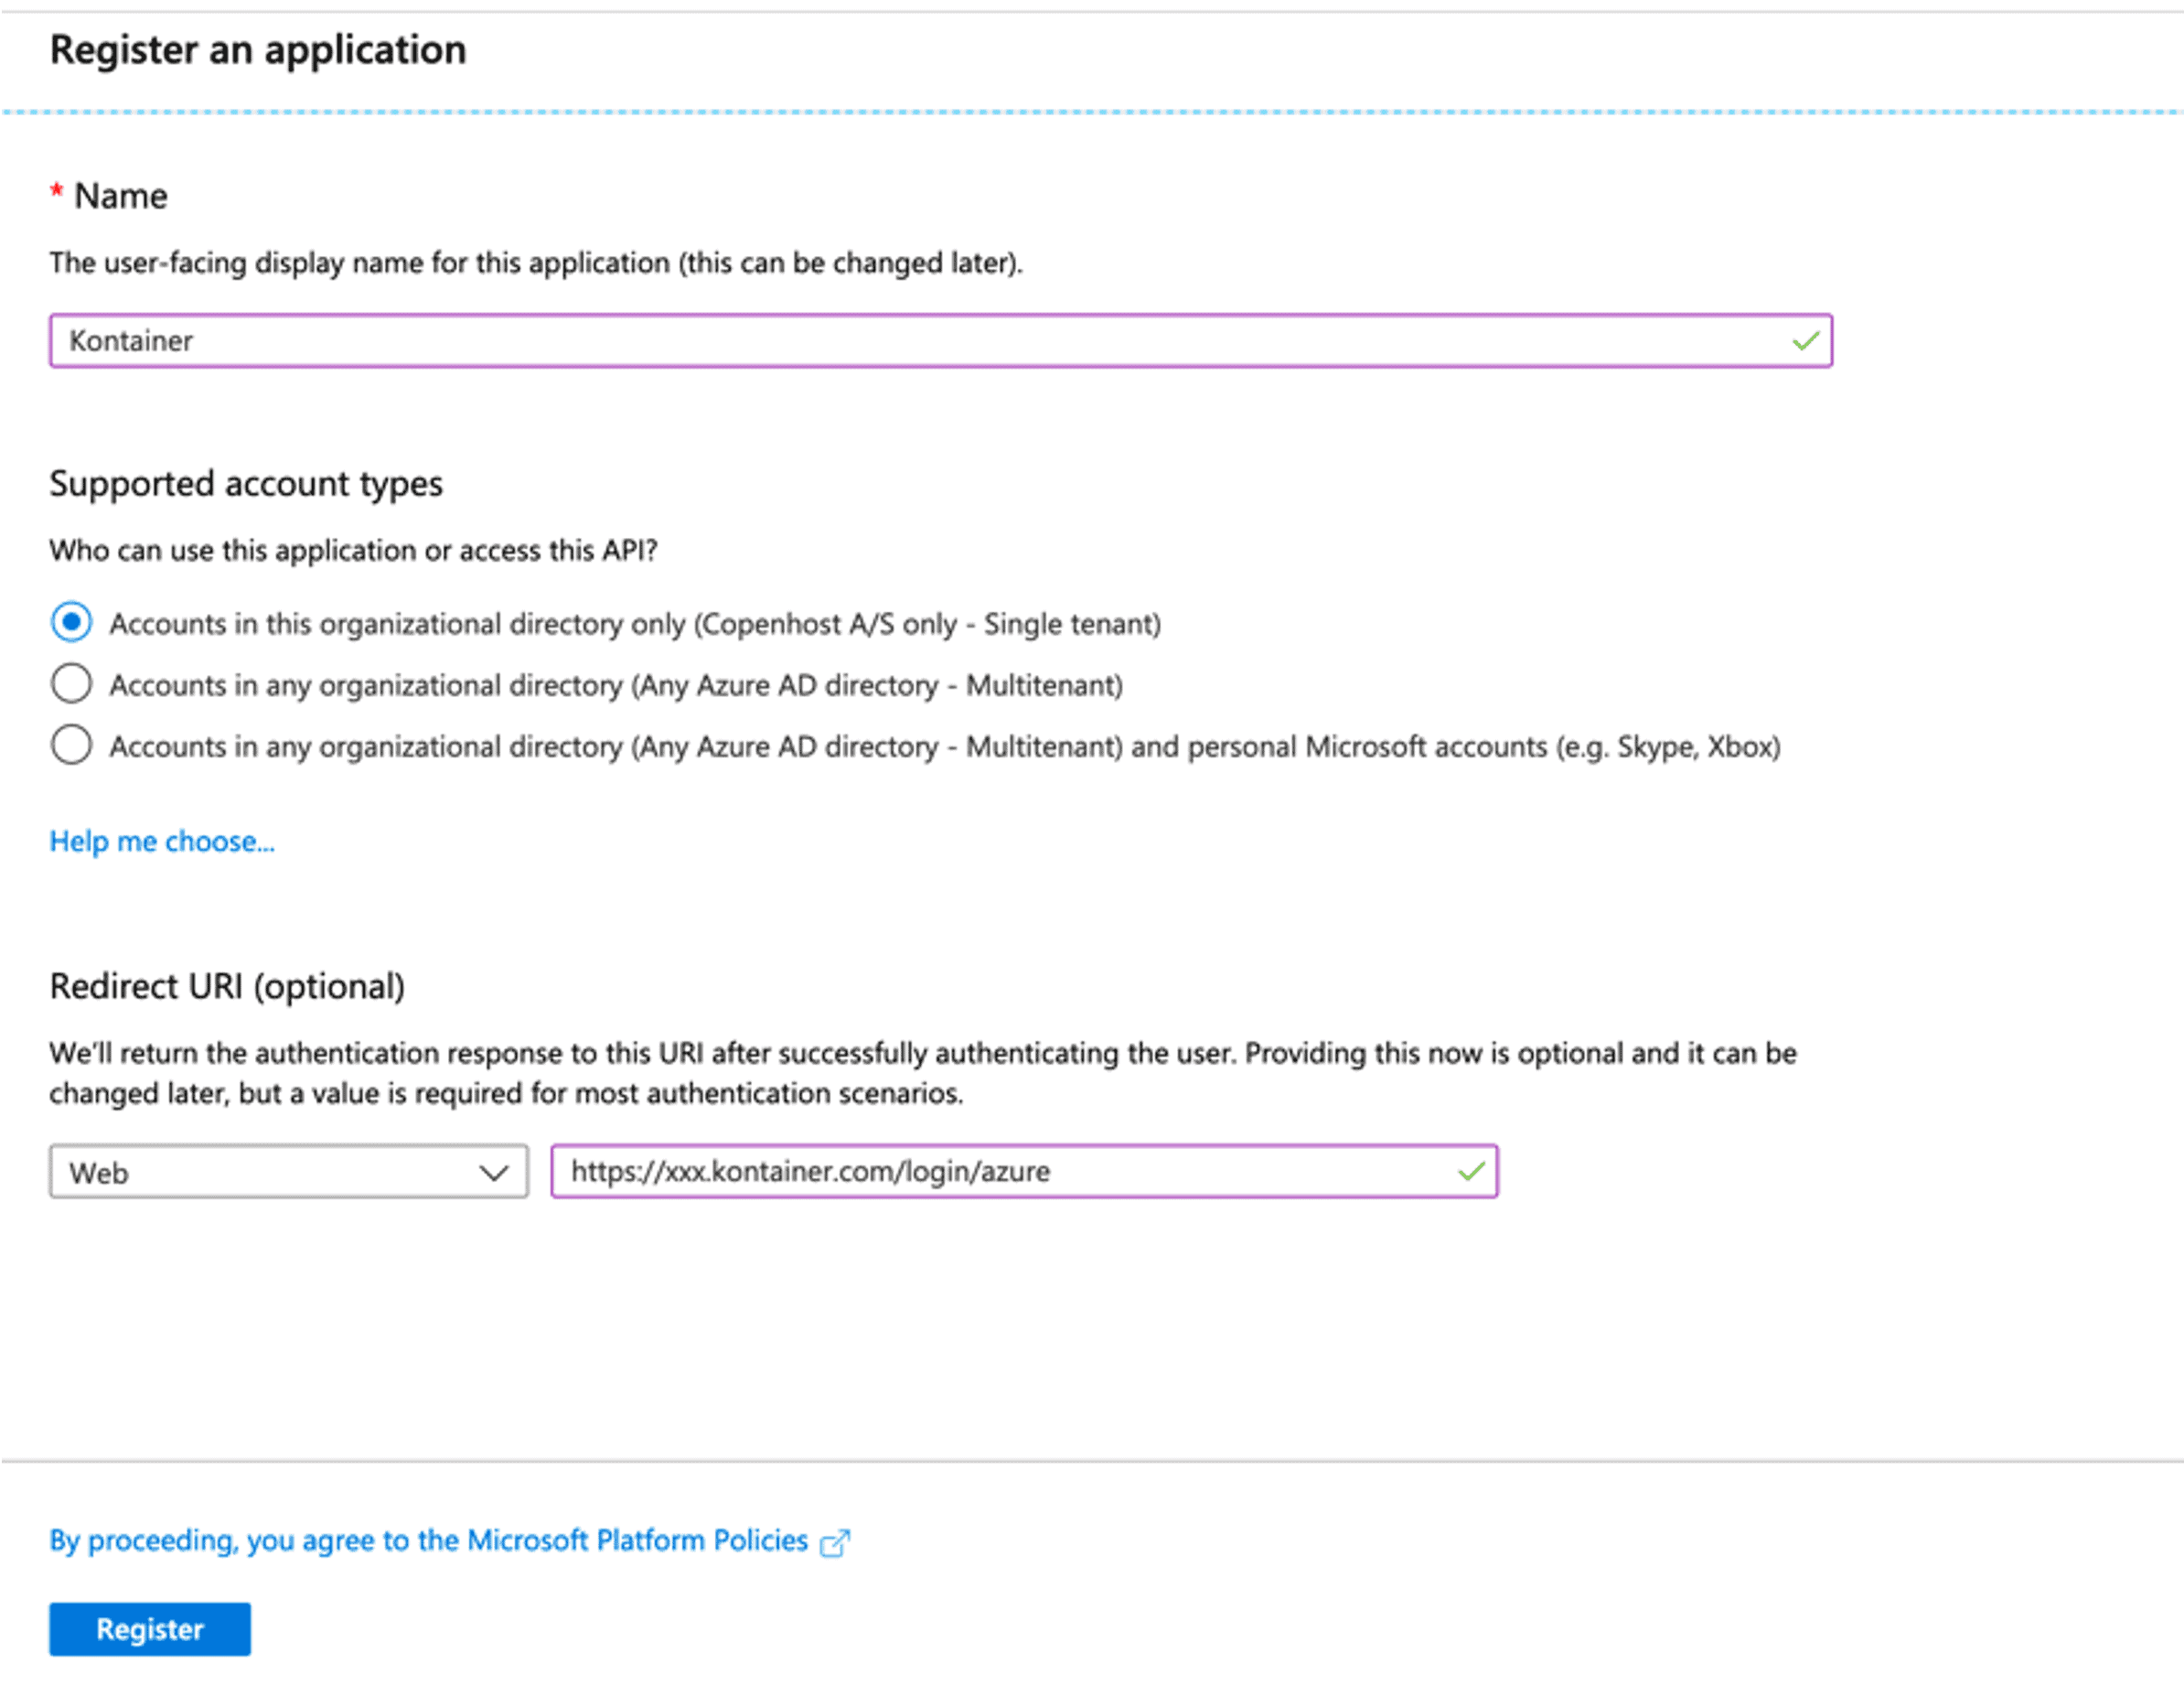
New Registration
At the top, click “New registration”

Fill in the details
- Name: Kontainer
- Redirect URI: https://xxx.kontainer.com/login/entraid (replacing xxx with Kontainer client id)
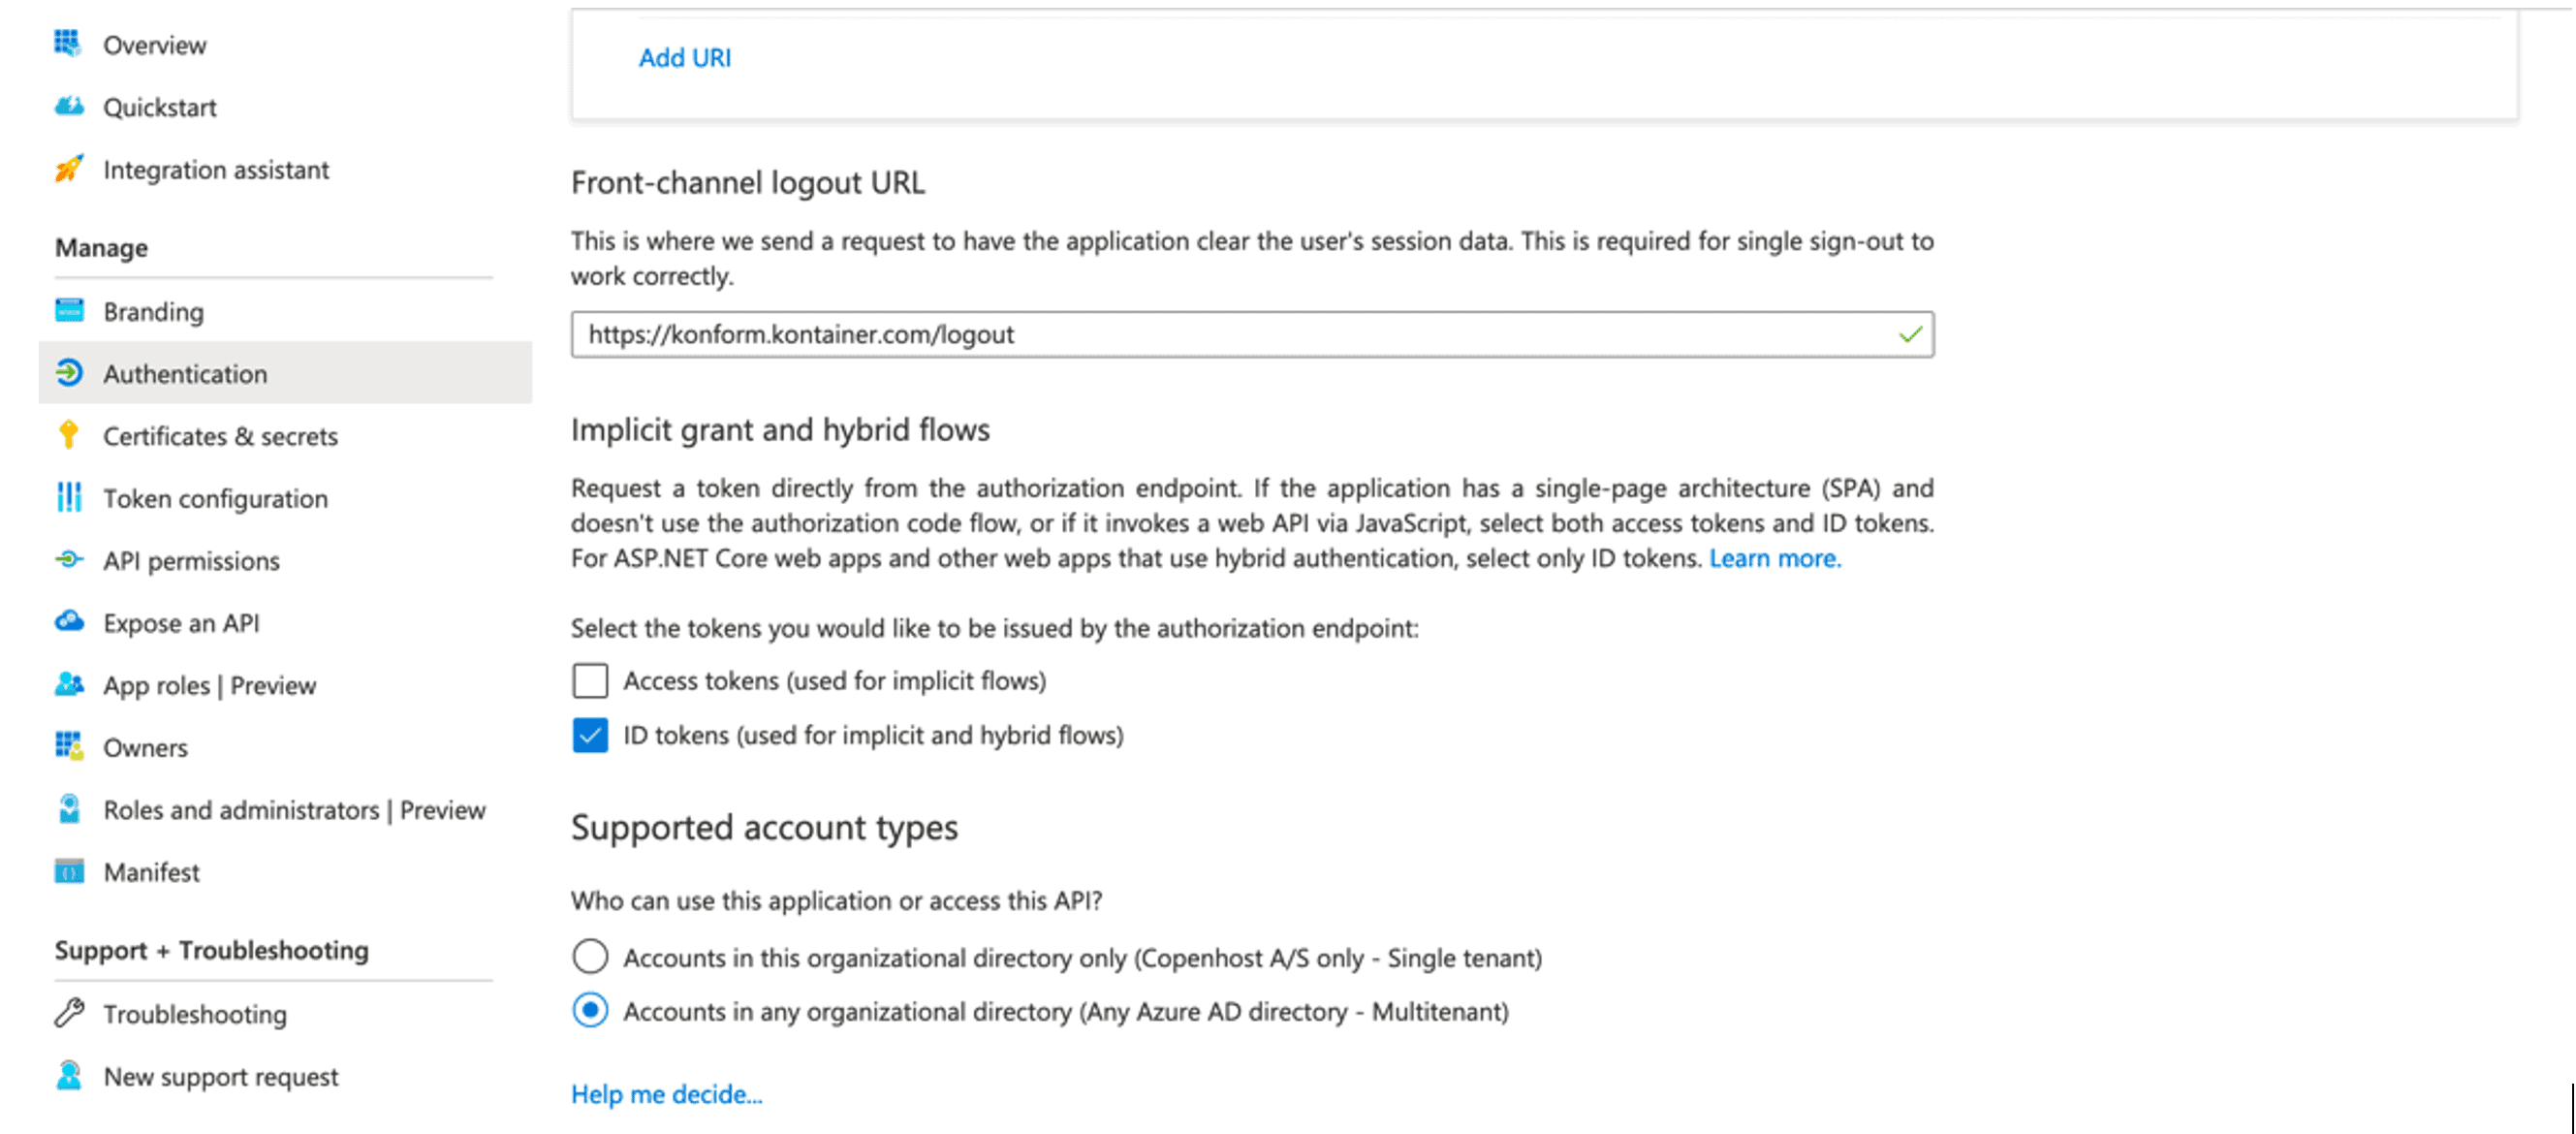
Step 3: Authenticate
Click “Authentication” and fill in details:
- Logout URL: https://xxx.kontainer.com/logout
Check the boxes
- “ID tokens”
- “Multitenant”
Click “Save”
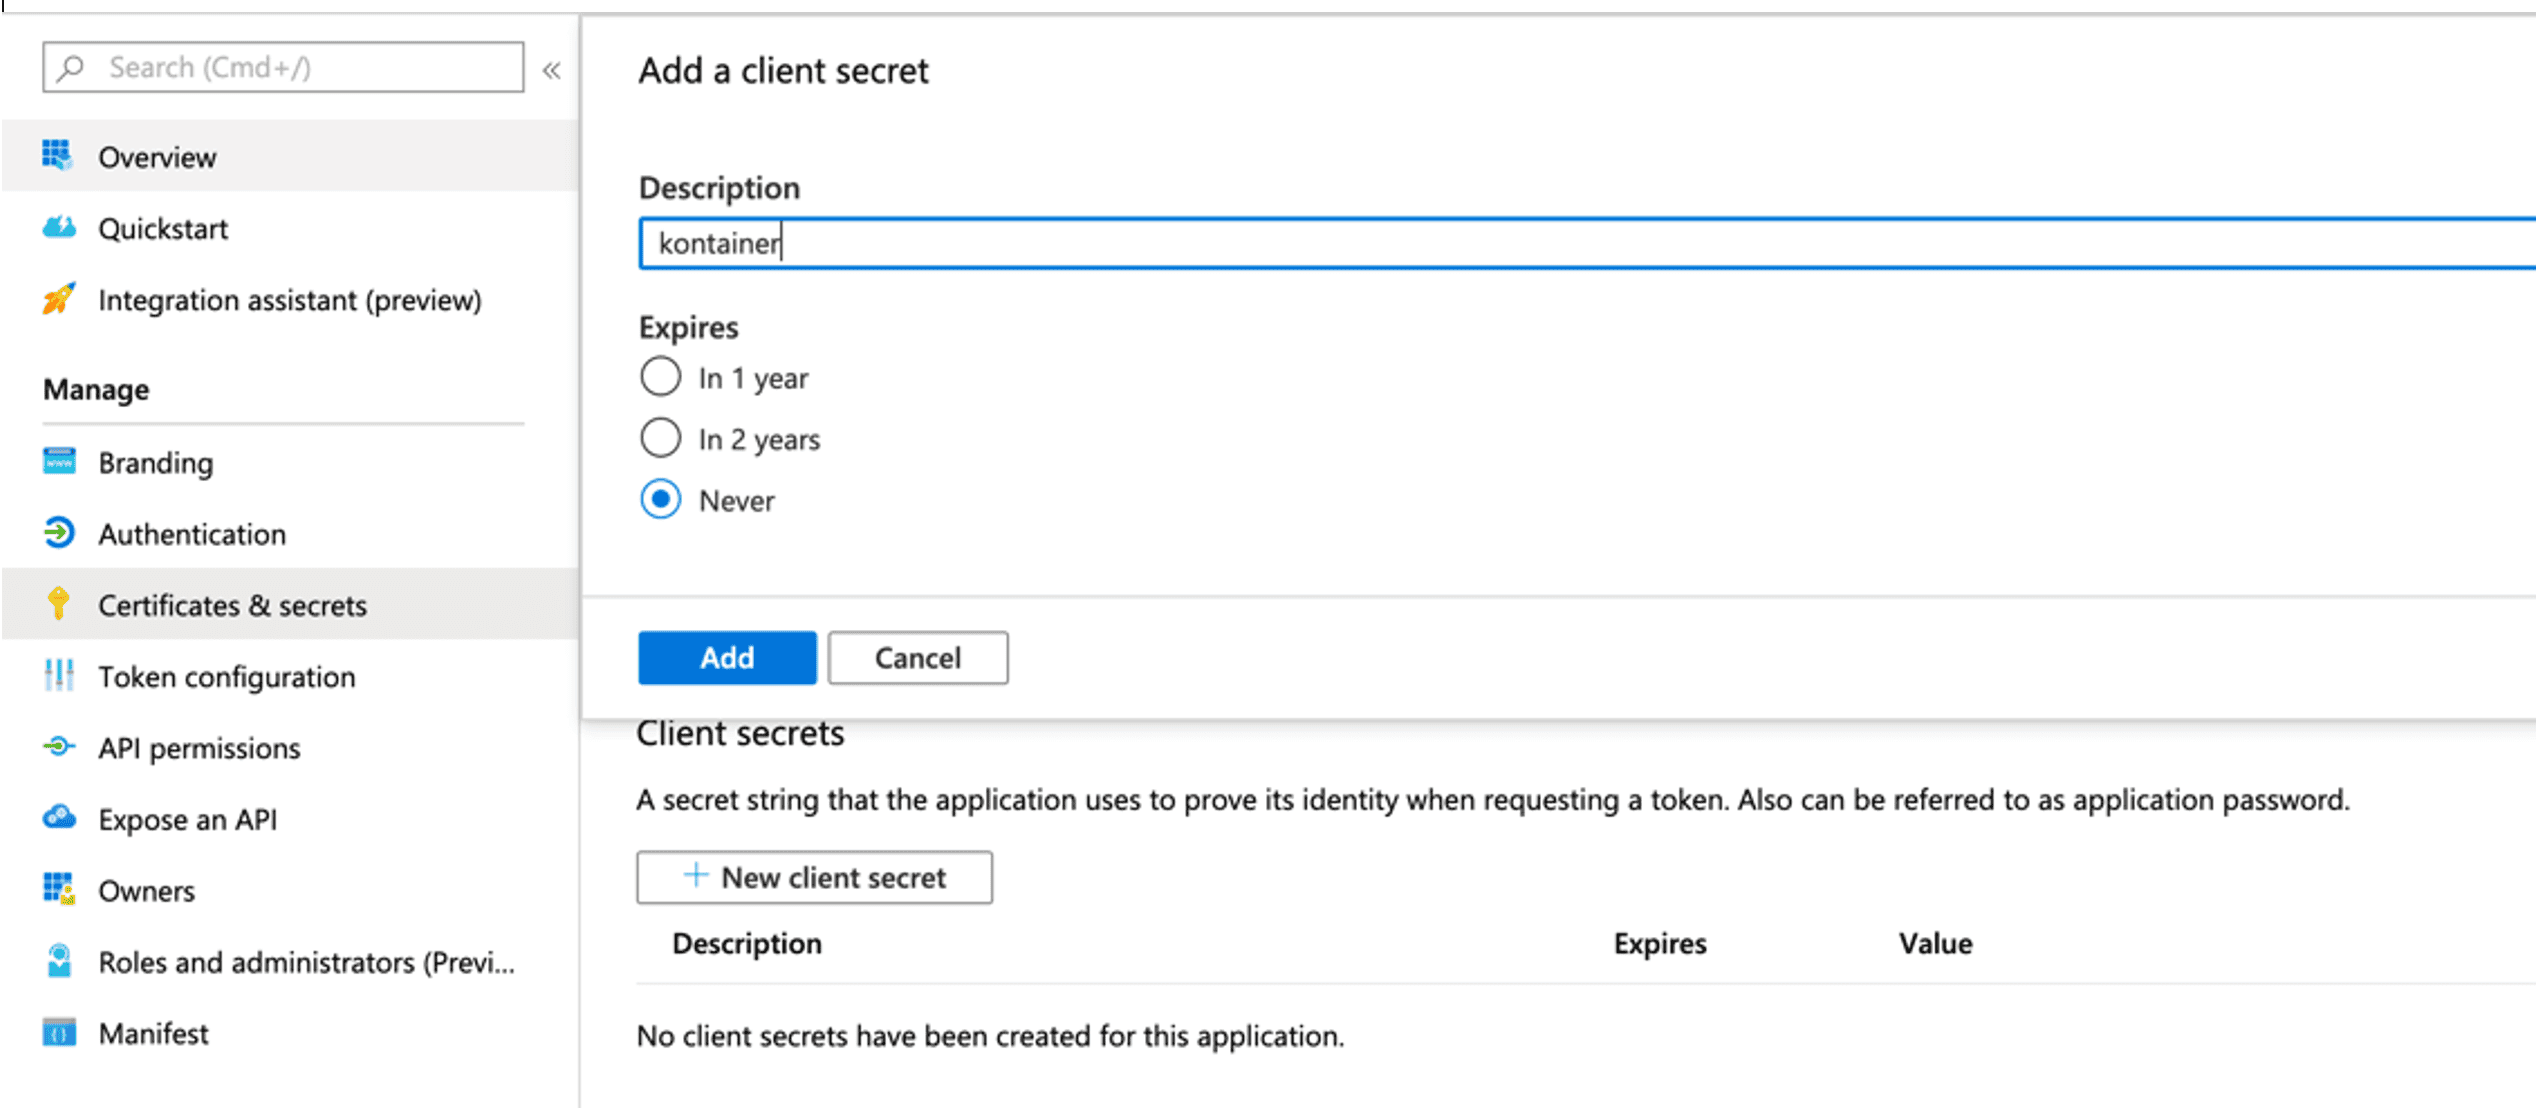
Step 4: Certificate and secret
Click “Certificates and secrets” and then “New client secret”.
Fill in:
- Description: Kontainer
Set "Expires" to “Never”
NOTE: Write down secret.
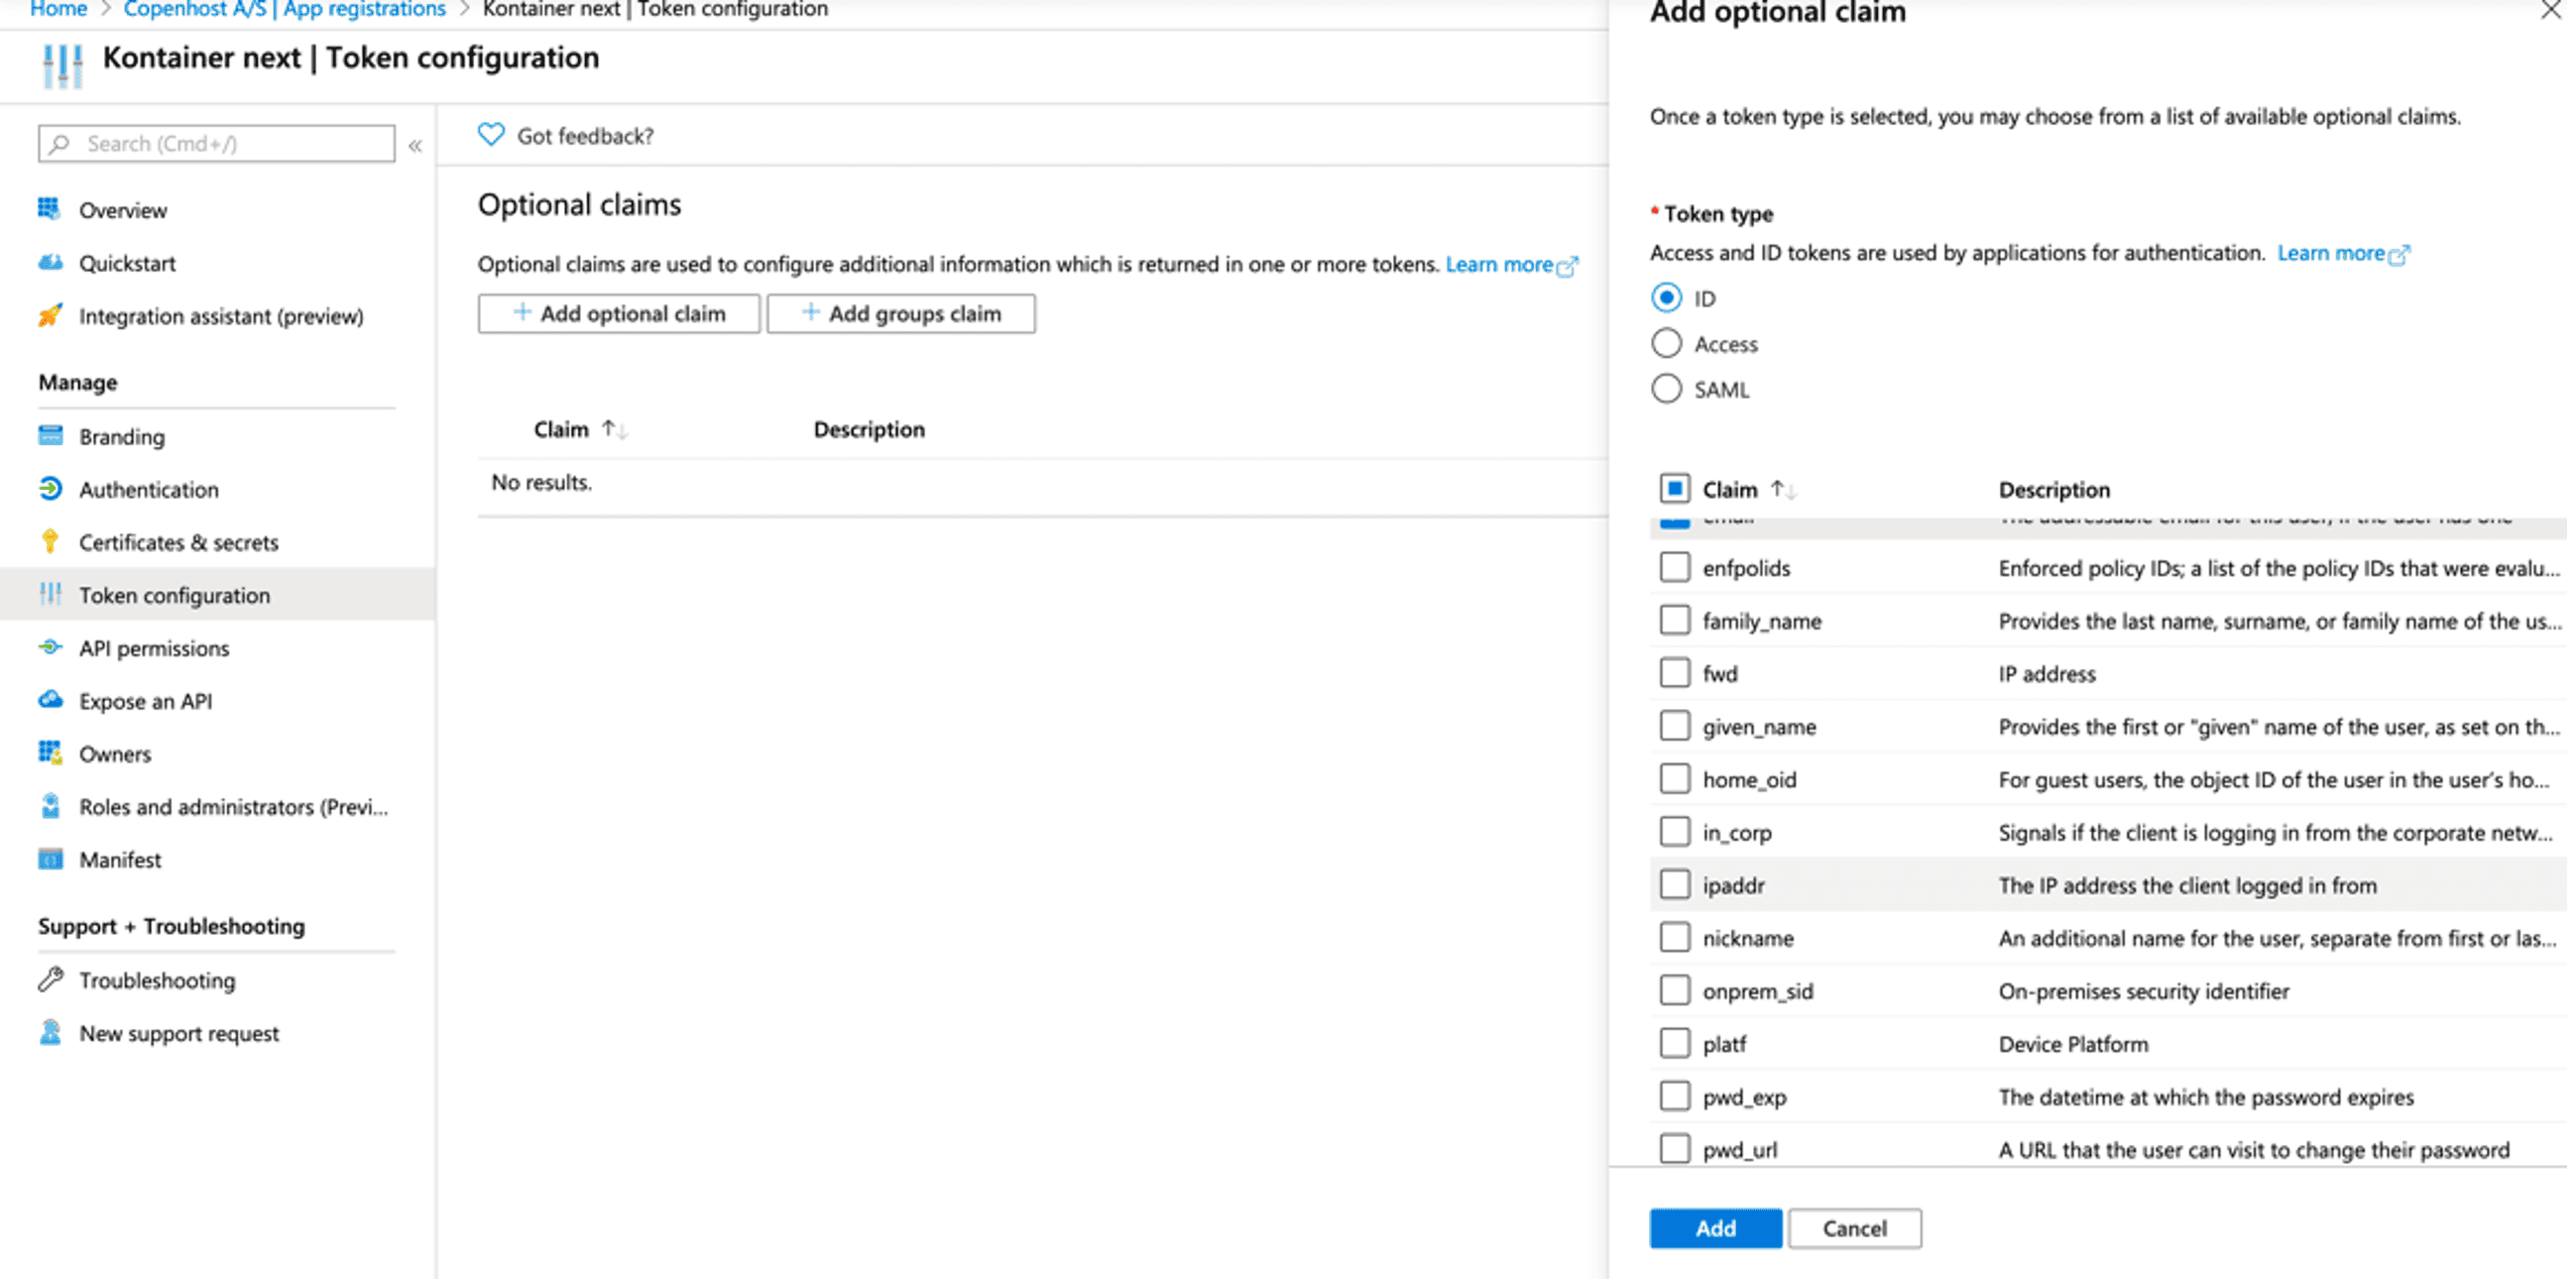
Step 5: Token configuration
Click “Token configuration”, and then “Add optional claim”.
Select “ID” and check
- “email”
- “upn”
Click “Add”.
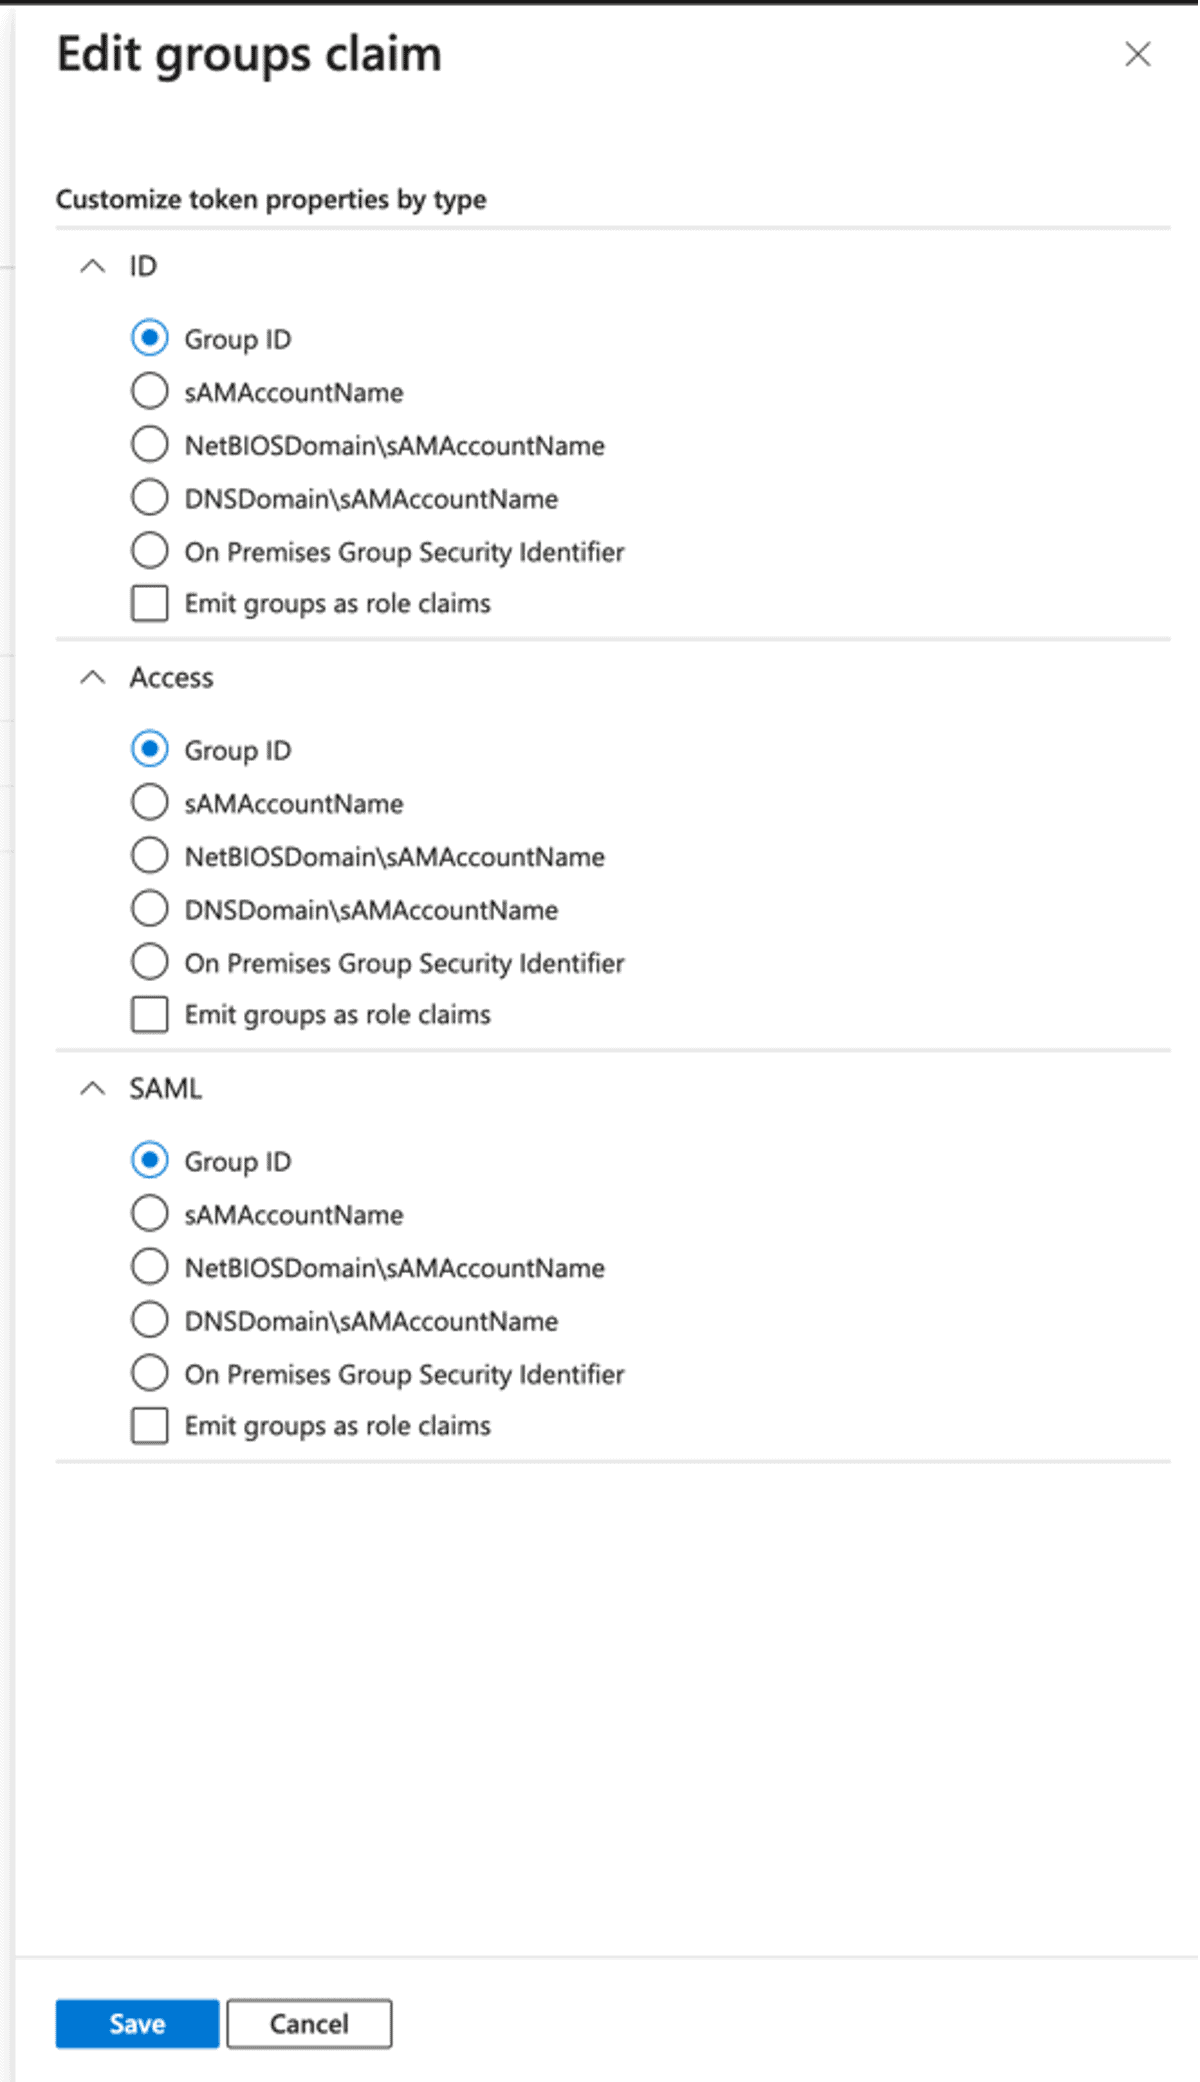
Step 6: Edit group claim
Click "Add groups claim" and check:
- "Security groups"
- "ID"
And then check:
- "Group ID"
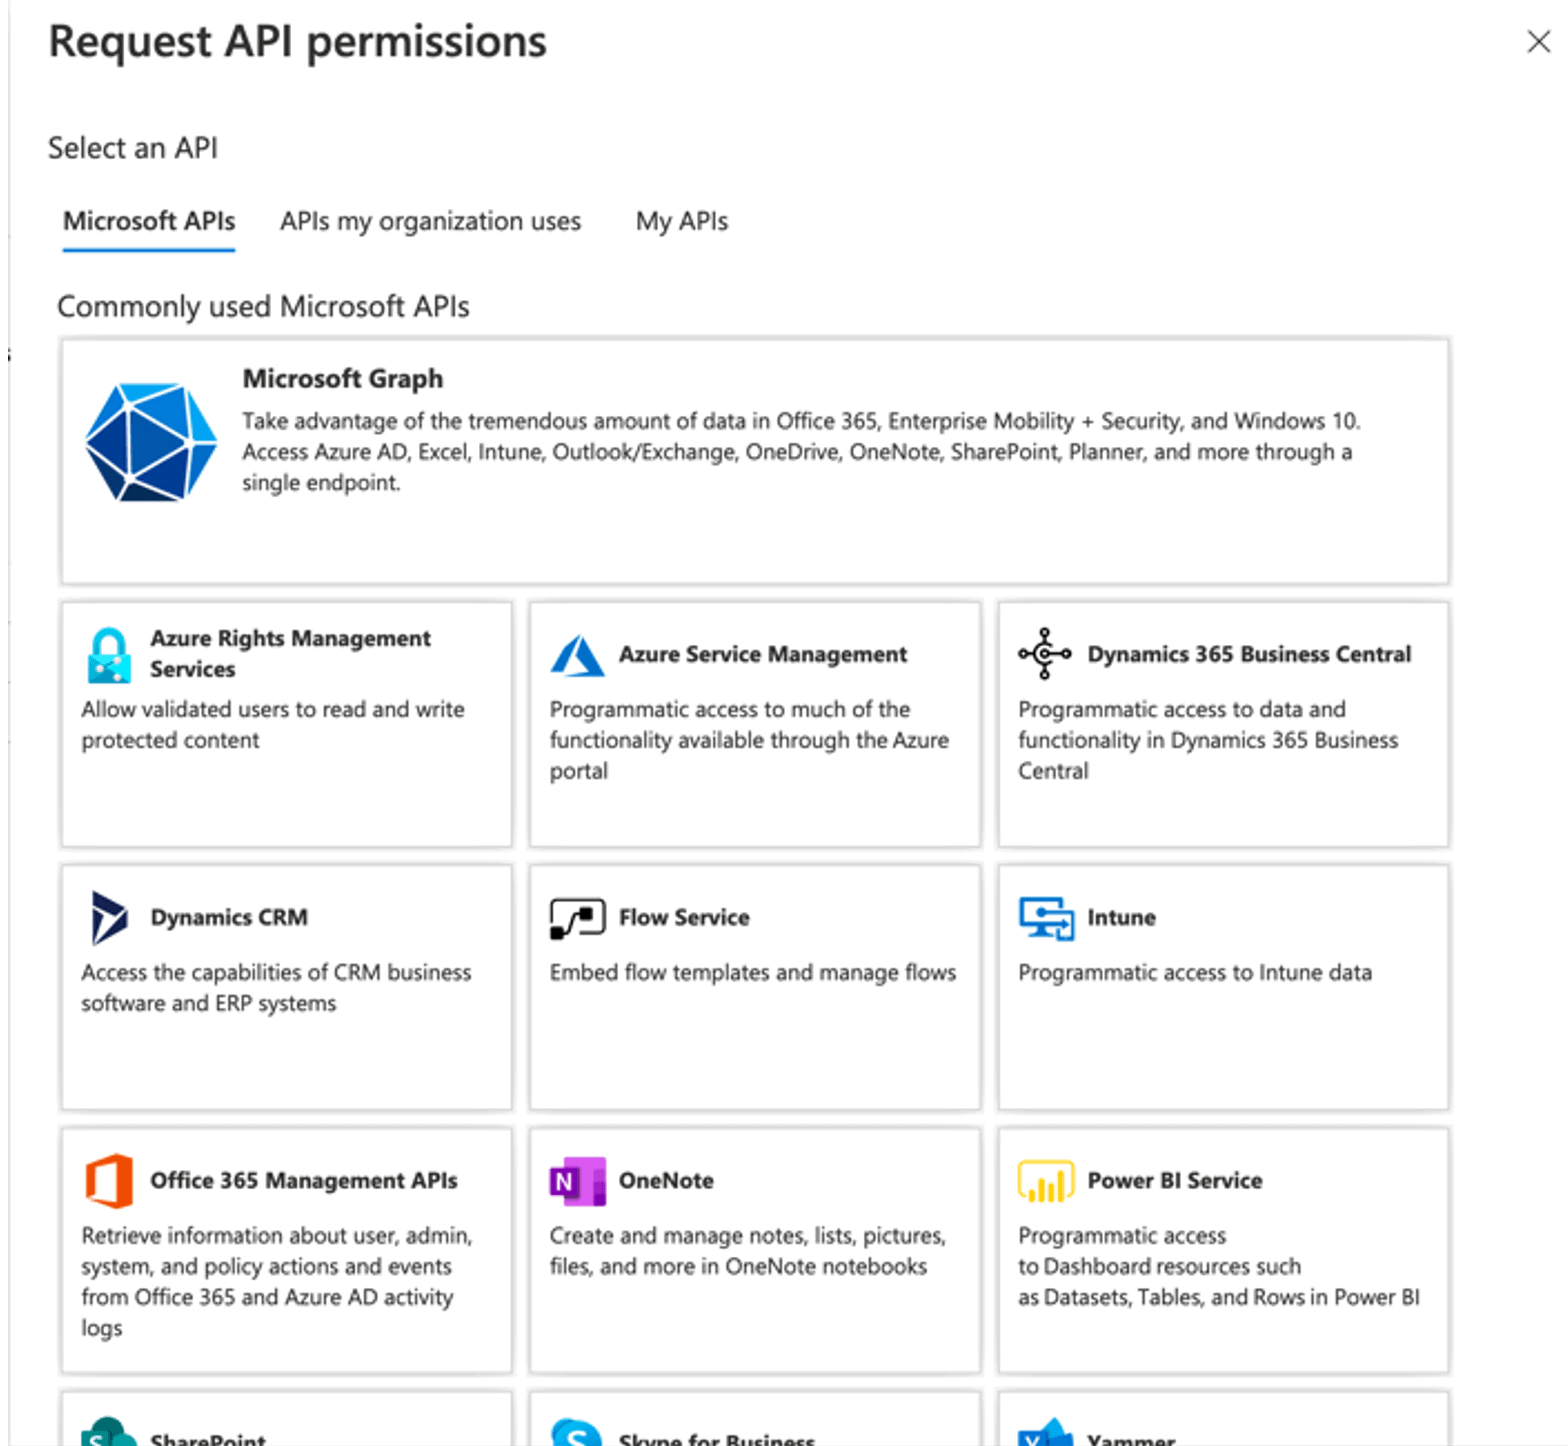
Step 7: API permissions
Go to "API permissions" and click "Add a permission".
Choose "Microsoft Graph" and click “Delegated permissions"
OpenID permissions
Scroll down to OpenID permissions and check “email” and “profile”

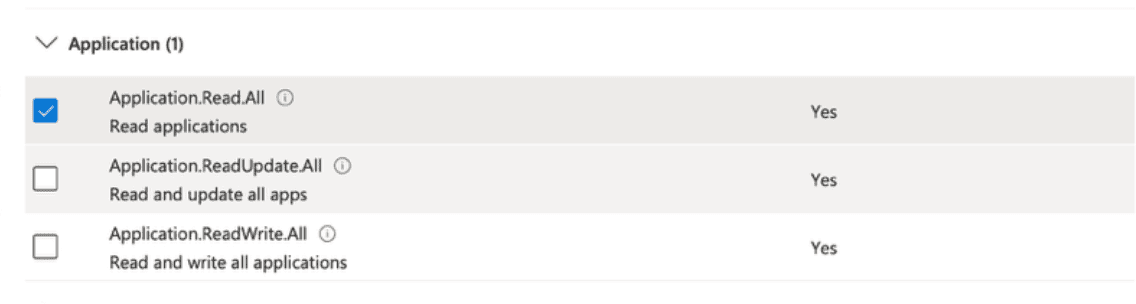
Application permissions
Scroll down to "Application" and check “Application.Read.All”
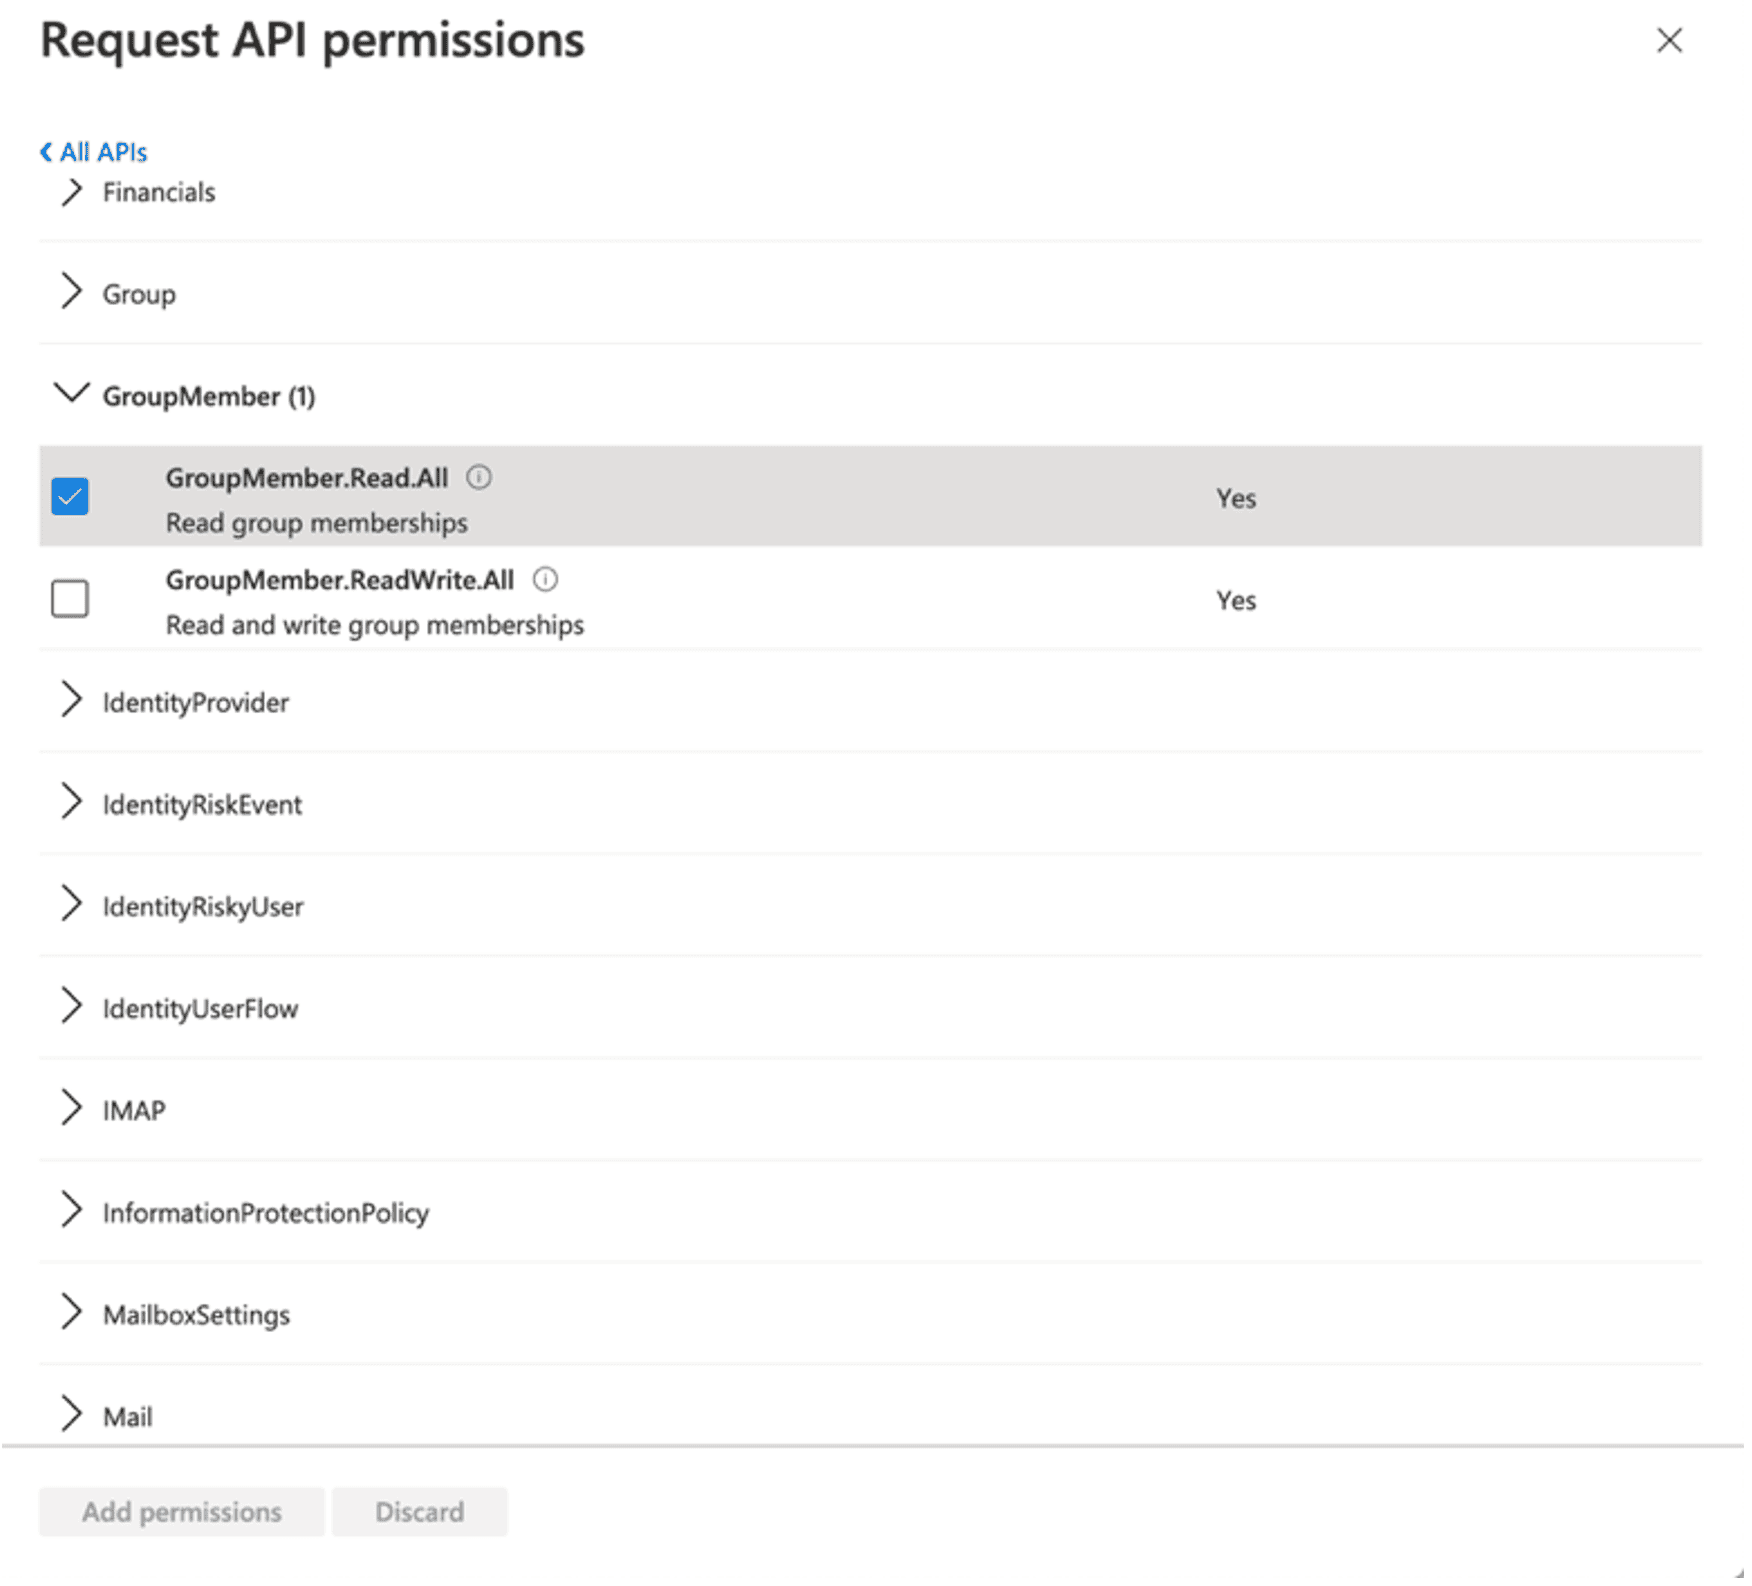
GroupMember
Scroll down to “GroupMember” and check:
- “GroupMember.Read.All”
Step 8: Check permissions
Permissions should now be as below.
Perhaps you will need an administrator to consent the permissions.

Step 9: Send details to Kontainer support
Go to “Overview” where you can find the details below to send to your Kontainer contact or support@kontainer.com:
- “Application (client) ID”
- “Directory (tenant) ID”
NOTE: Send the saved secret in a safe way.