Spacers are a simple but effective way to organize your folder structure in Kontainer DAM. They can help you separate categories, add more breathing room, and make your folders more visually clear.
Adding a Spacer
-
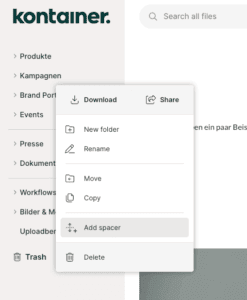
Spacers will always appear below the folder that you select and click on. In the folder menu on the left-hand side, locate the folder where you’d like the spacer to appear.
-
Right-click on the folder and select “Add spacer.”
-
A spacer will now appear directly below the selected folder. By default, it will show as a black line with a small gap underneath.


Customizing Your Spacer
You can tailor the spacer to fit your folder structure:
-
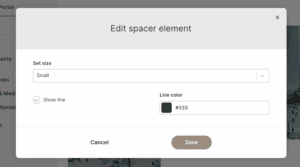
Style: Choose between a horizontal line or just a gap.
-
Color: Select a color for the line if you’ve chosen the line option.
-
Spacing: Adjust the size of the gap between the selected folder and the folder below.

To edit a spacer, simply right-click the same folder it’s attached to and update the settings.
Deleting a Spacer
If you no longer need a spacer:
-
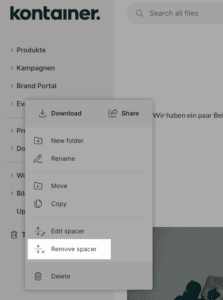
Right-click on the folder the spacer is attached to.
-
Select “Delete spacer.”

The spacer will be removed immediately.